
Wondering what all of the buzz is about yoga? The Furman Fitness Center offers several yoga classes in the Herman W. Lay Physical Activities Center each week. Classes are led by Austin Charles (Asian Studies/ History major), Diane Boyd (Center for Teaching and Learning Associate Director), and me (Kelly Frazier, M.A., Lecturer of Health Sciences).
Yoga is an attempt to unite the mind and the body, particularly by focusing on the breath. It can improve flexibility, muscular strength and endurance, stamina, balance, posture, body alignment, mental focus, and relaxation for stress relief. Yoga is one of the most popular classes offered at the PAC so we are excited to share some of our favorite yoga sequences and postures with you.
We photographed these introductory yoga postures in front of Furman University’s beautiful Place of Peace beside the Furman lake.
Please remember that not all exercises are appropriate for everyone. Be sure to check with your health care provider or a qualified exercise specialist to determine what exercises may be appropriate for you. Never force or strain when performing a yoga posture. Breathe deeply through the belly and do not hold your breath.
The Sun Salutation
Stand at the front of the mat in Mountain Pose. The outer edges of the feet are parallel to each other. Balance your weight between the balls of your feet and the heels of your feet. Contract the quadricep muscles in your thighs and ground your legs into the floor like a “mountain.” Lengthen your spine upward toward the ceiling. Draw your shoulder blades down and back to create a flat service across your upper back. Tuck the tailbone under slightly to minimize the curve in the lower back.
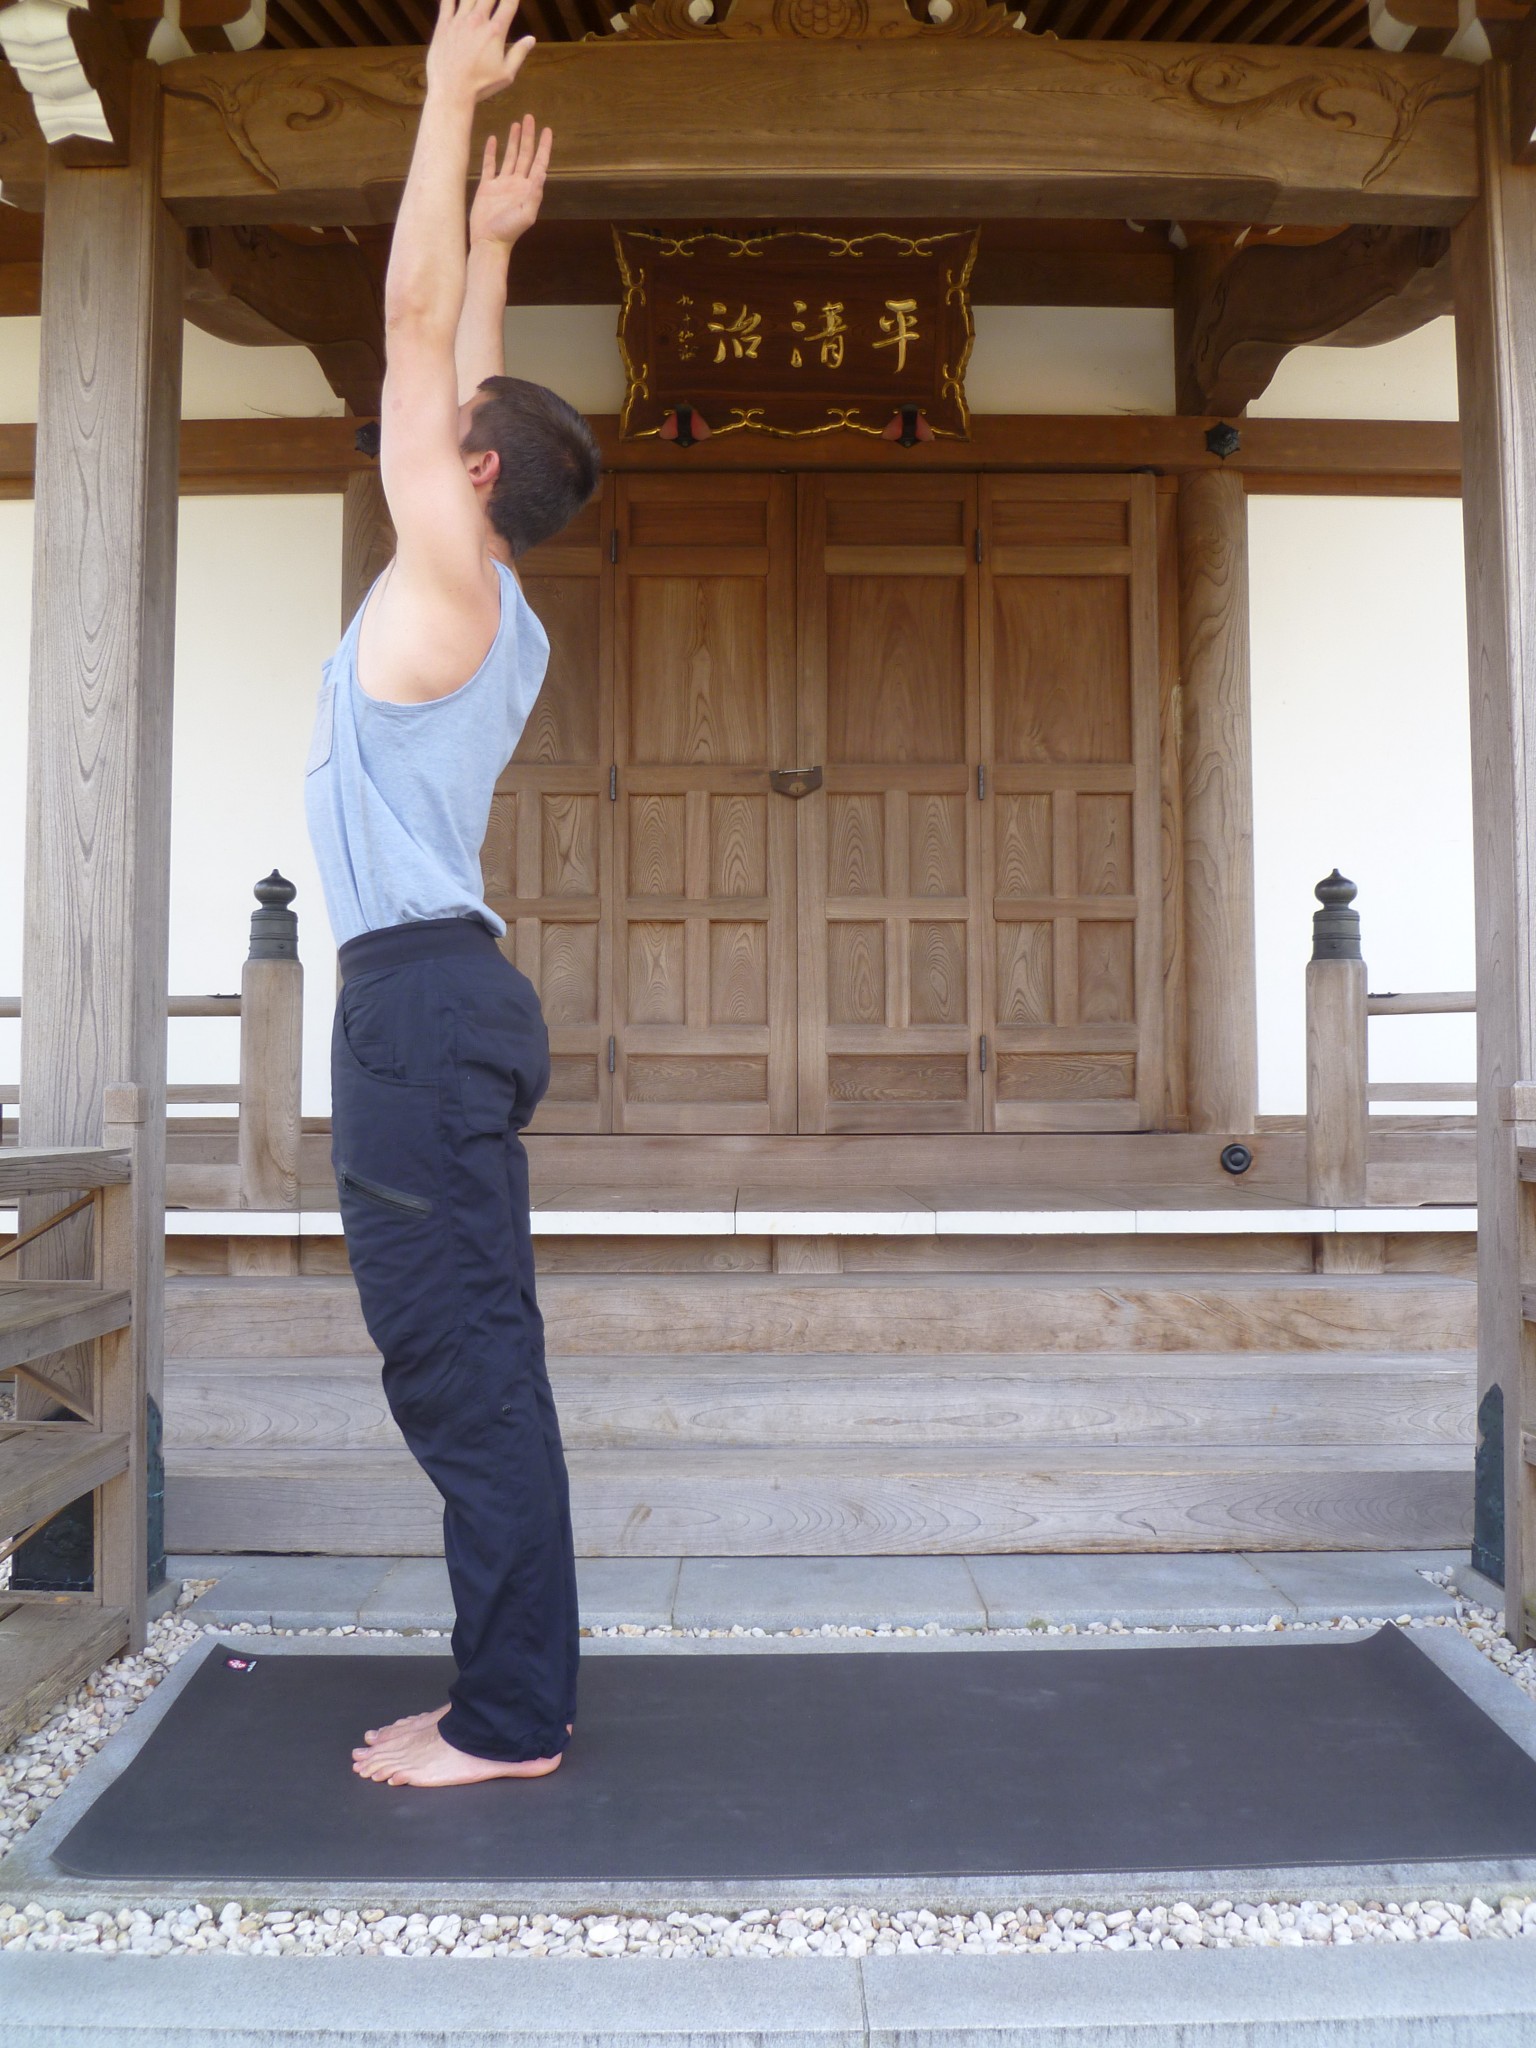
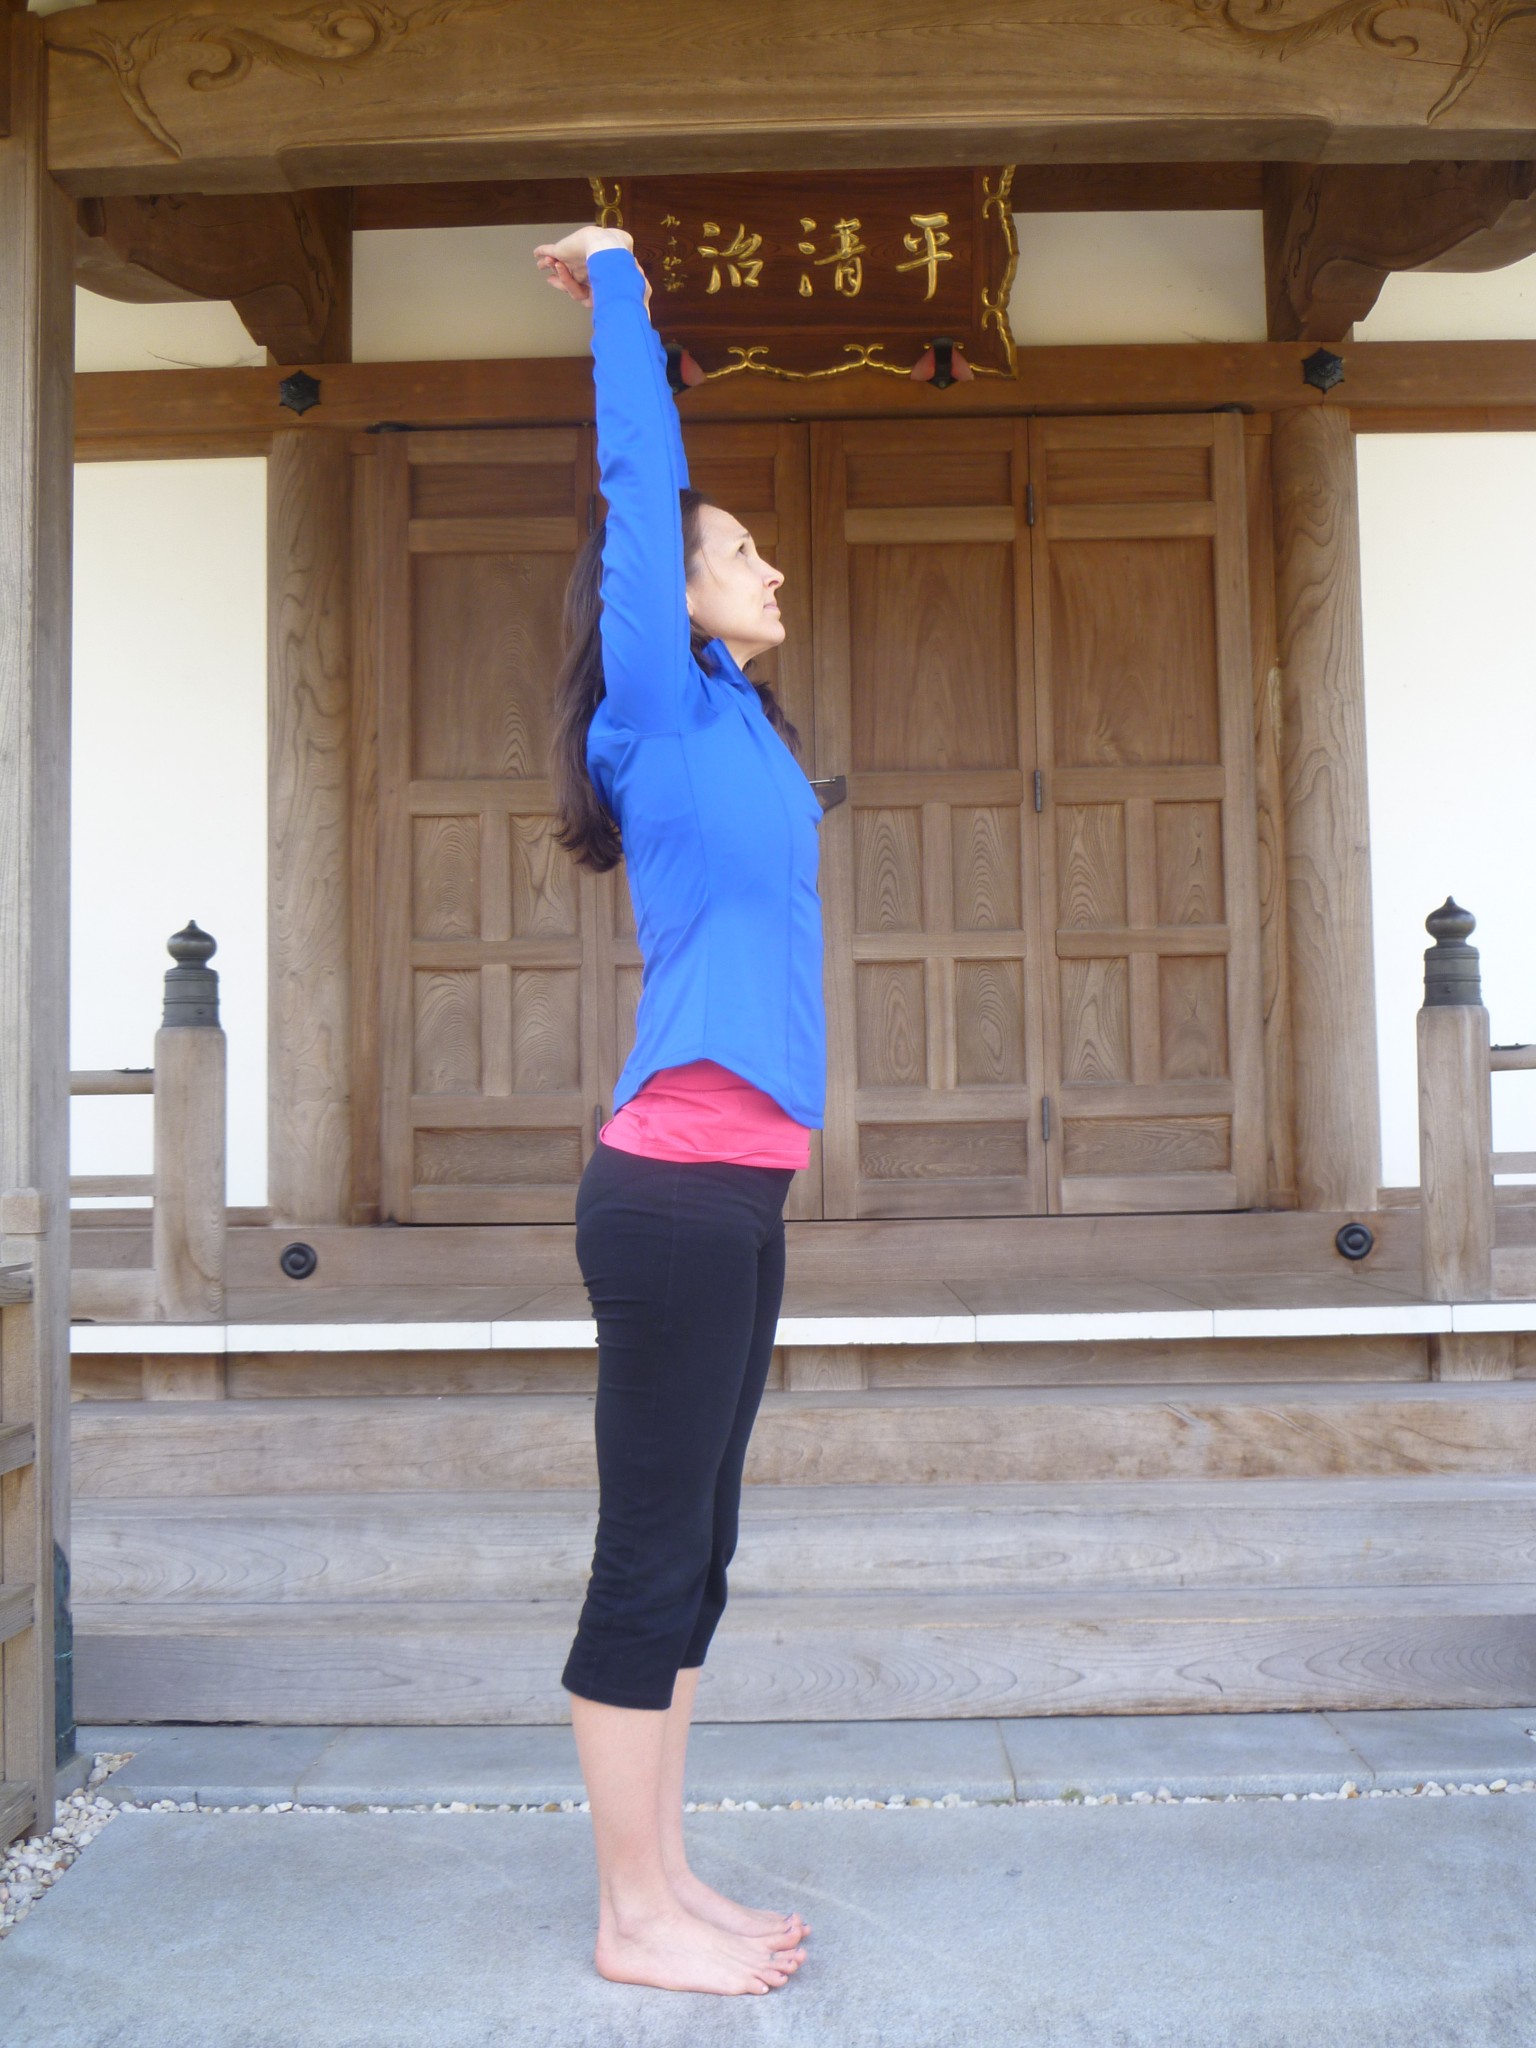
Inhale and extend your arms overhead.

Slight backbend as you look up.

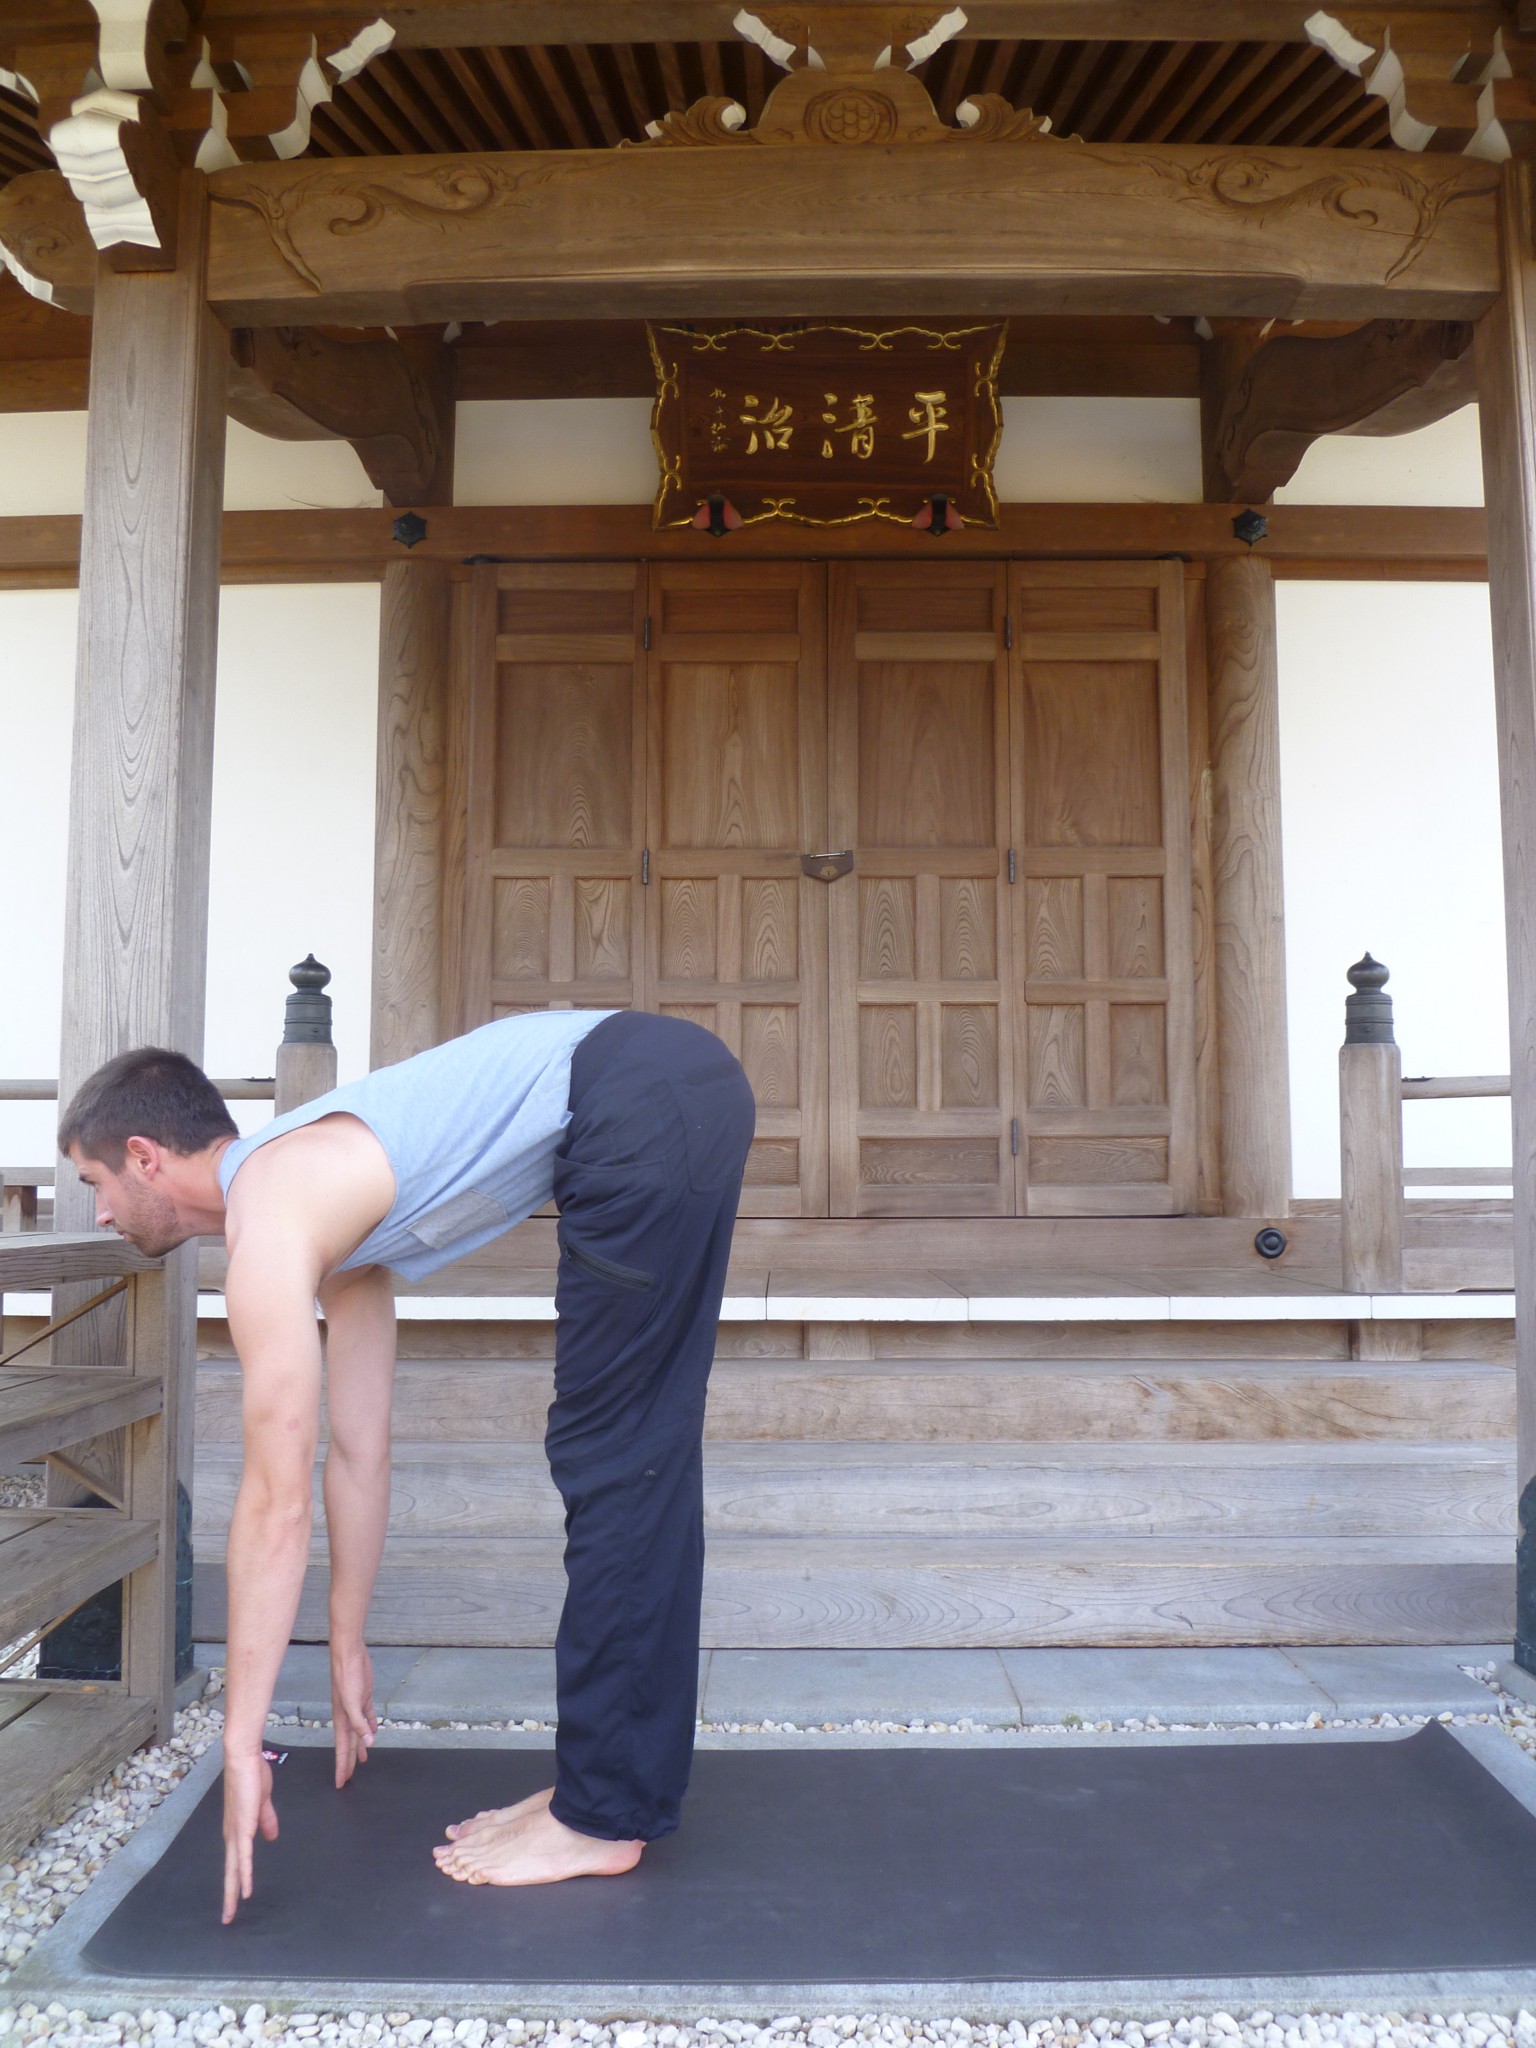
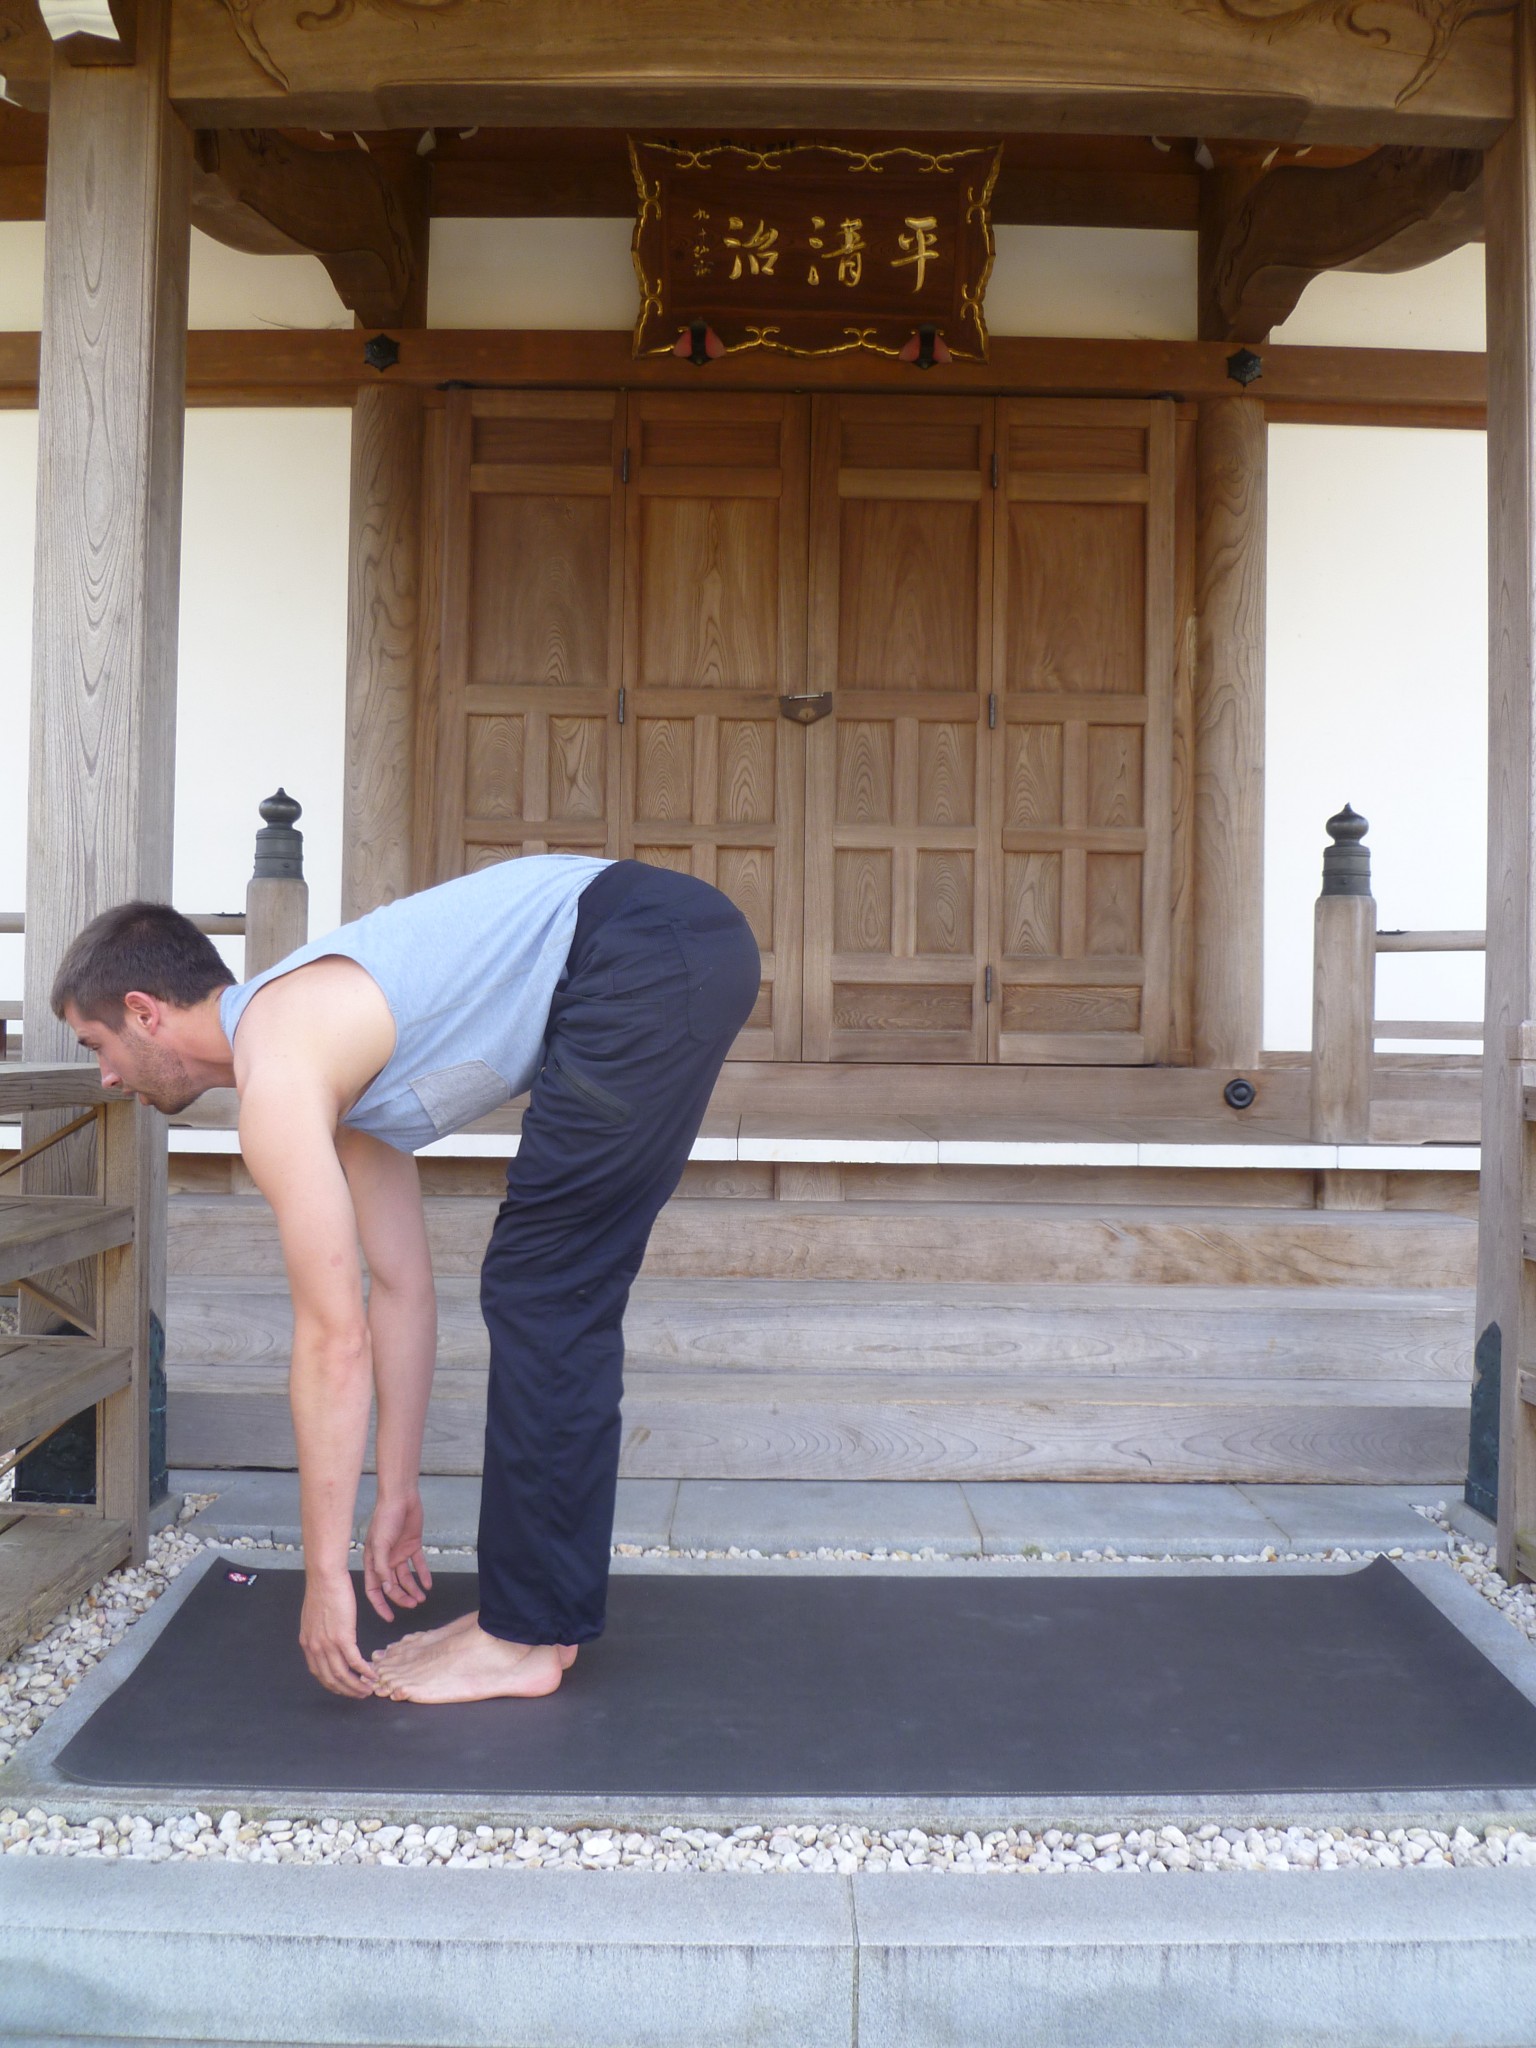
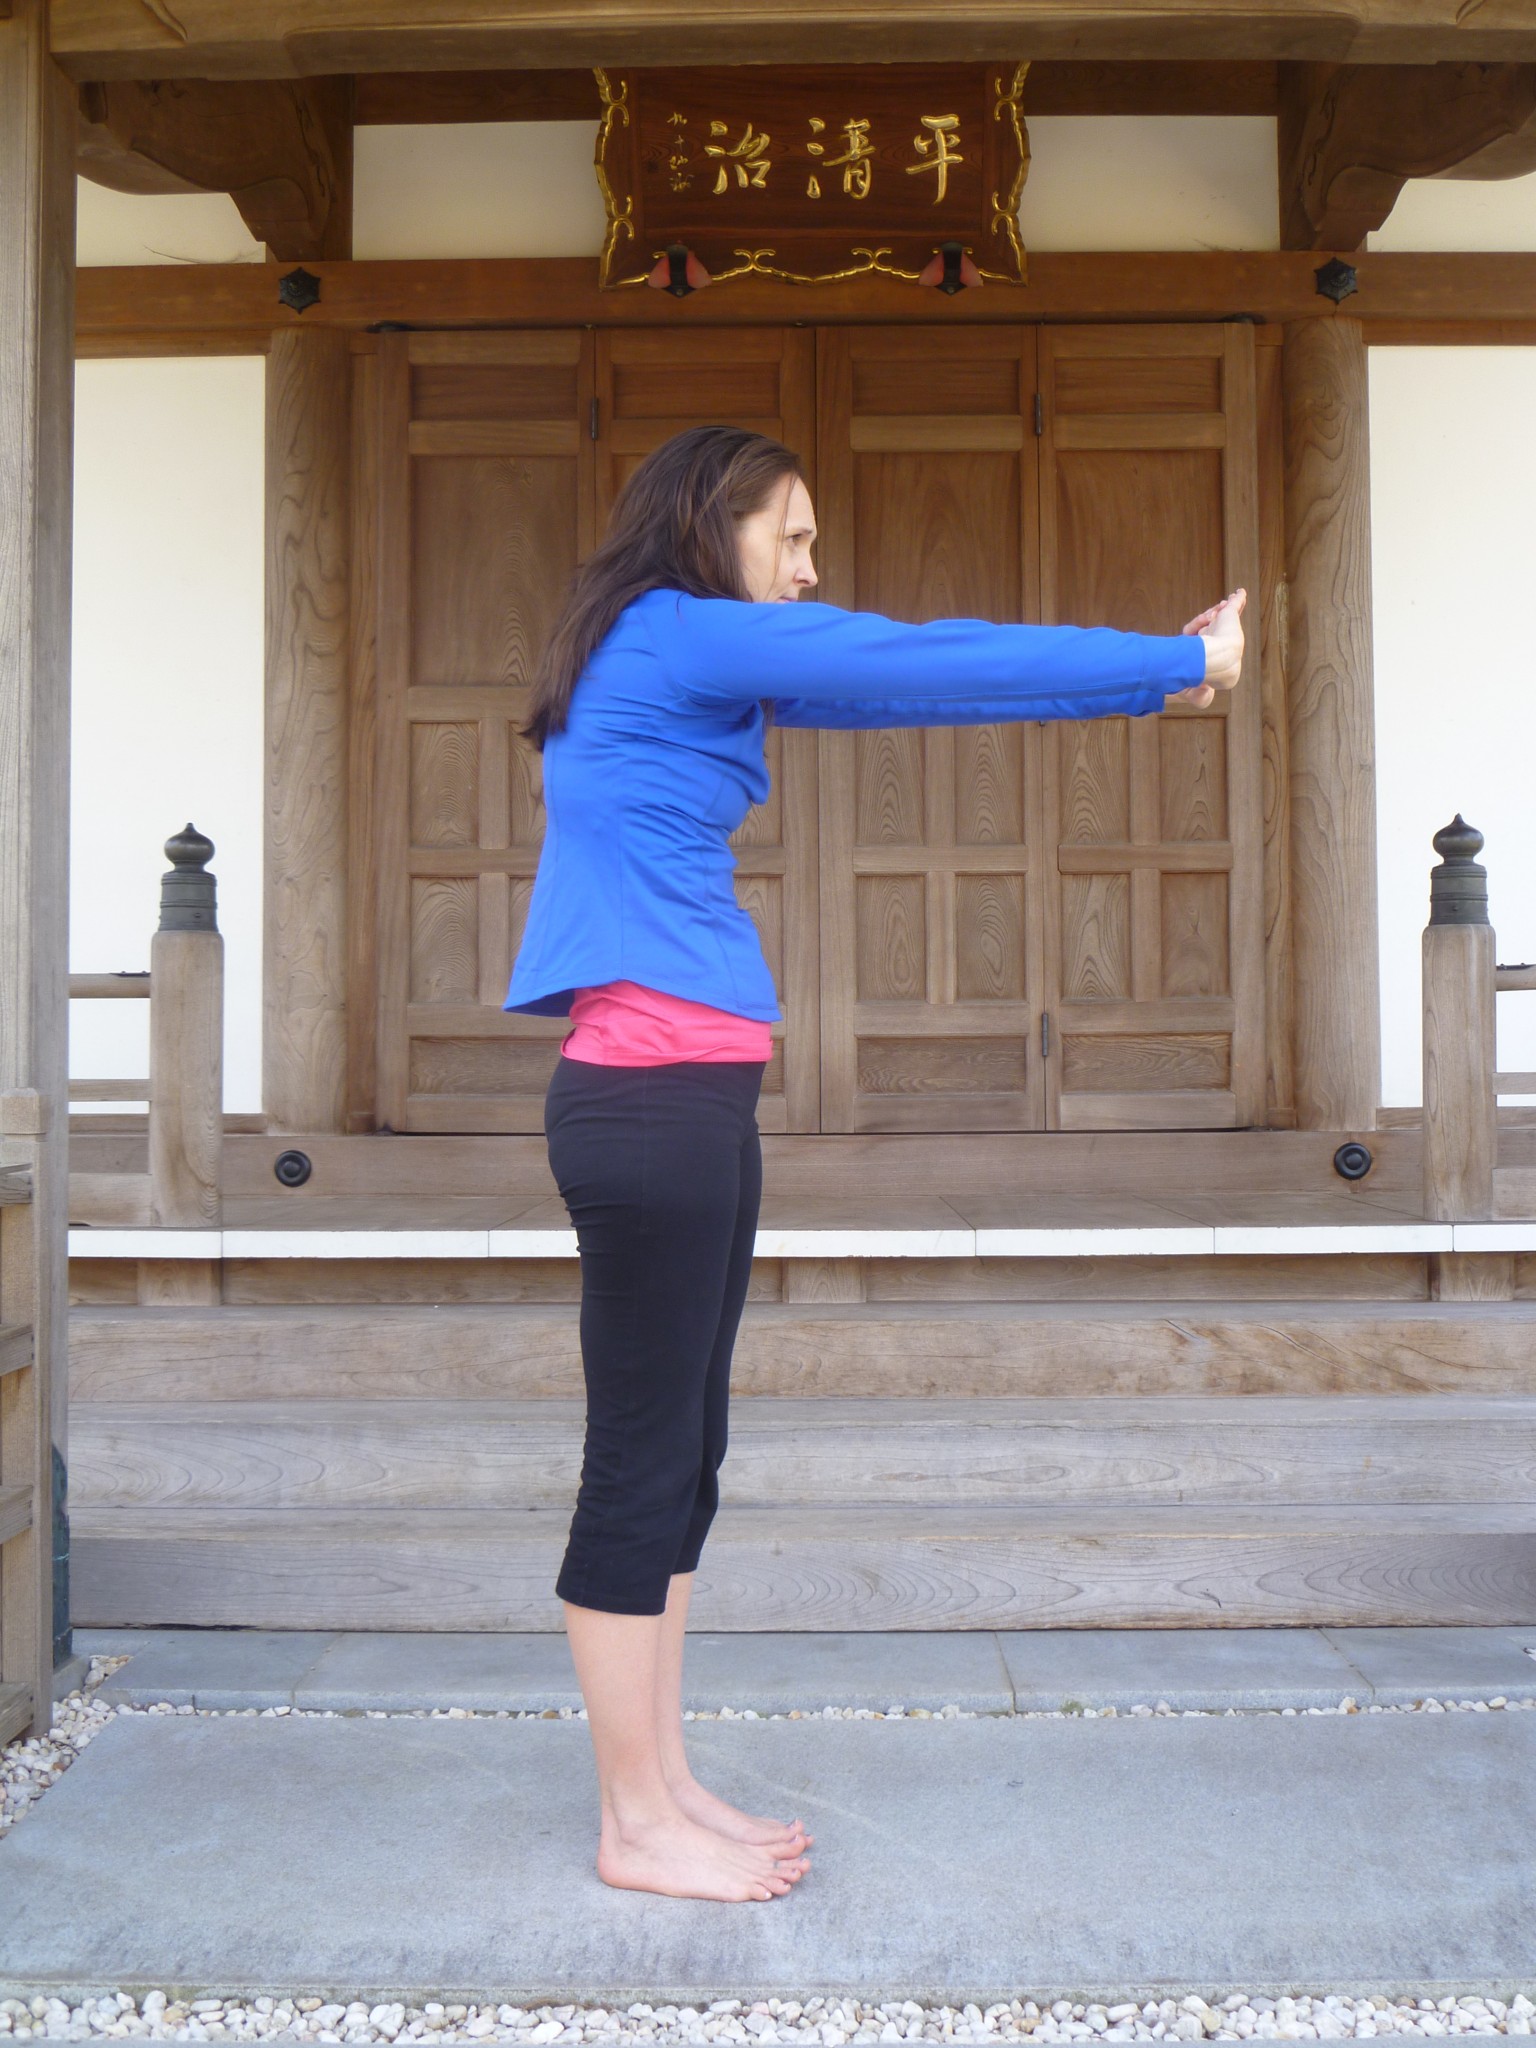
Exhale and fold forward from the hips. Beginners may bend the knees and clasp the hands behind the knees. More advanced exercisers may be able to touch the fingers to the floor.
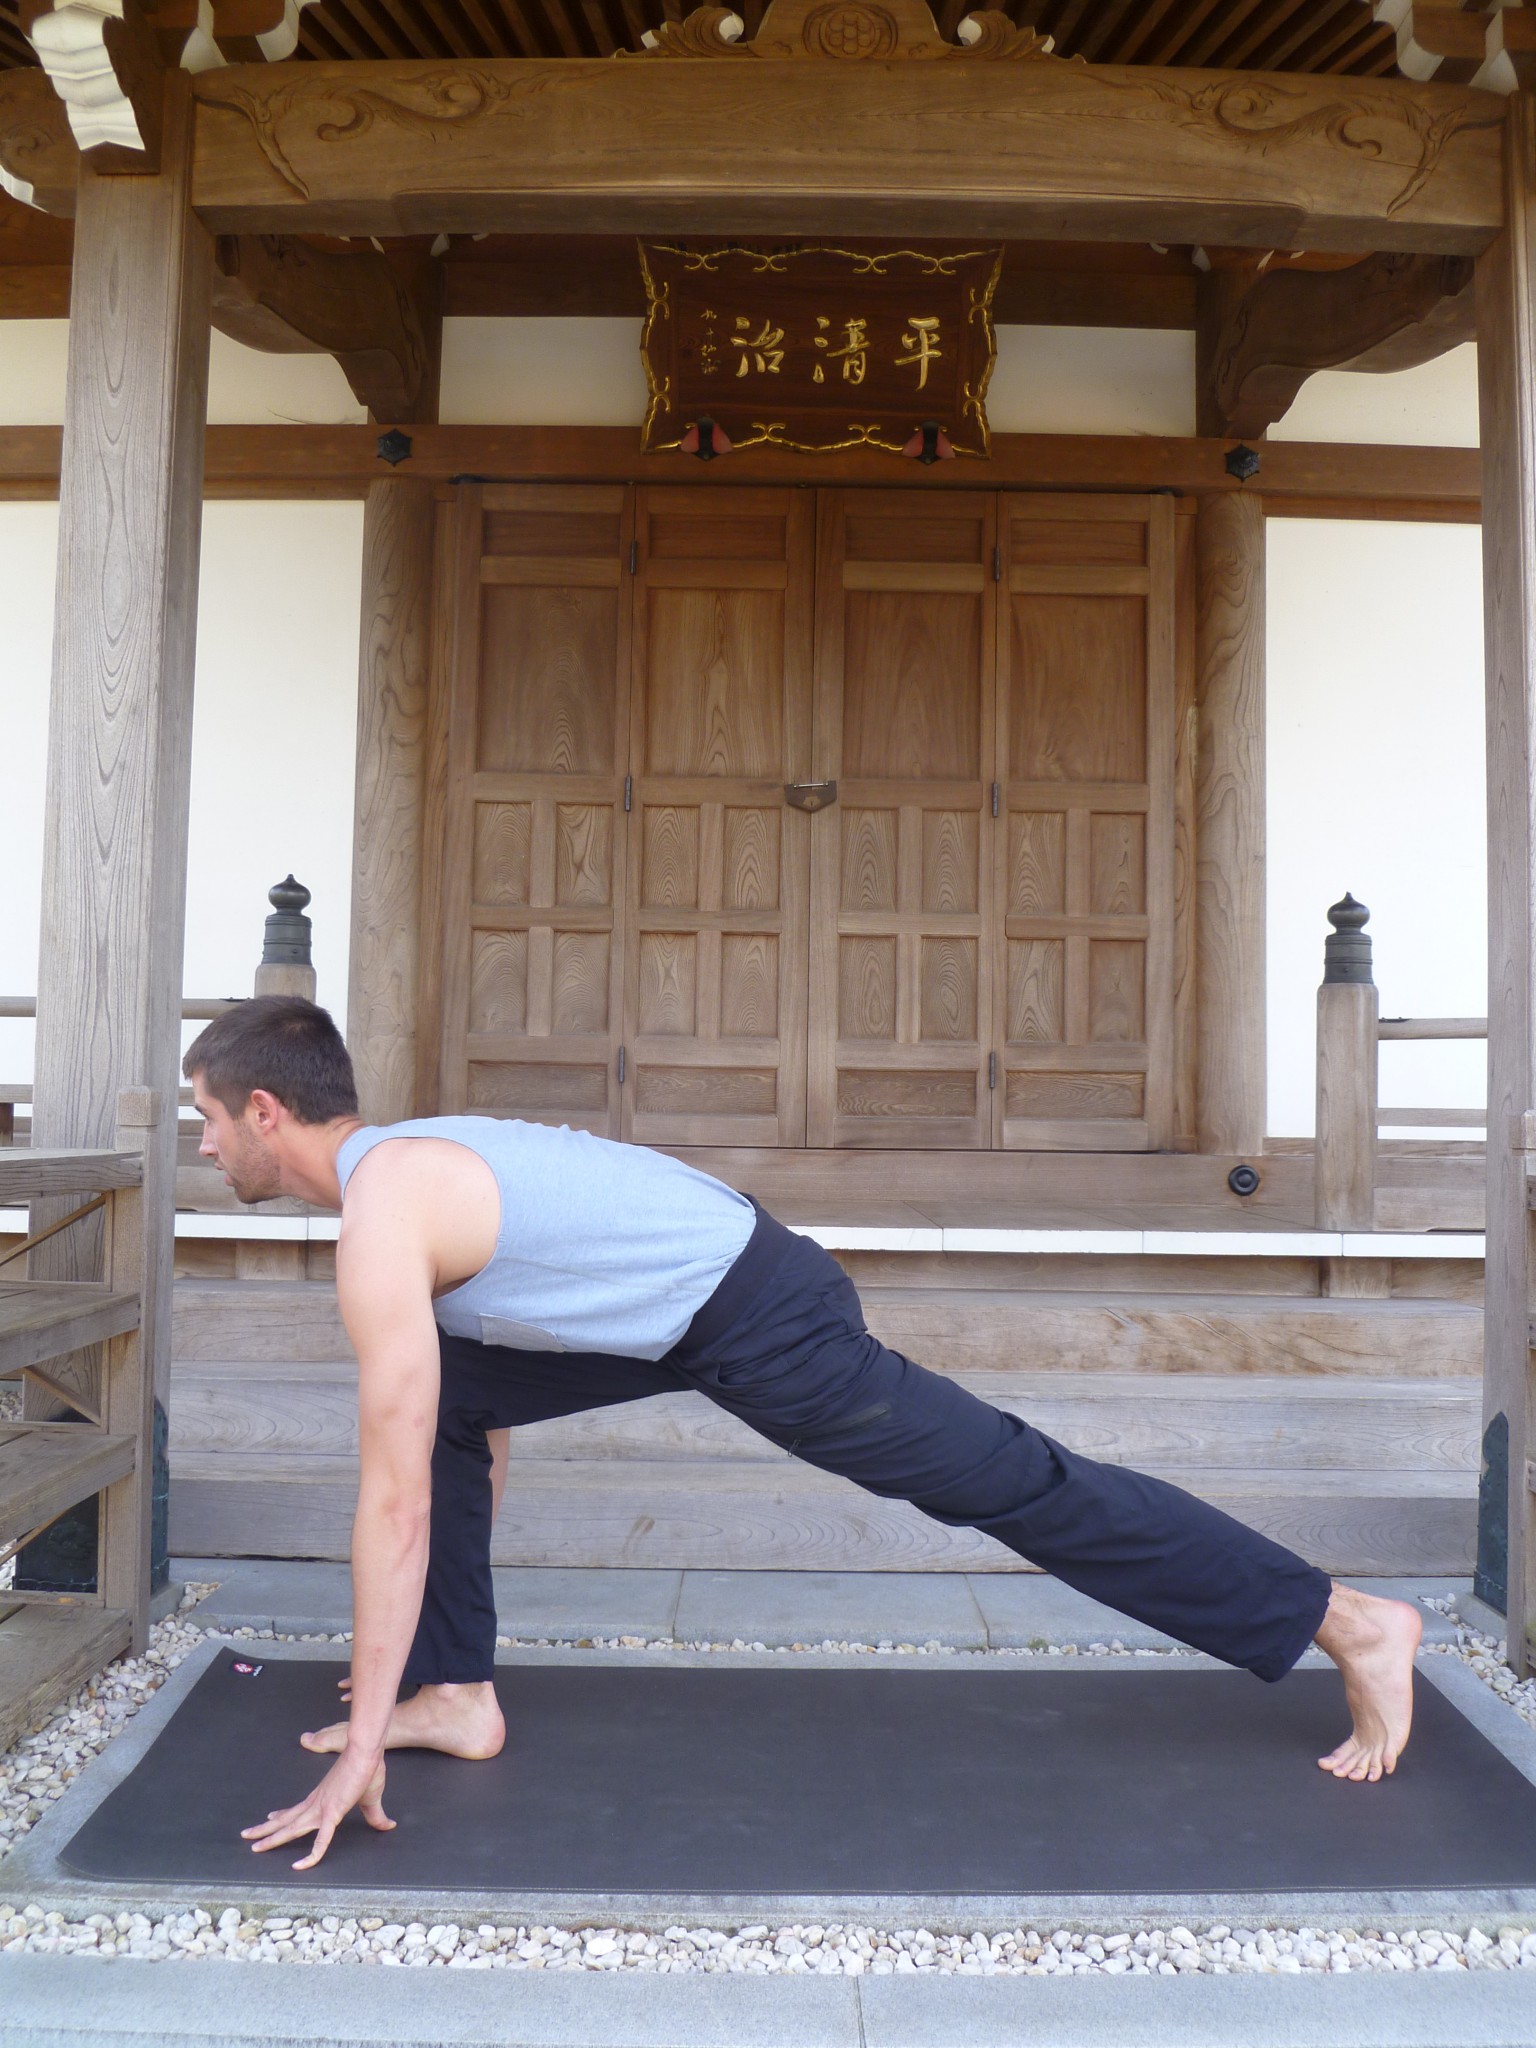
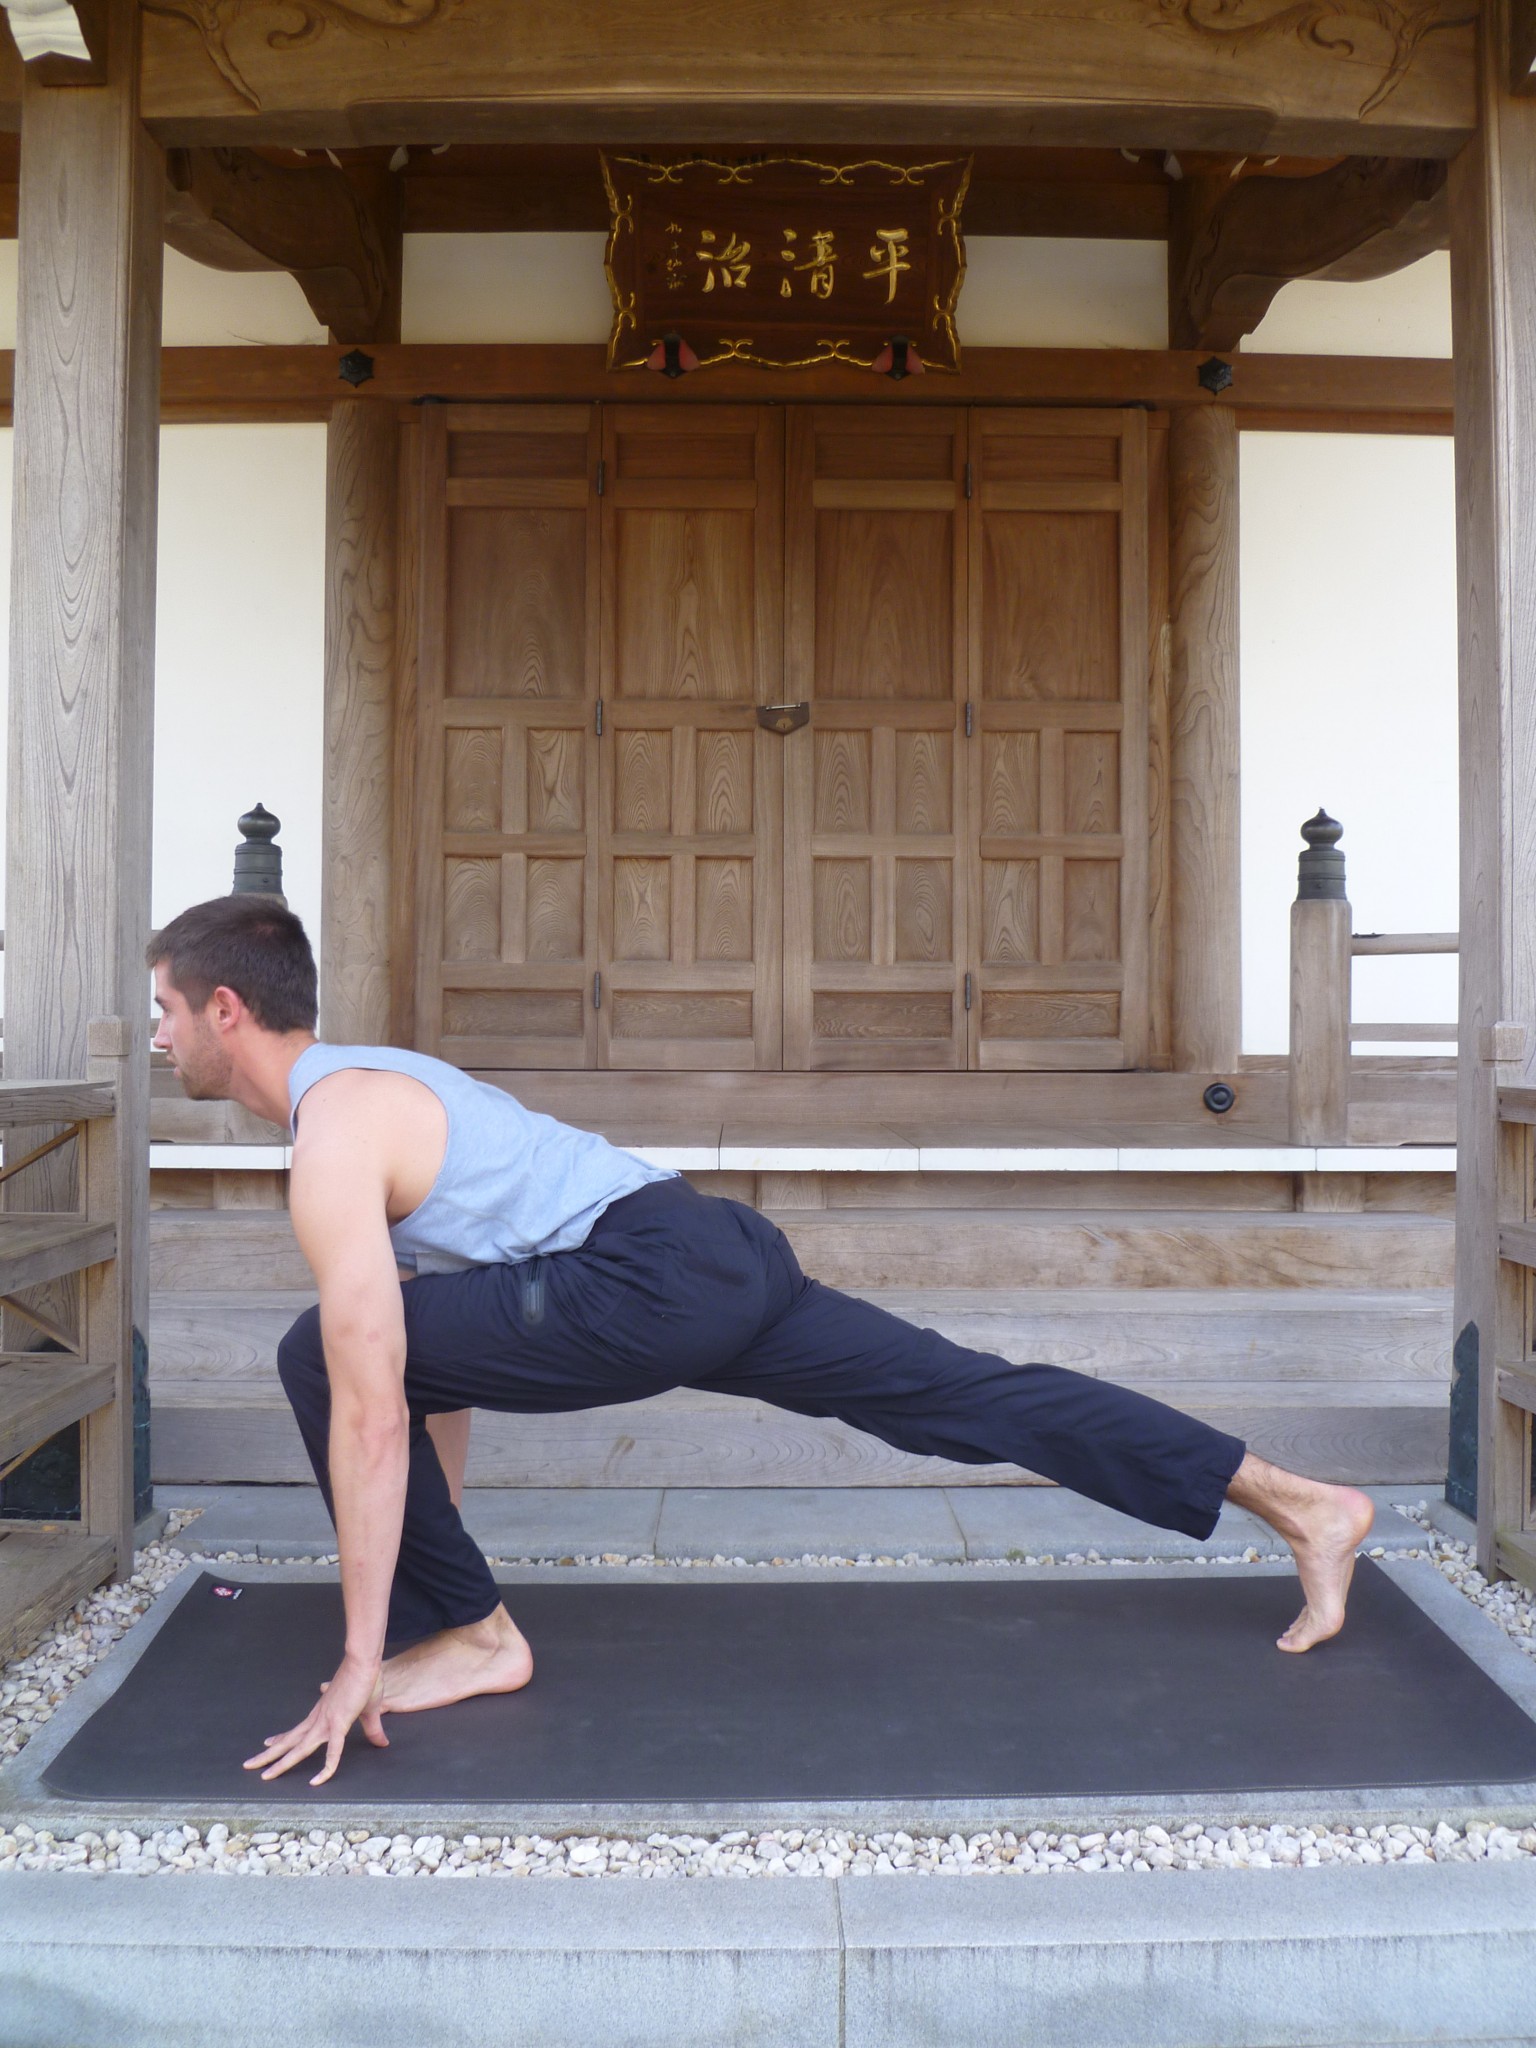
Step the left leg back into a lunge. Be sure to keep your front knee directly over your front ankle. Stretch your back foot toward the back wall. To further the posture, lift your back knee up as you press your hips down.
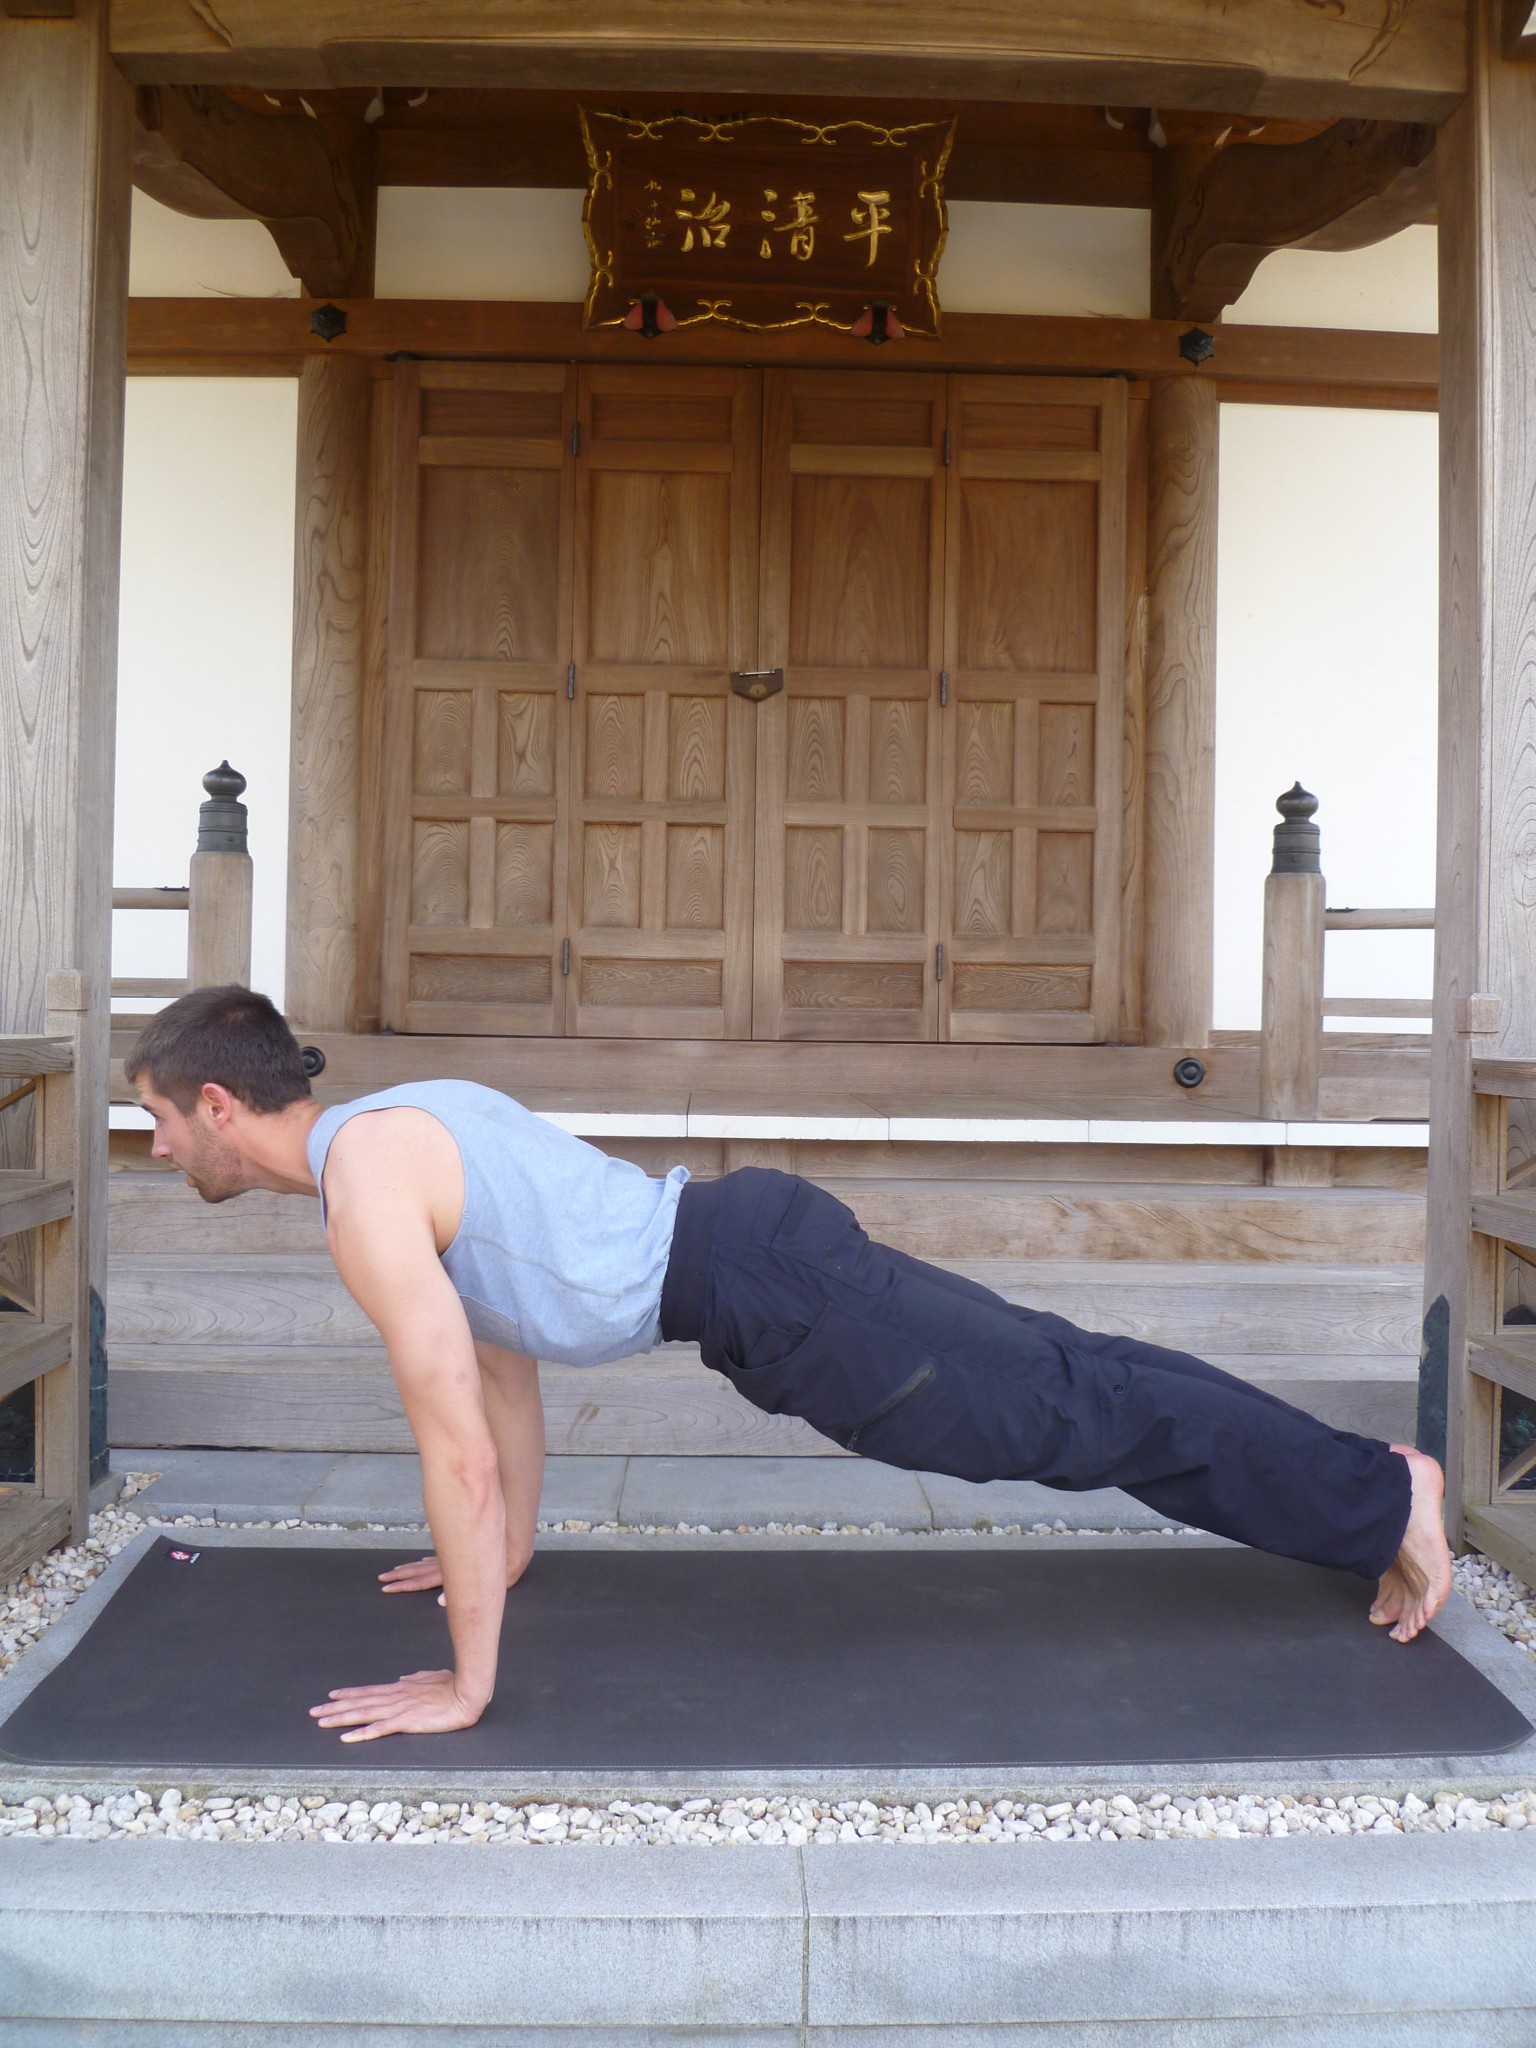
Step both feet back into a Plank position. Always keep the elbows soft (slightly bent), not locked when they are bearing weight. Beginners may put the knees on the floor. The body should be straight from the knees through the hips to the shoulders. More advanced exercisers may perform a full Plank on the feet. Notice that the body is straight from the feet, through the hips, to the shoulders like a “plank” of wood.
Keep the arms close to the sides and lower the body down to hover over the floor. Use the strength of your arms. Beginners may put the knees on the ground.
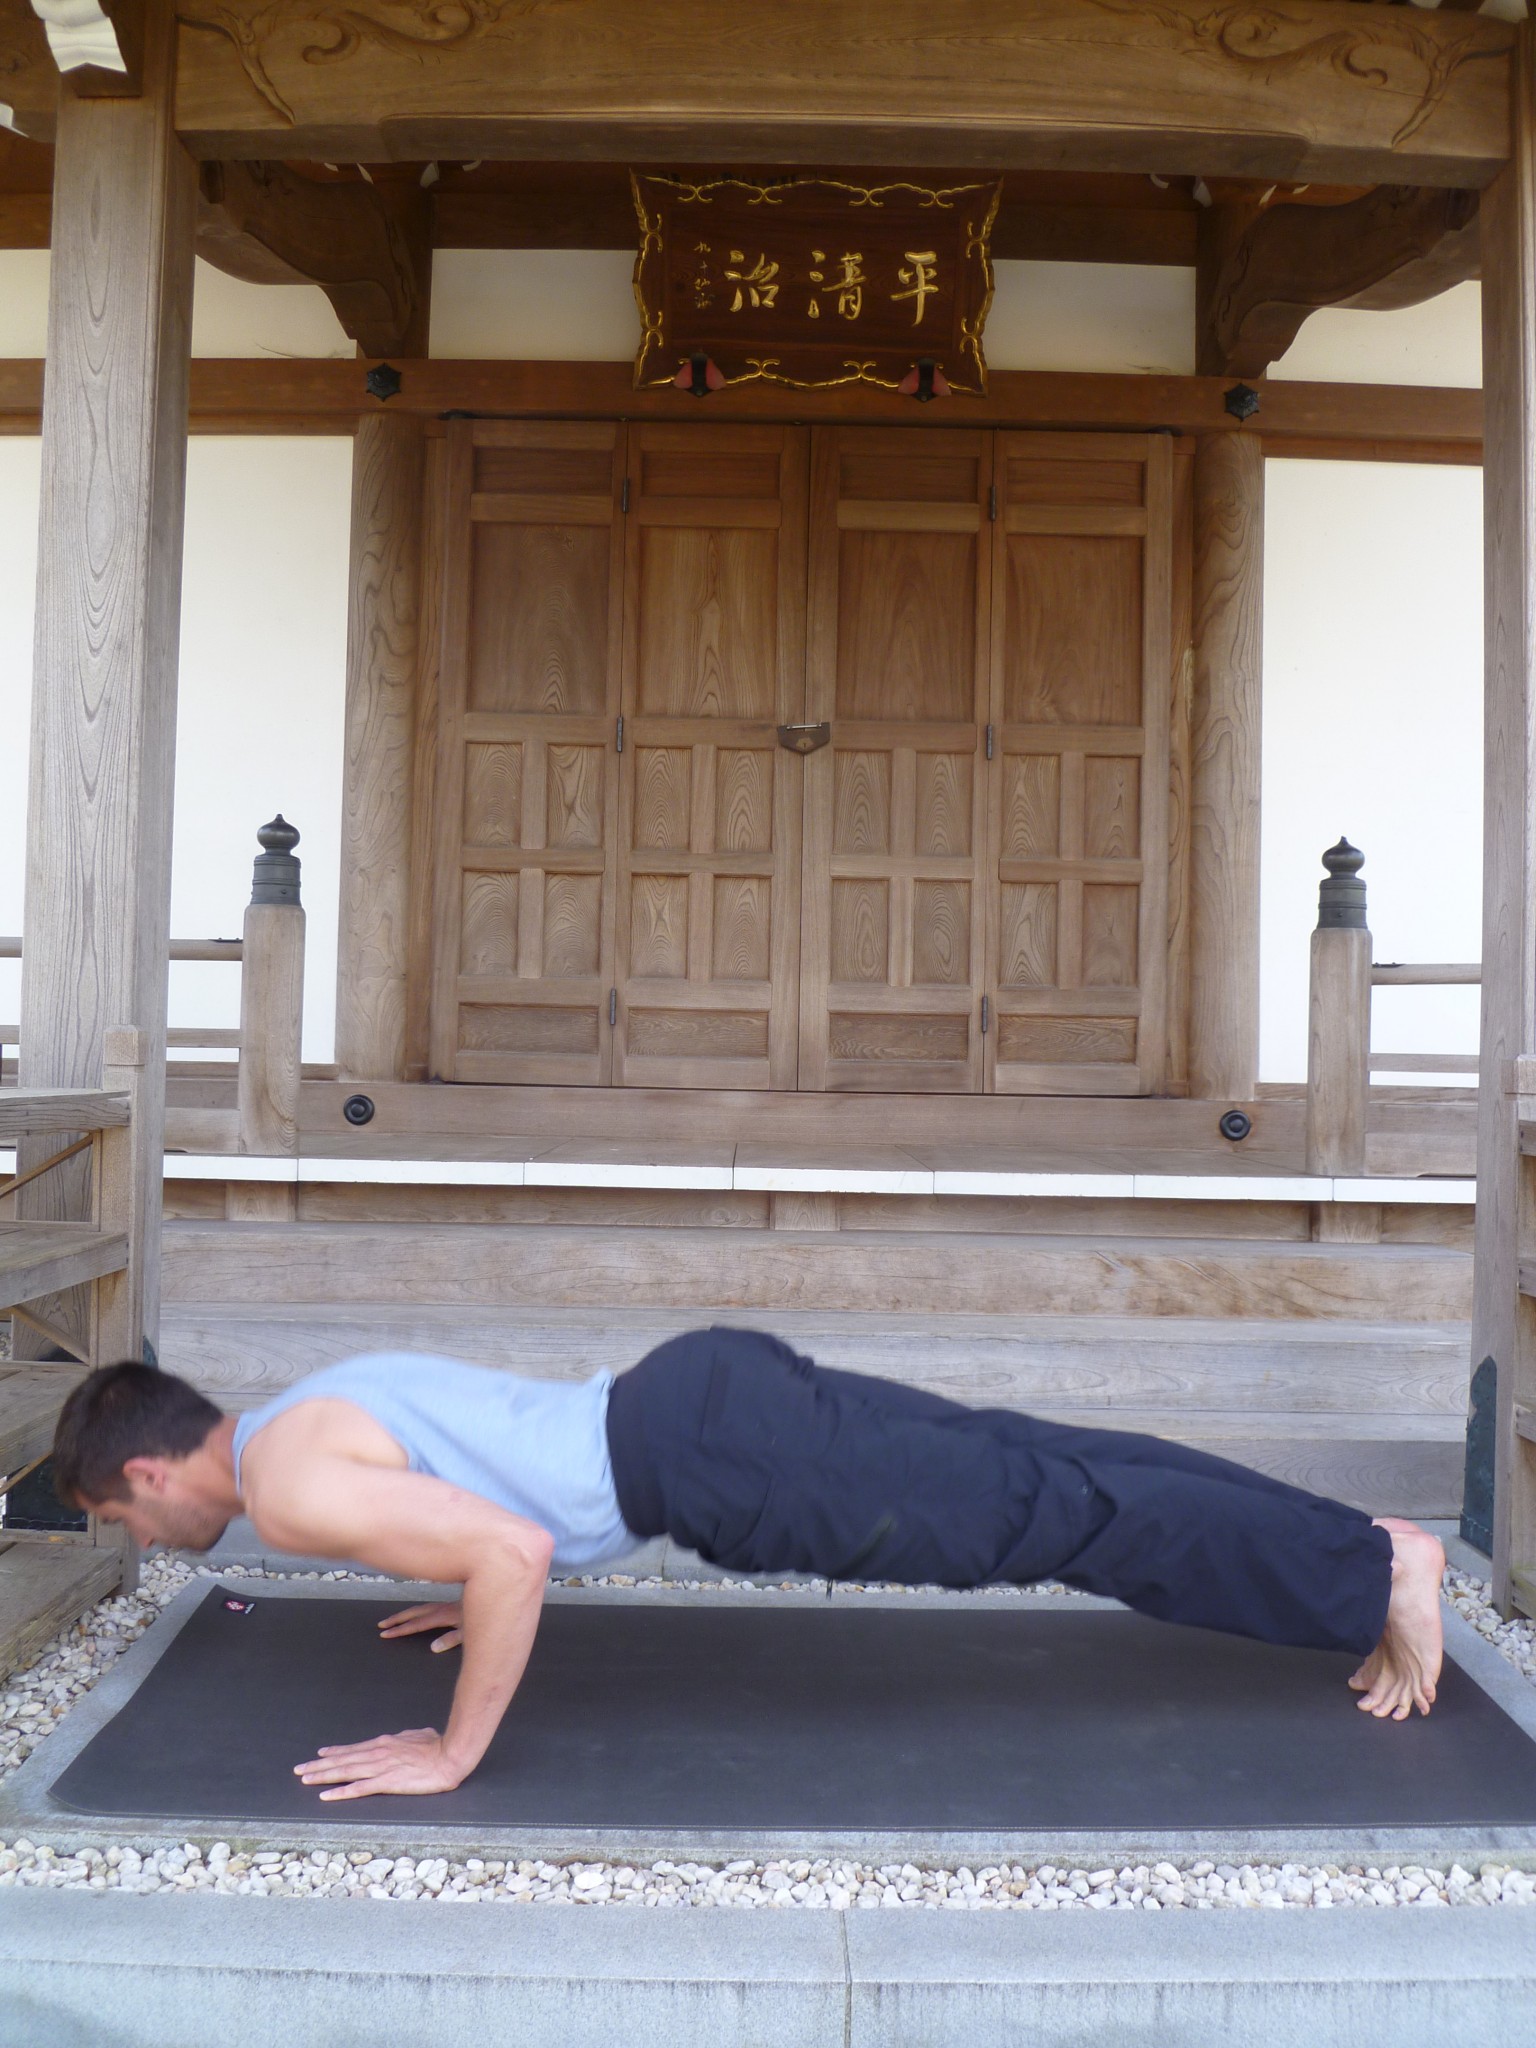
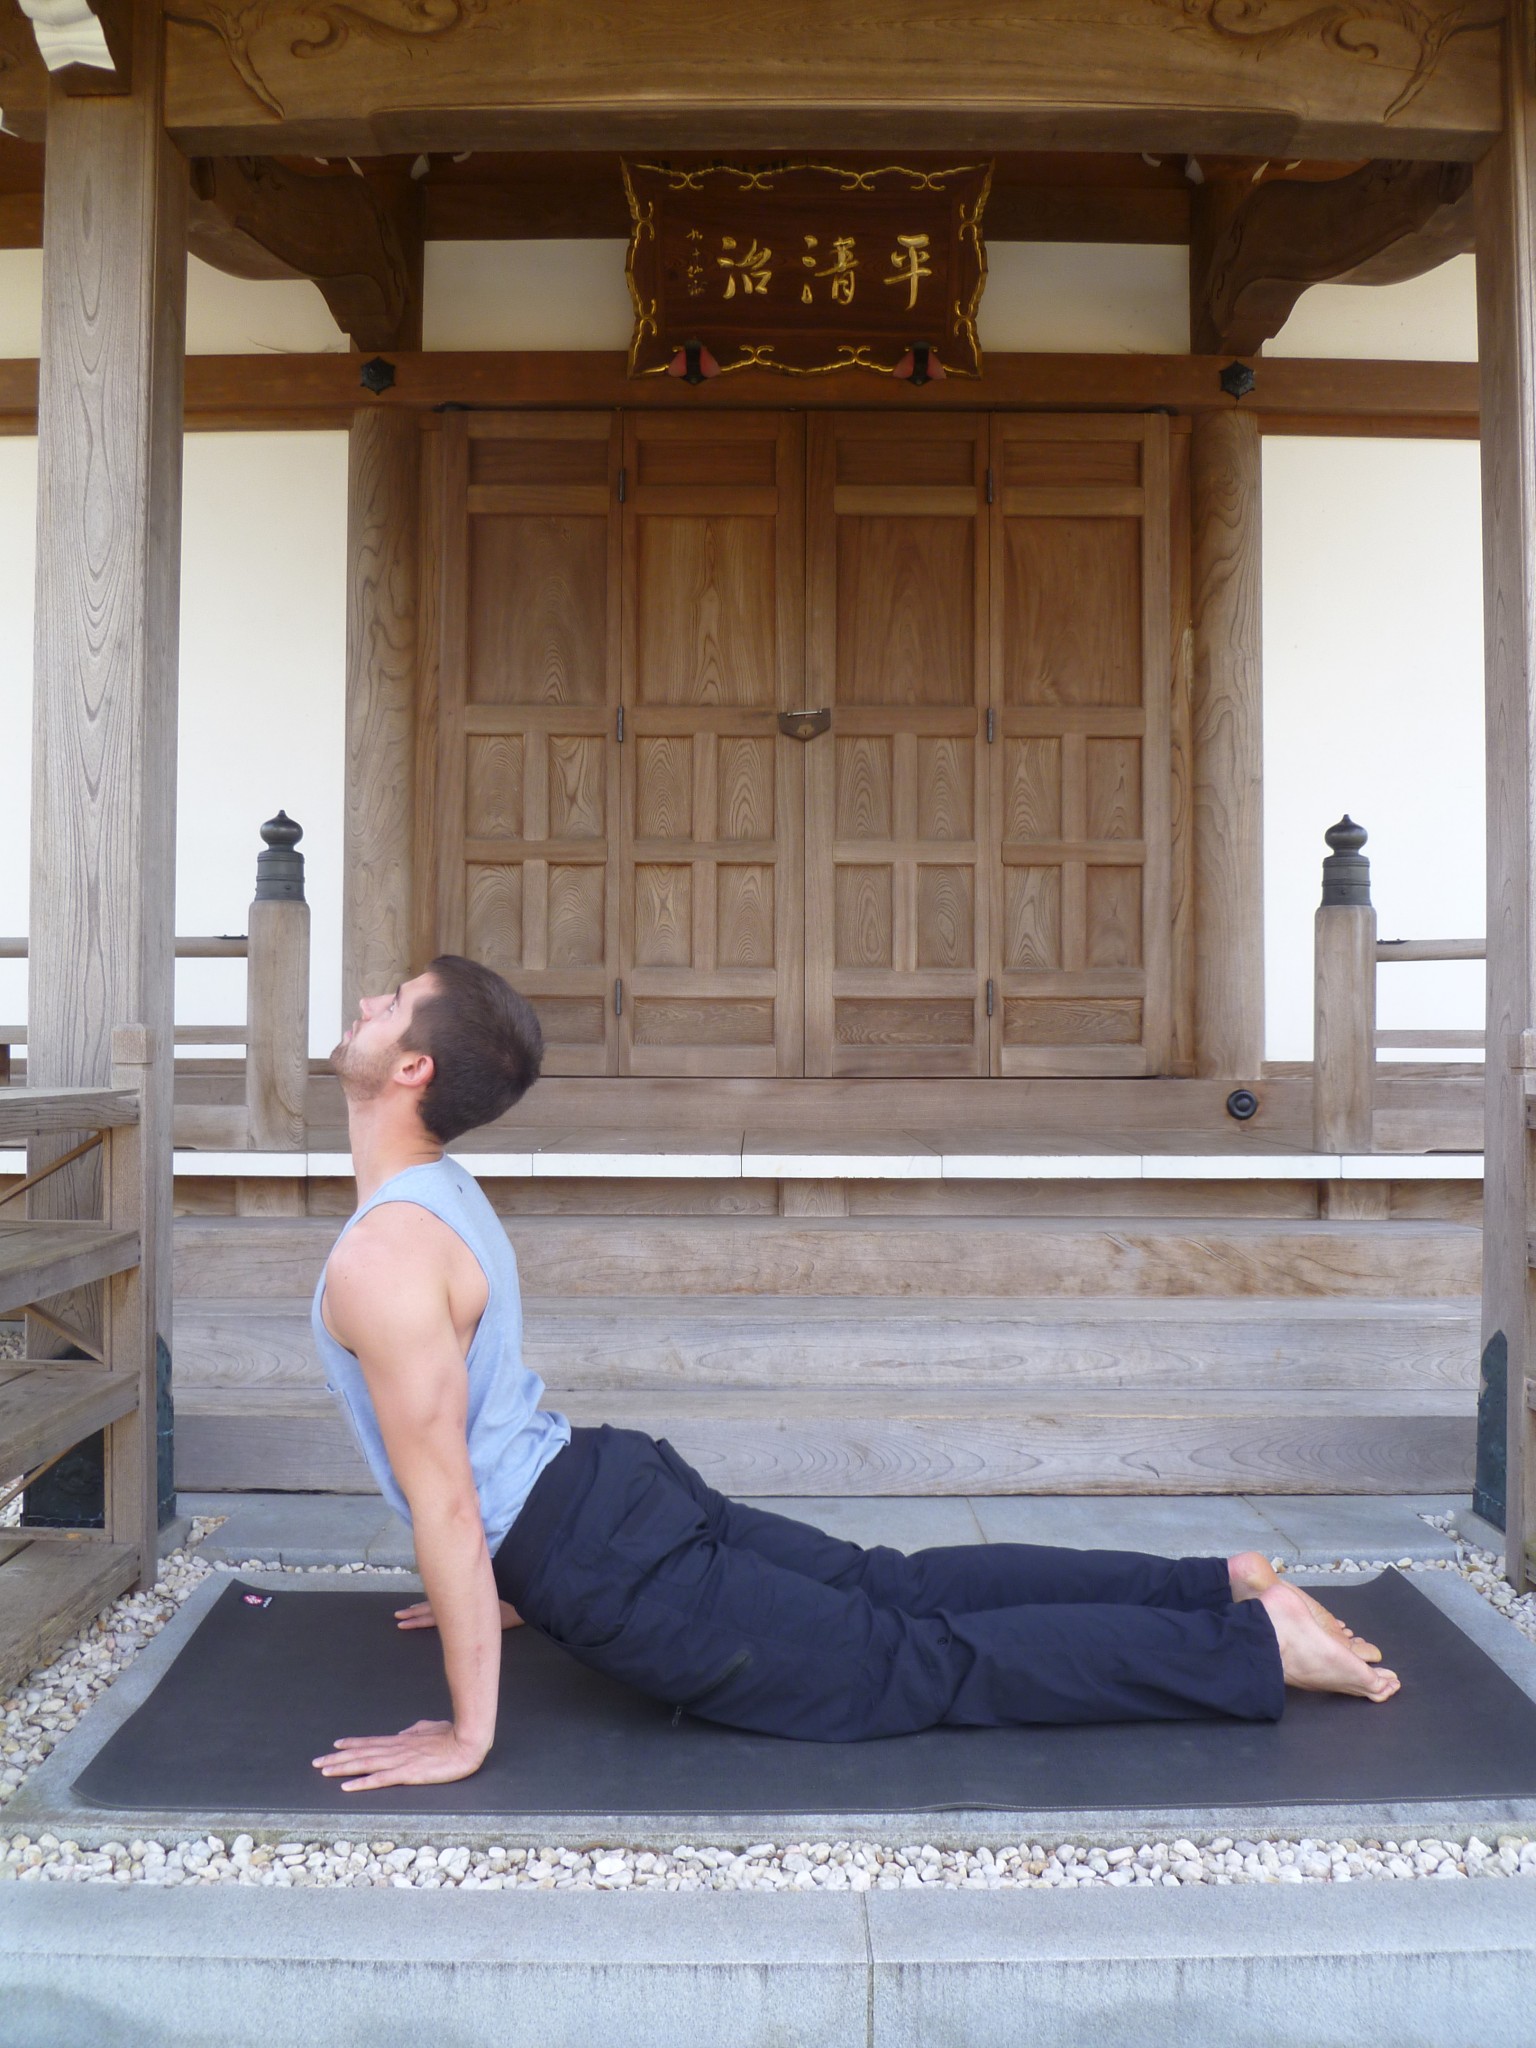
Press the body upward and look upward without straining the neck. Beginners may lie on the floor and lift the shoulders off of the floor about 10-12 inches for a modified version. Be careful not to strain the back.
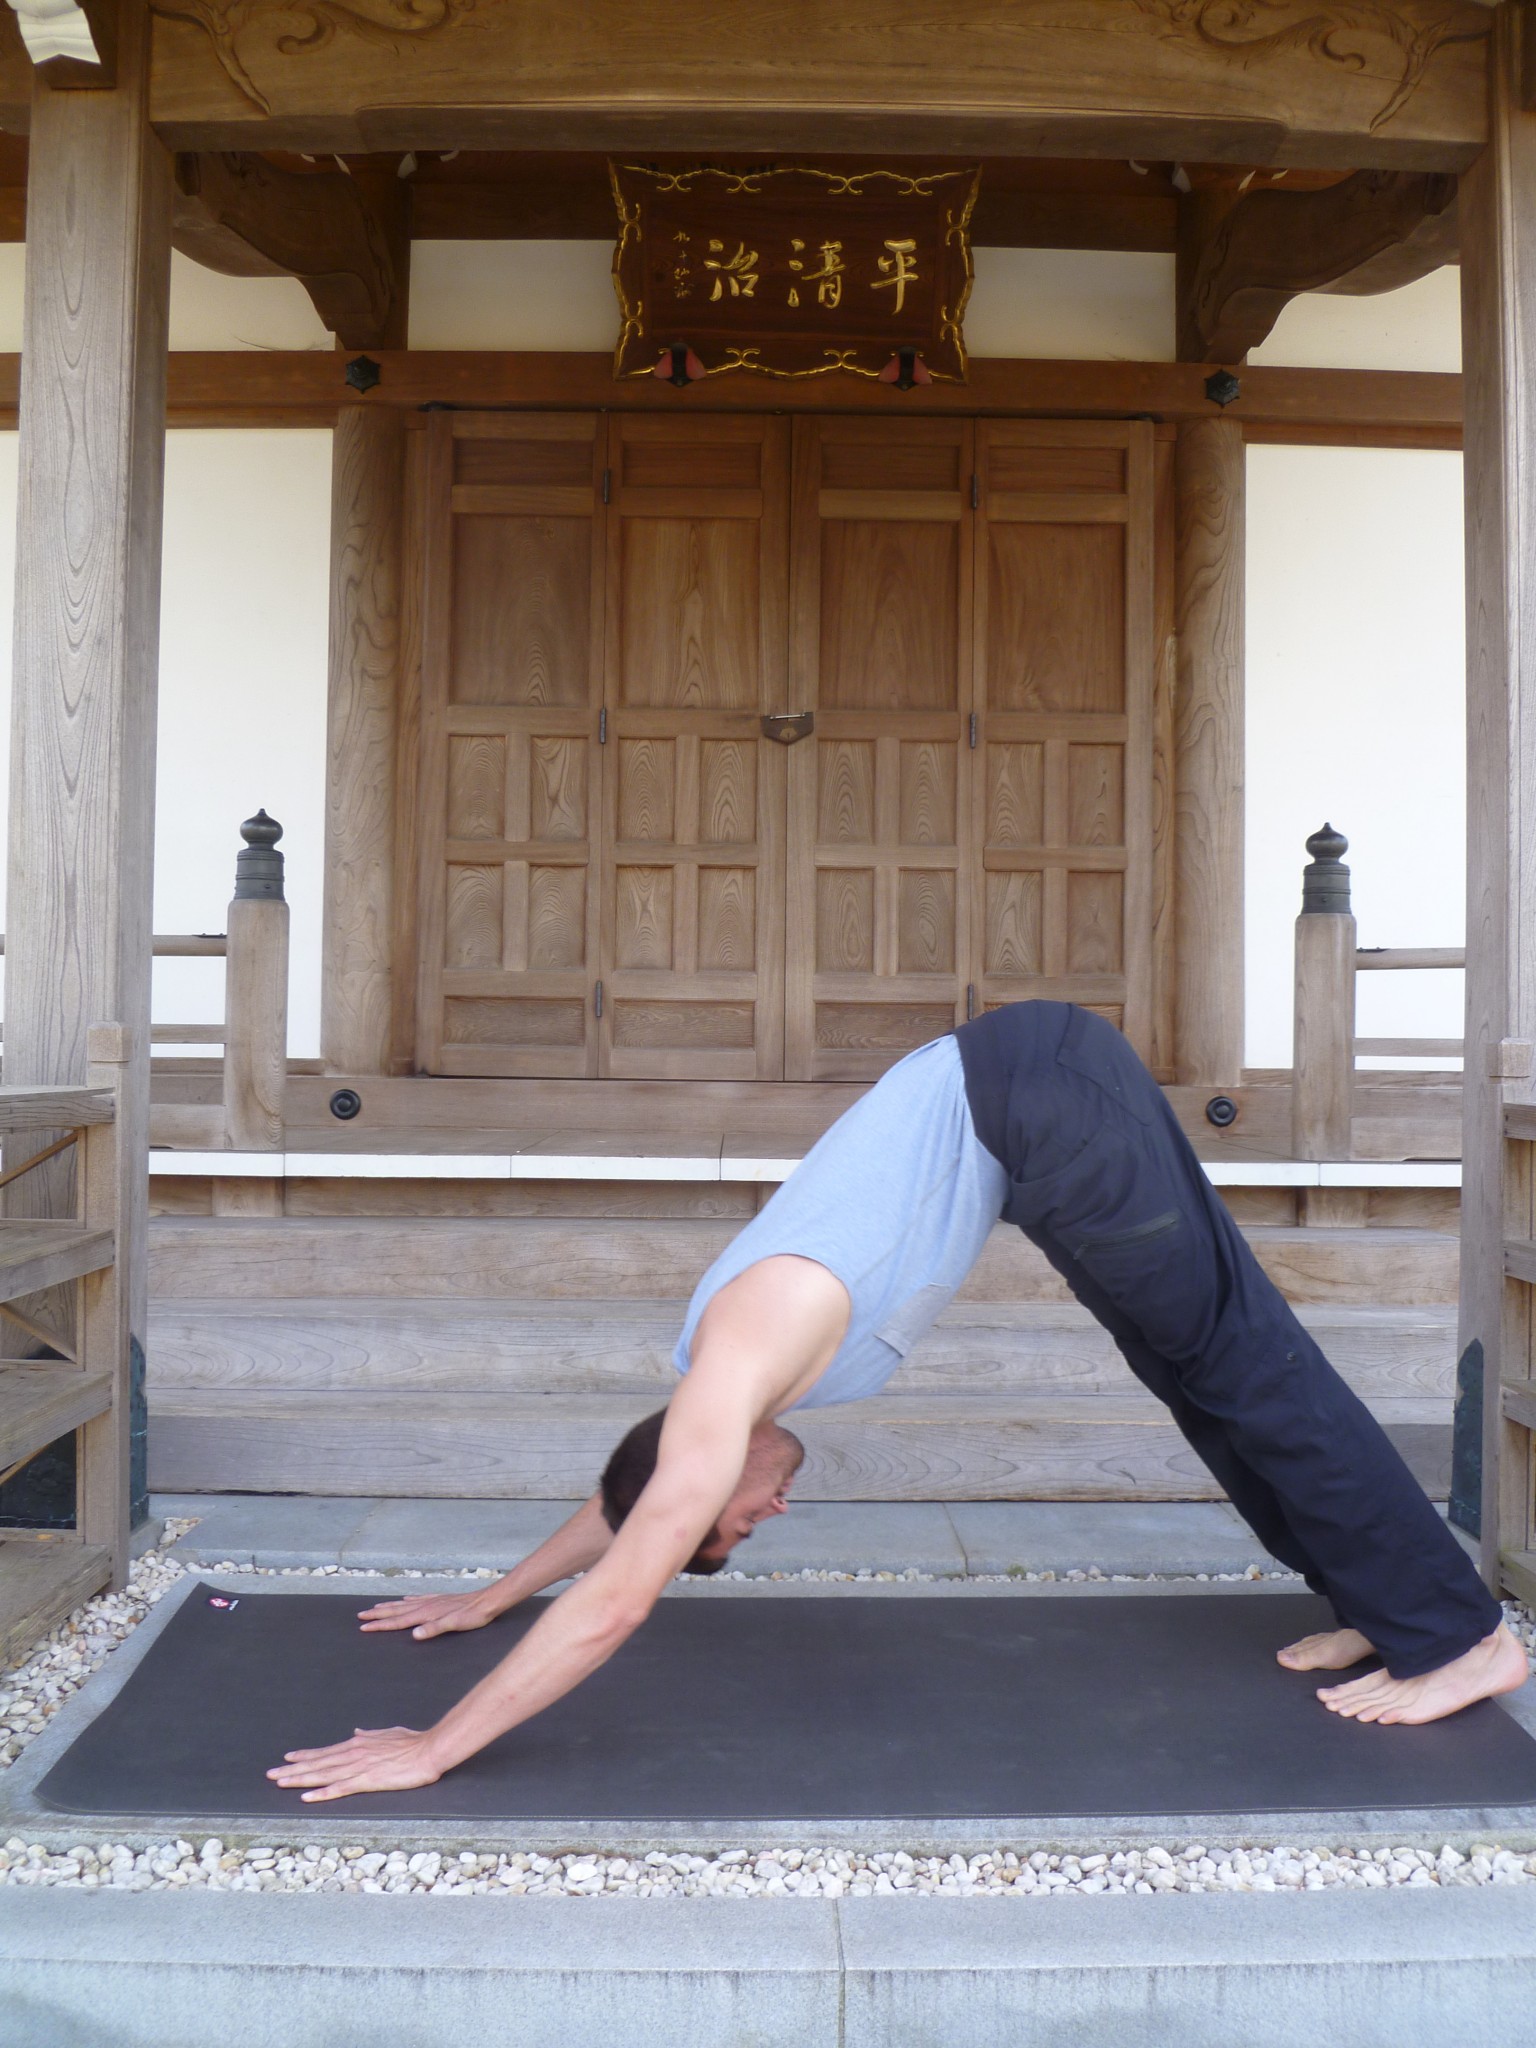
Press upward into Downward Facing Dog. Beginners may modify this by bending the knees and keeping the heels raised. It is important to distribute your weight evenly between your upper and lower body so you look like an upside down “V.” The elbows are soft. Think about lifting your tailbone up into the air to stretch the backs of your legs. As you become more flexible, you can start to lower the heels toward the floor and stretch out the backs of the knees as pictured below. Be careful not to force.
Step the left foot forward into a lunge. It helps to lift the left hand off of the floor when you do this to make room to step through. Be sure that your front knee is directly over your front ankle.
Step both feet together. Beginners may modify this by bending the knees and clasping the hands behind the knees. More advanced exercisers may be able to bring the fingers to the floor. Be careful not to strain.
Inhale and extend your arms overhead. Slight backbend to look up. Exhale and bring your hands down by your sides to return to Mountain Pose. Repeat on the other side, stepping back with the right leg.
Side Stretches
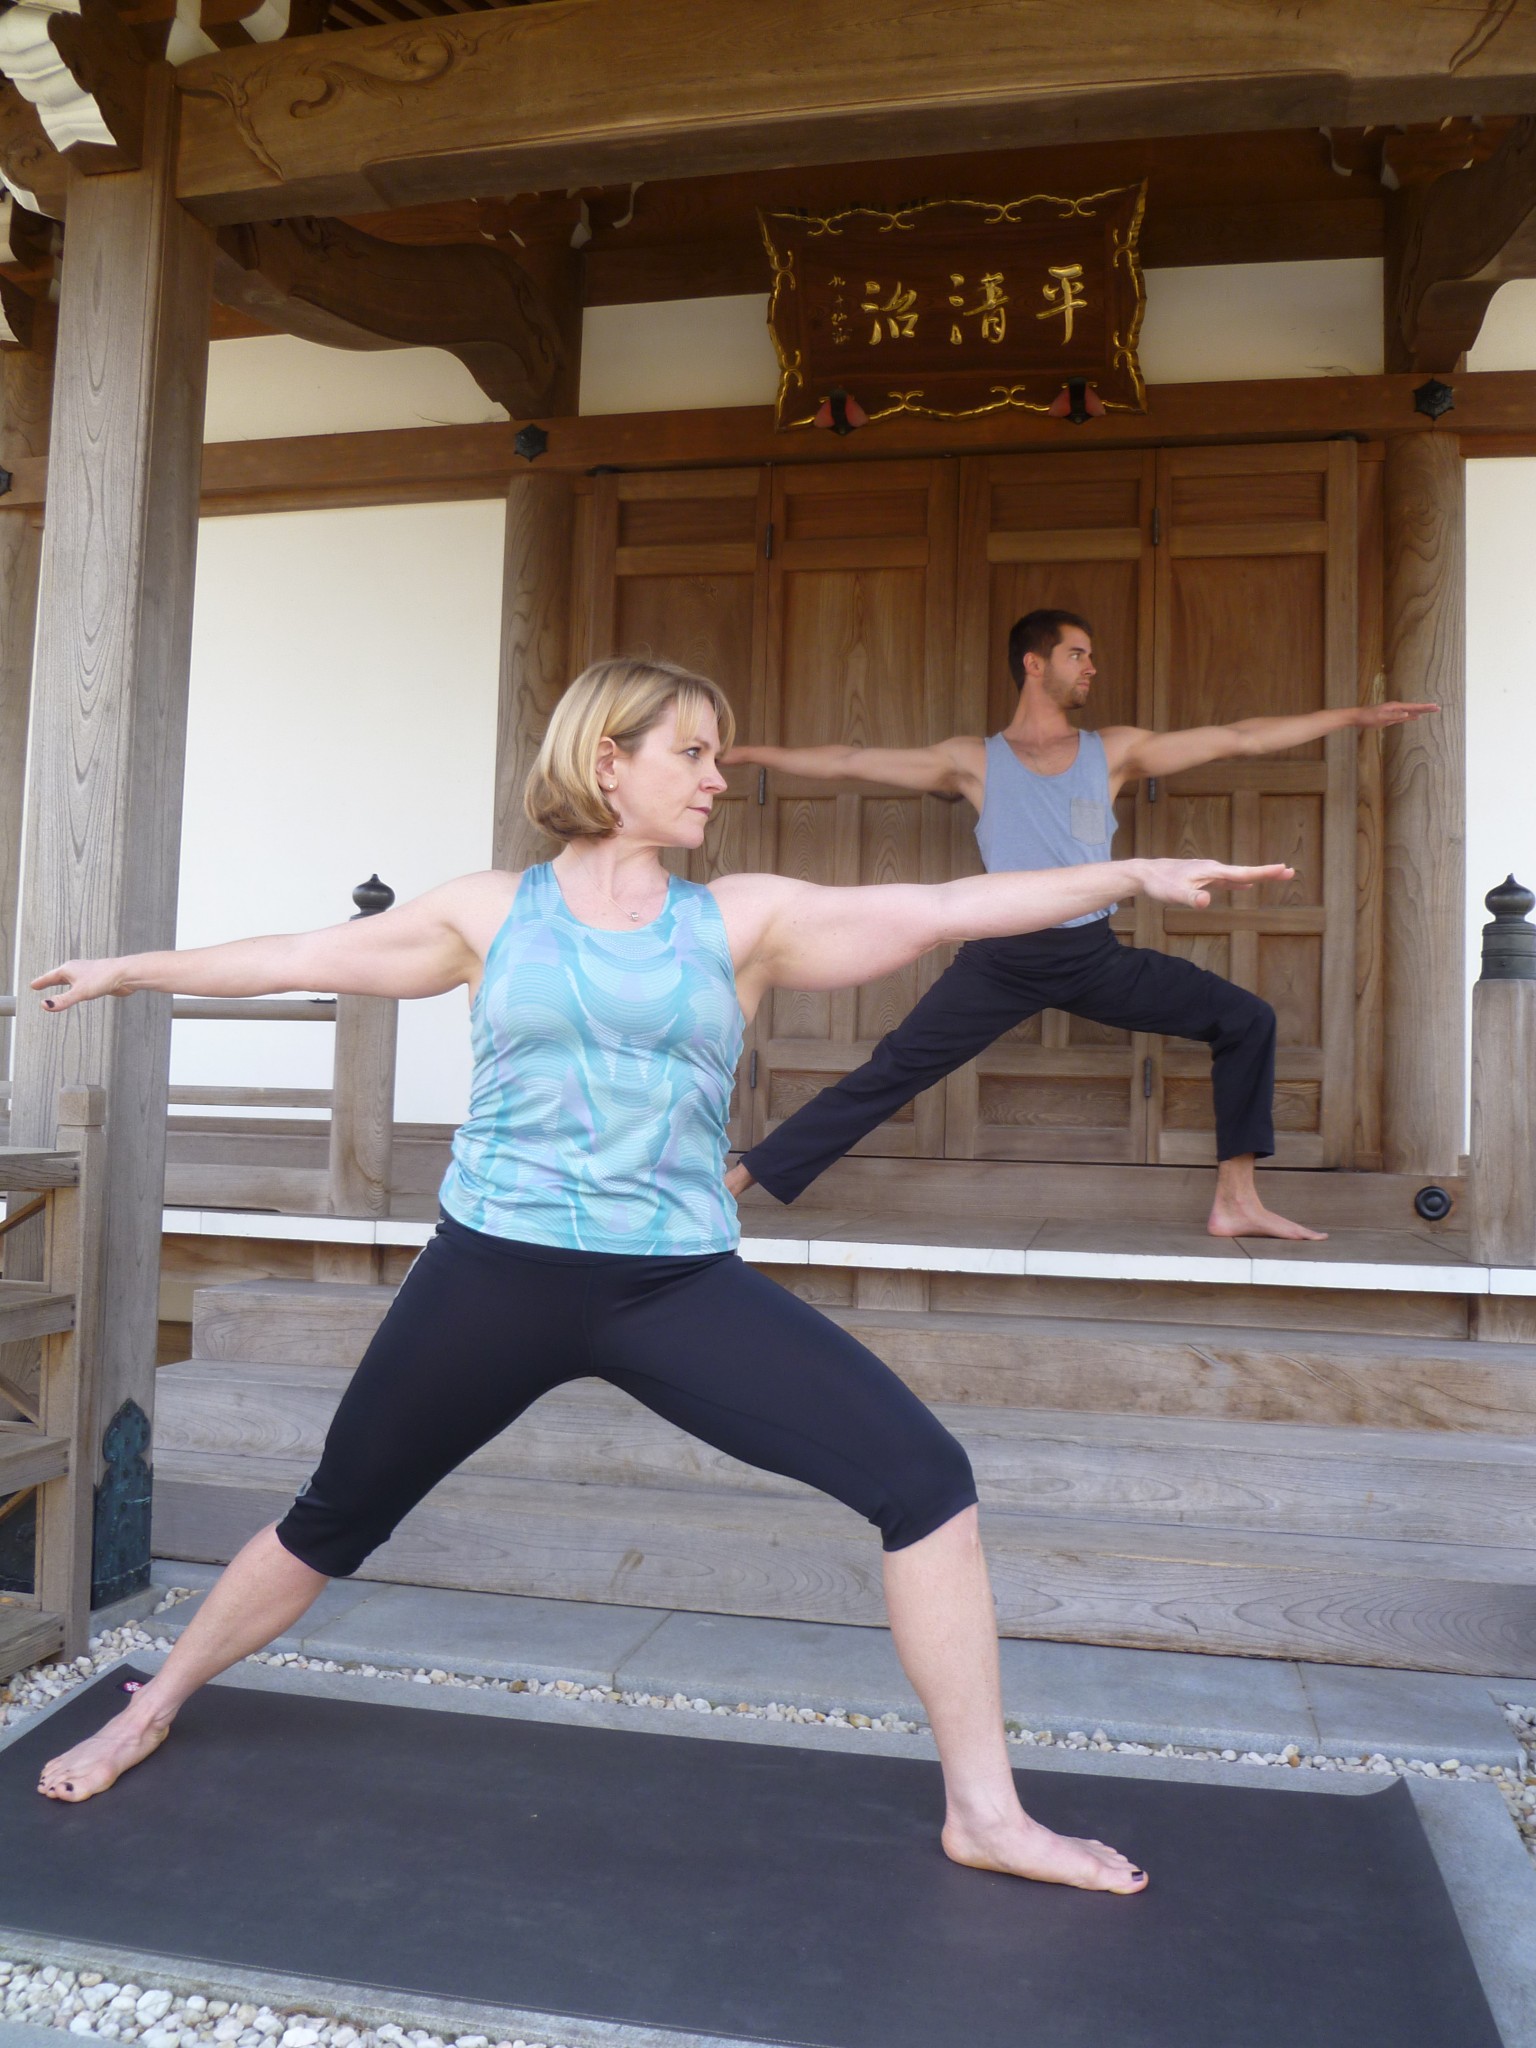
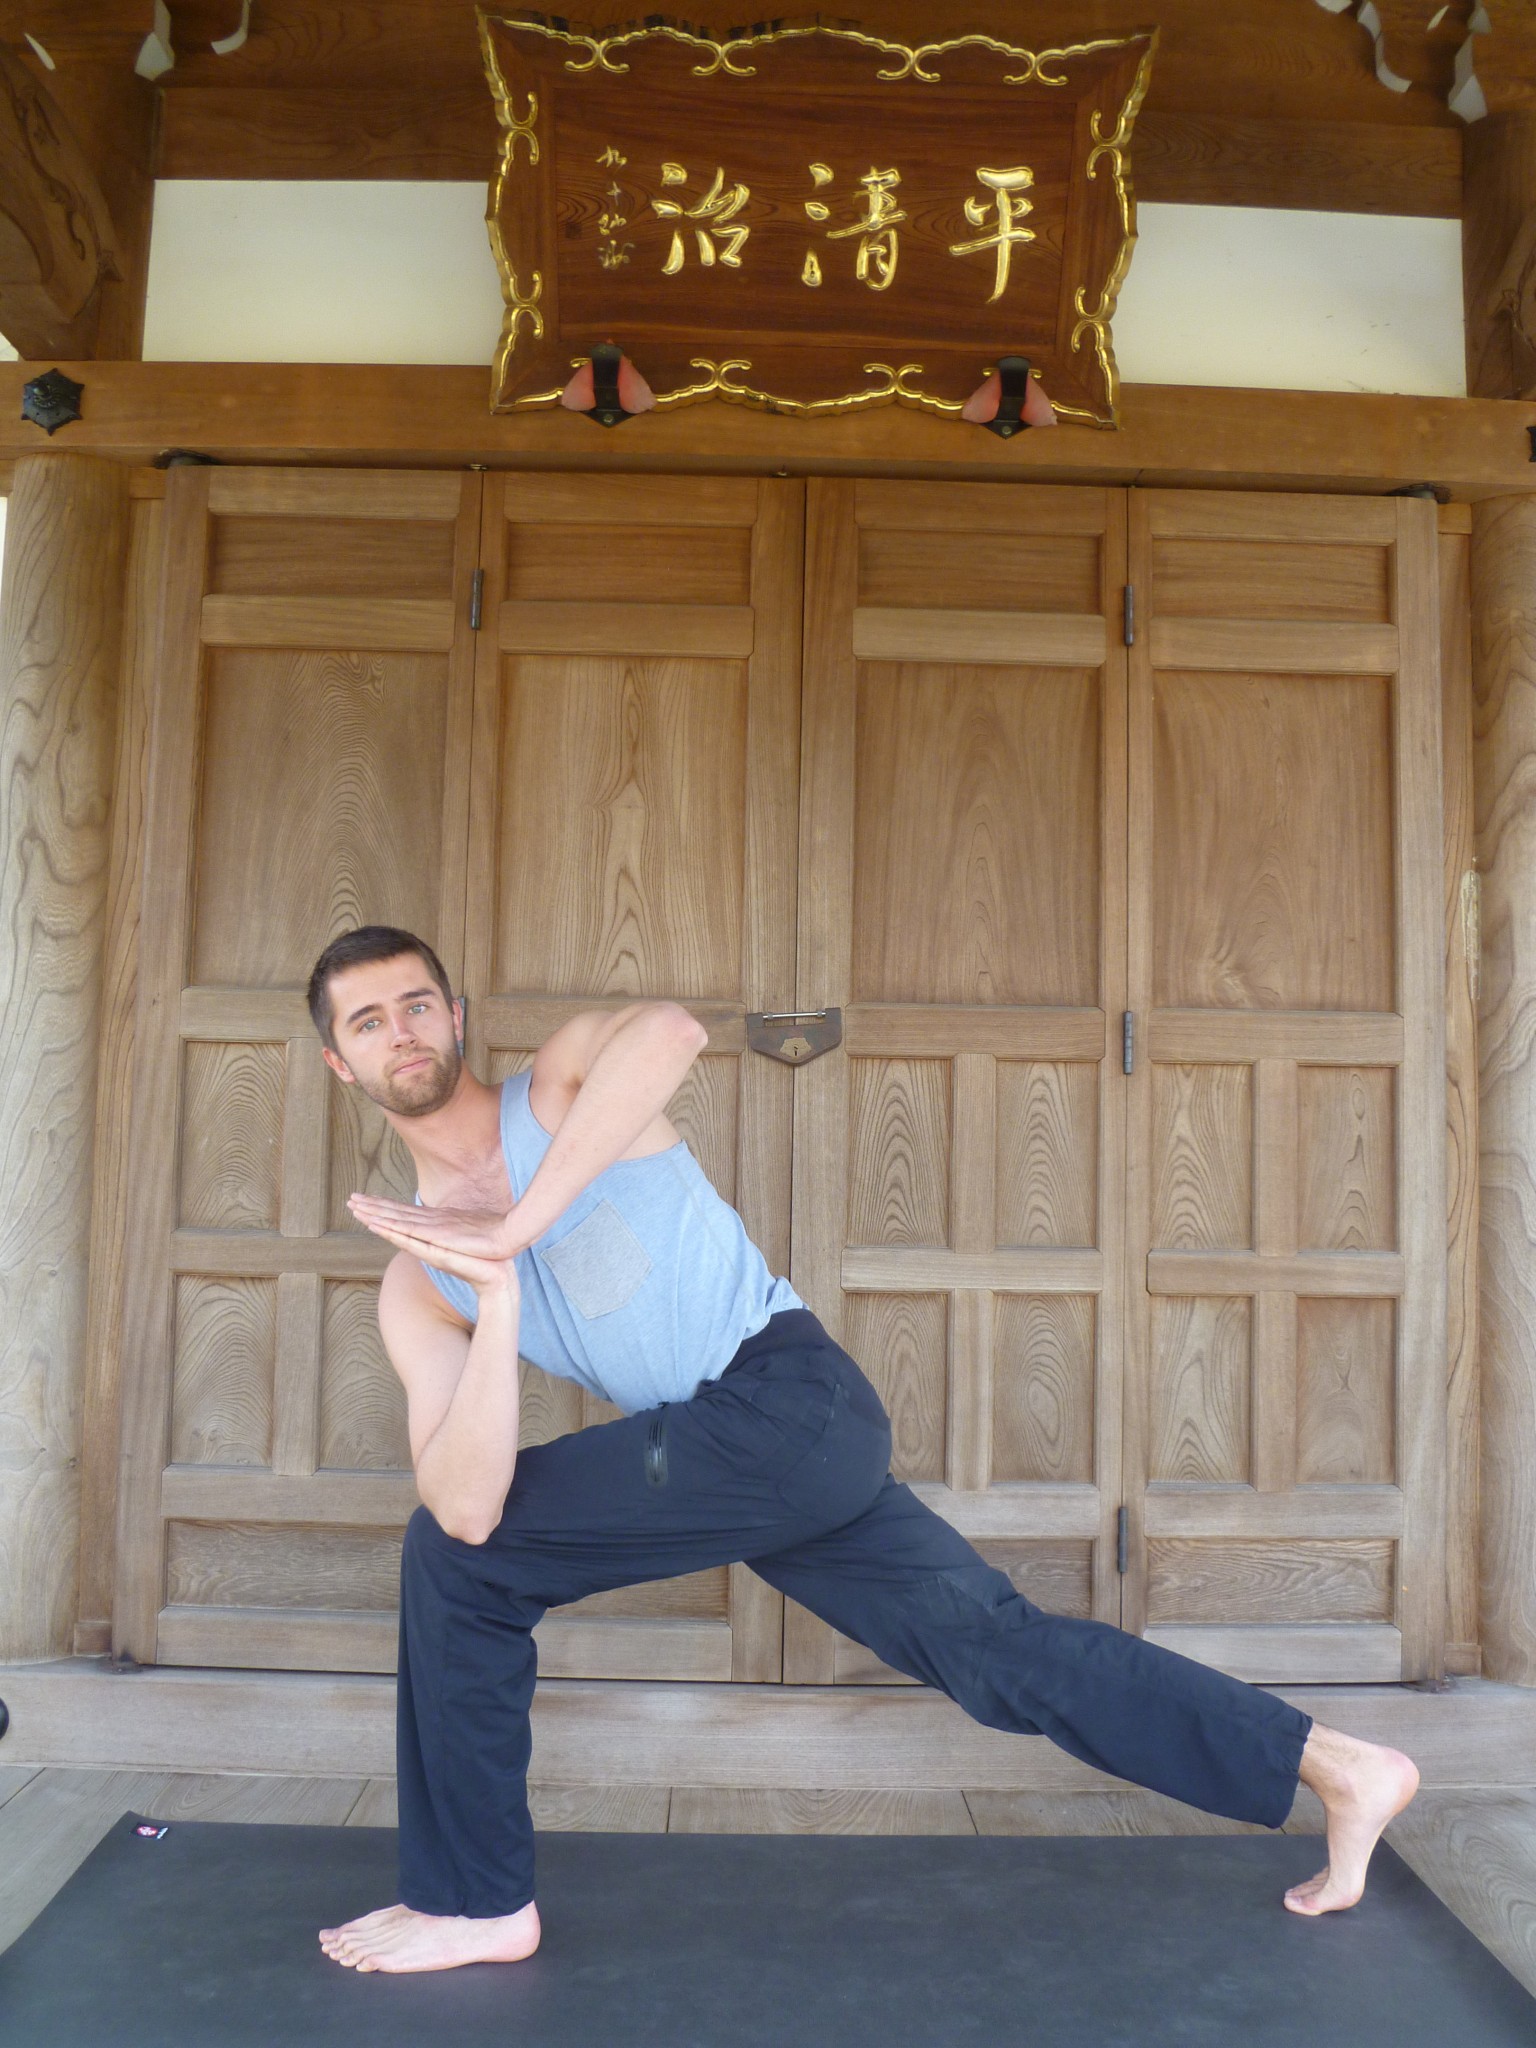
Warrior 2 Pose: From Mountain pose, step the feet about 4 feet apart. Pivot on the heels to turn the left foot out toward the left wall so the left knee and toes are facing the left wall. Turn the right foot inward about 30 degrees. The hips should stay square toward the front and square toward the floor. Inhale and lift your arms up halfway. Exhale and lunge forward so your left knee is directly over your left ankle. Lift your chin and chest. Look over your left fingers. Diane had modified the position below by standing up taller. Austin has made it more challenging by stepping his right foot back and bringing his left knee closer to 90 degrees. Feel the strength of your legs. Inhale deeply and then exhale deeply as you hold the posture.
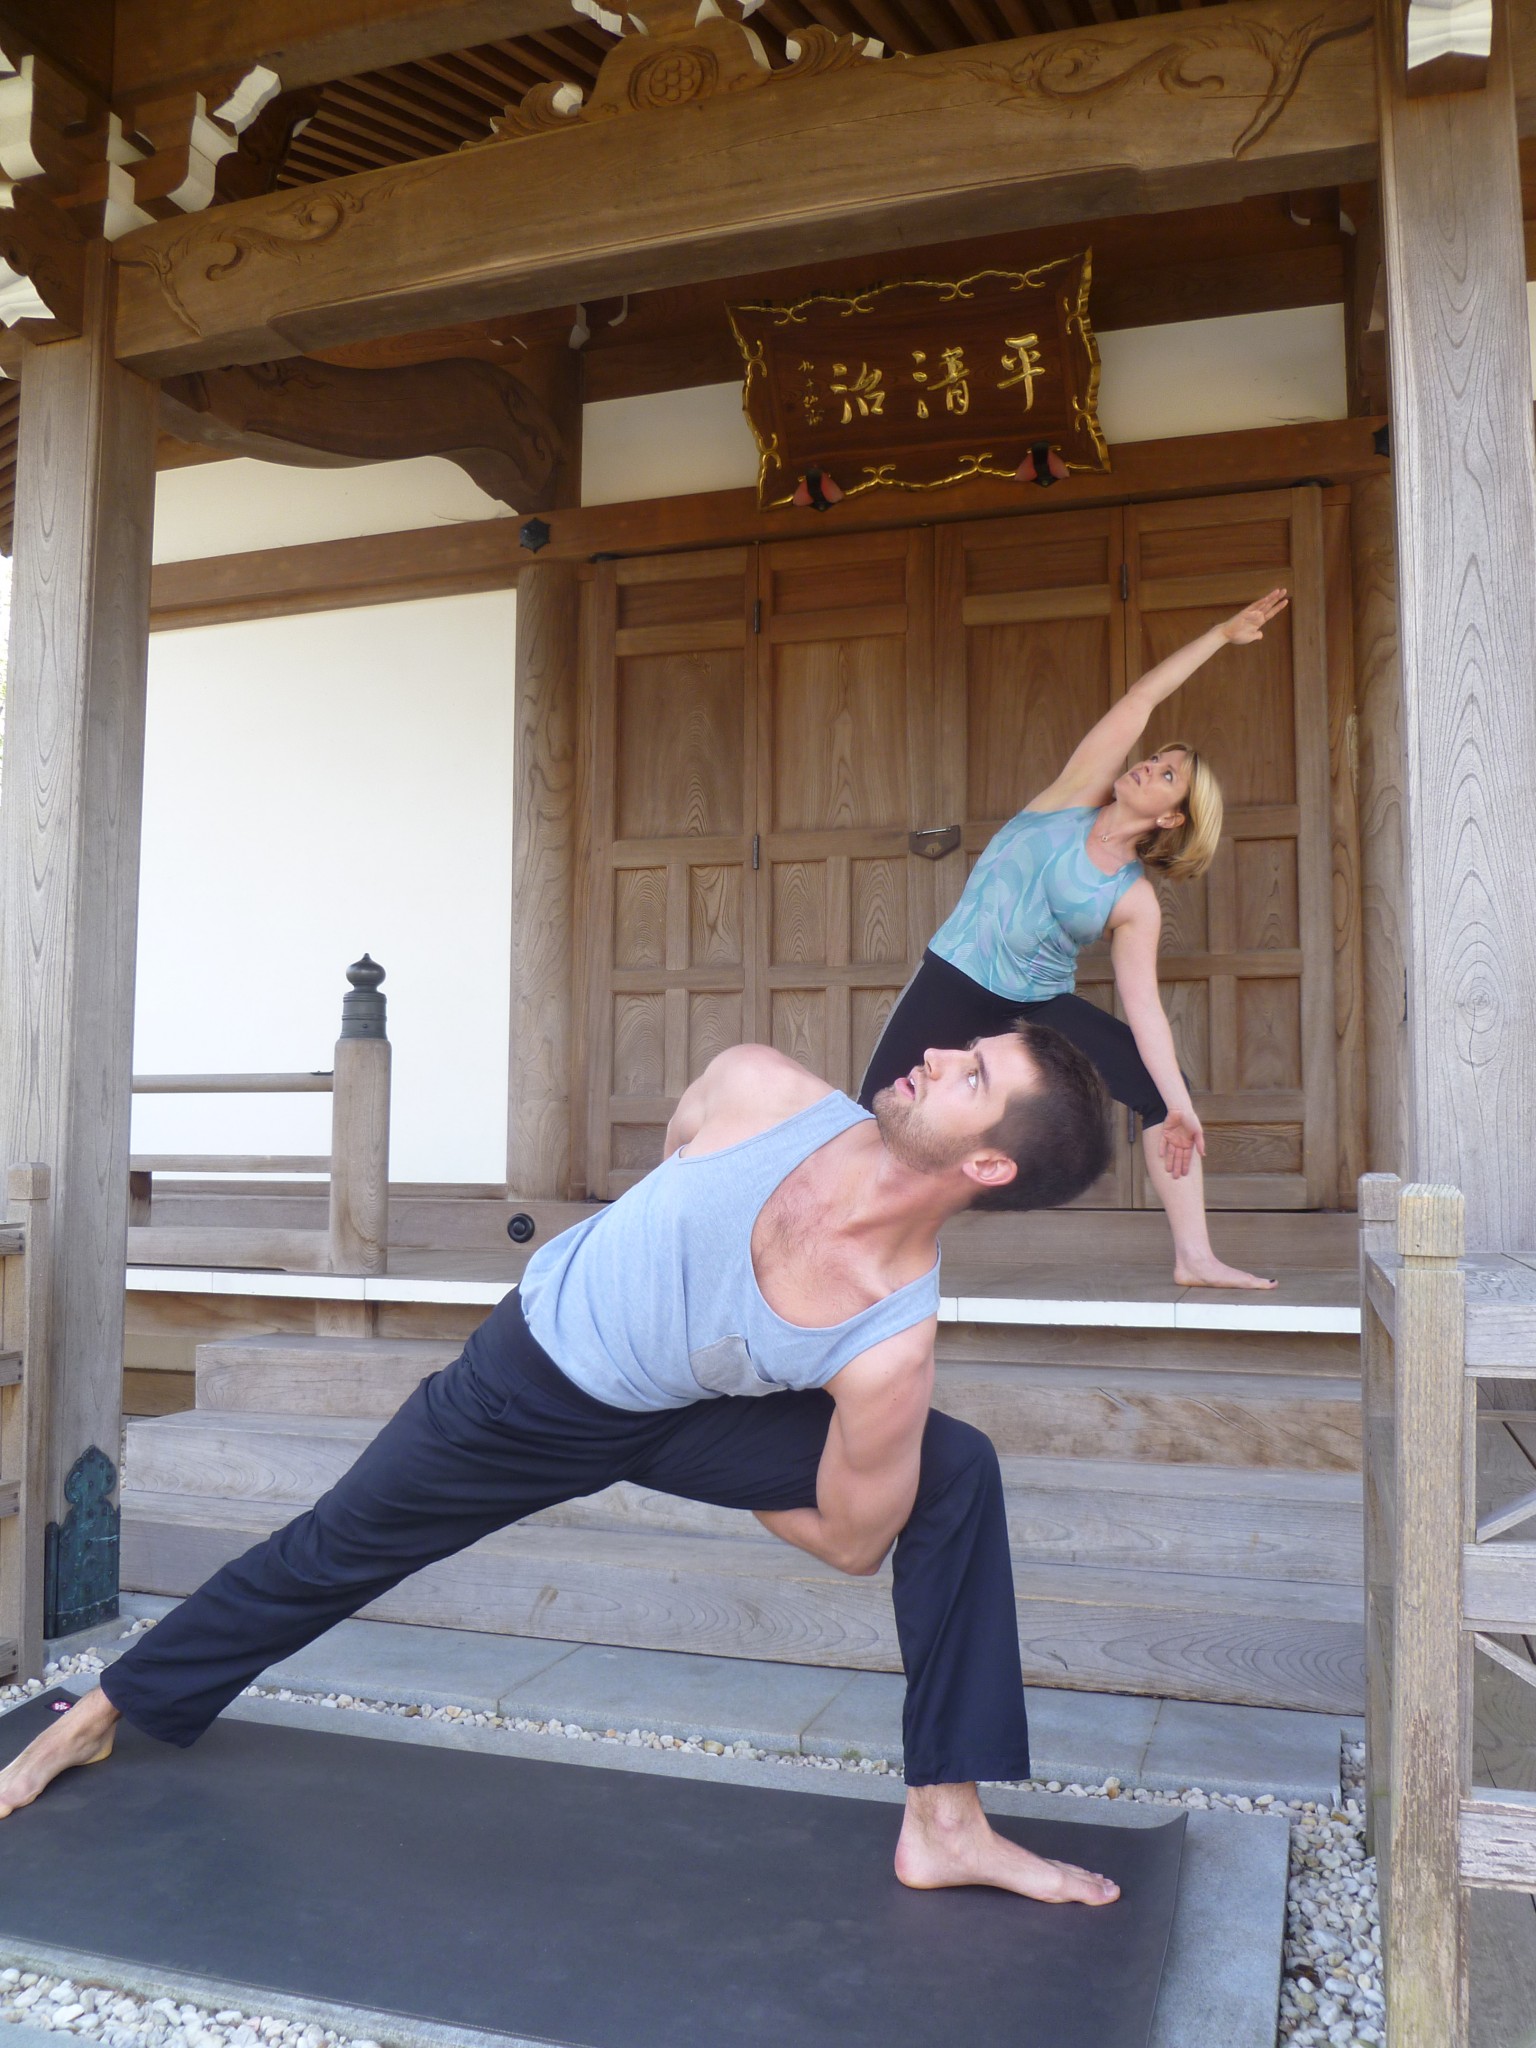
Side Stretch: From Warrior 2, bring the left arm elbow down to the left thigh. Bring the right arm up alongside of your ear. Be careful not to slouch onto your bottom shoulder. Always keep a little bit of space in between your ear and shoulder so you do not draw tension into your upper back. Look forward or toward the top arm. Austin has made the position more challenging below by clasping his hands behind his back to open the chest and shoulders
One Arm Stretch: From Side Stretch, windmill the arms back up into Warrior 2. Notice that the legs do not move and are still in a lunge. Inhale and stretch your left arm upward and arch the torso backward slightly toward the diagonal to open the chest. Diane demonstrates a different variation by bringing the right forearm to the lower back.

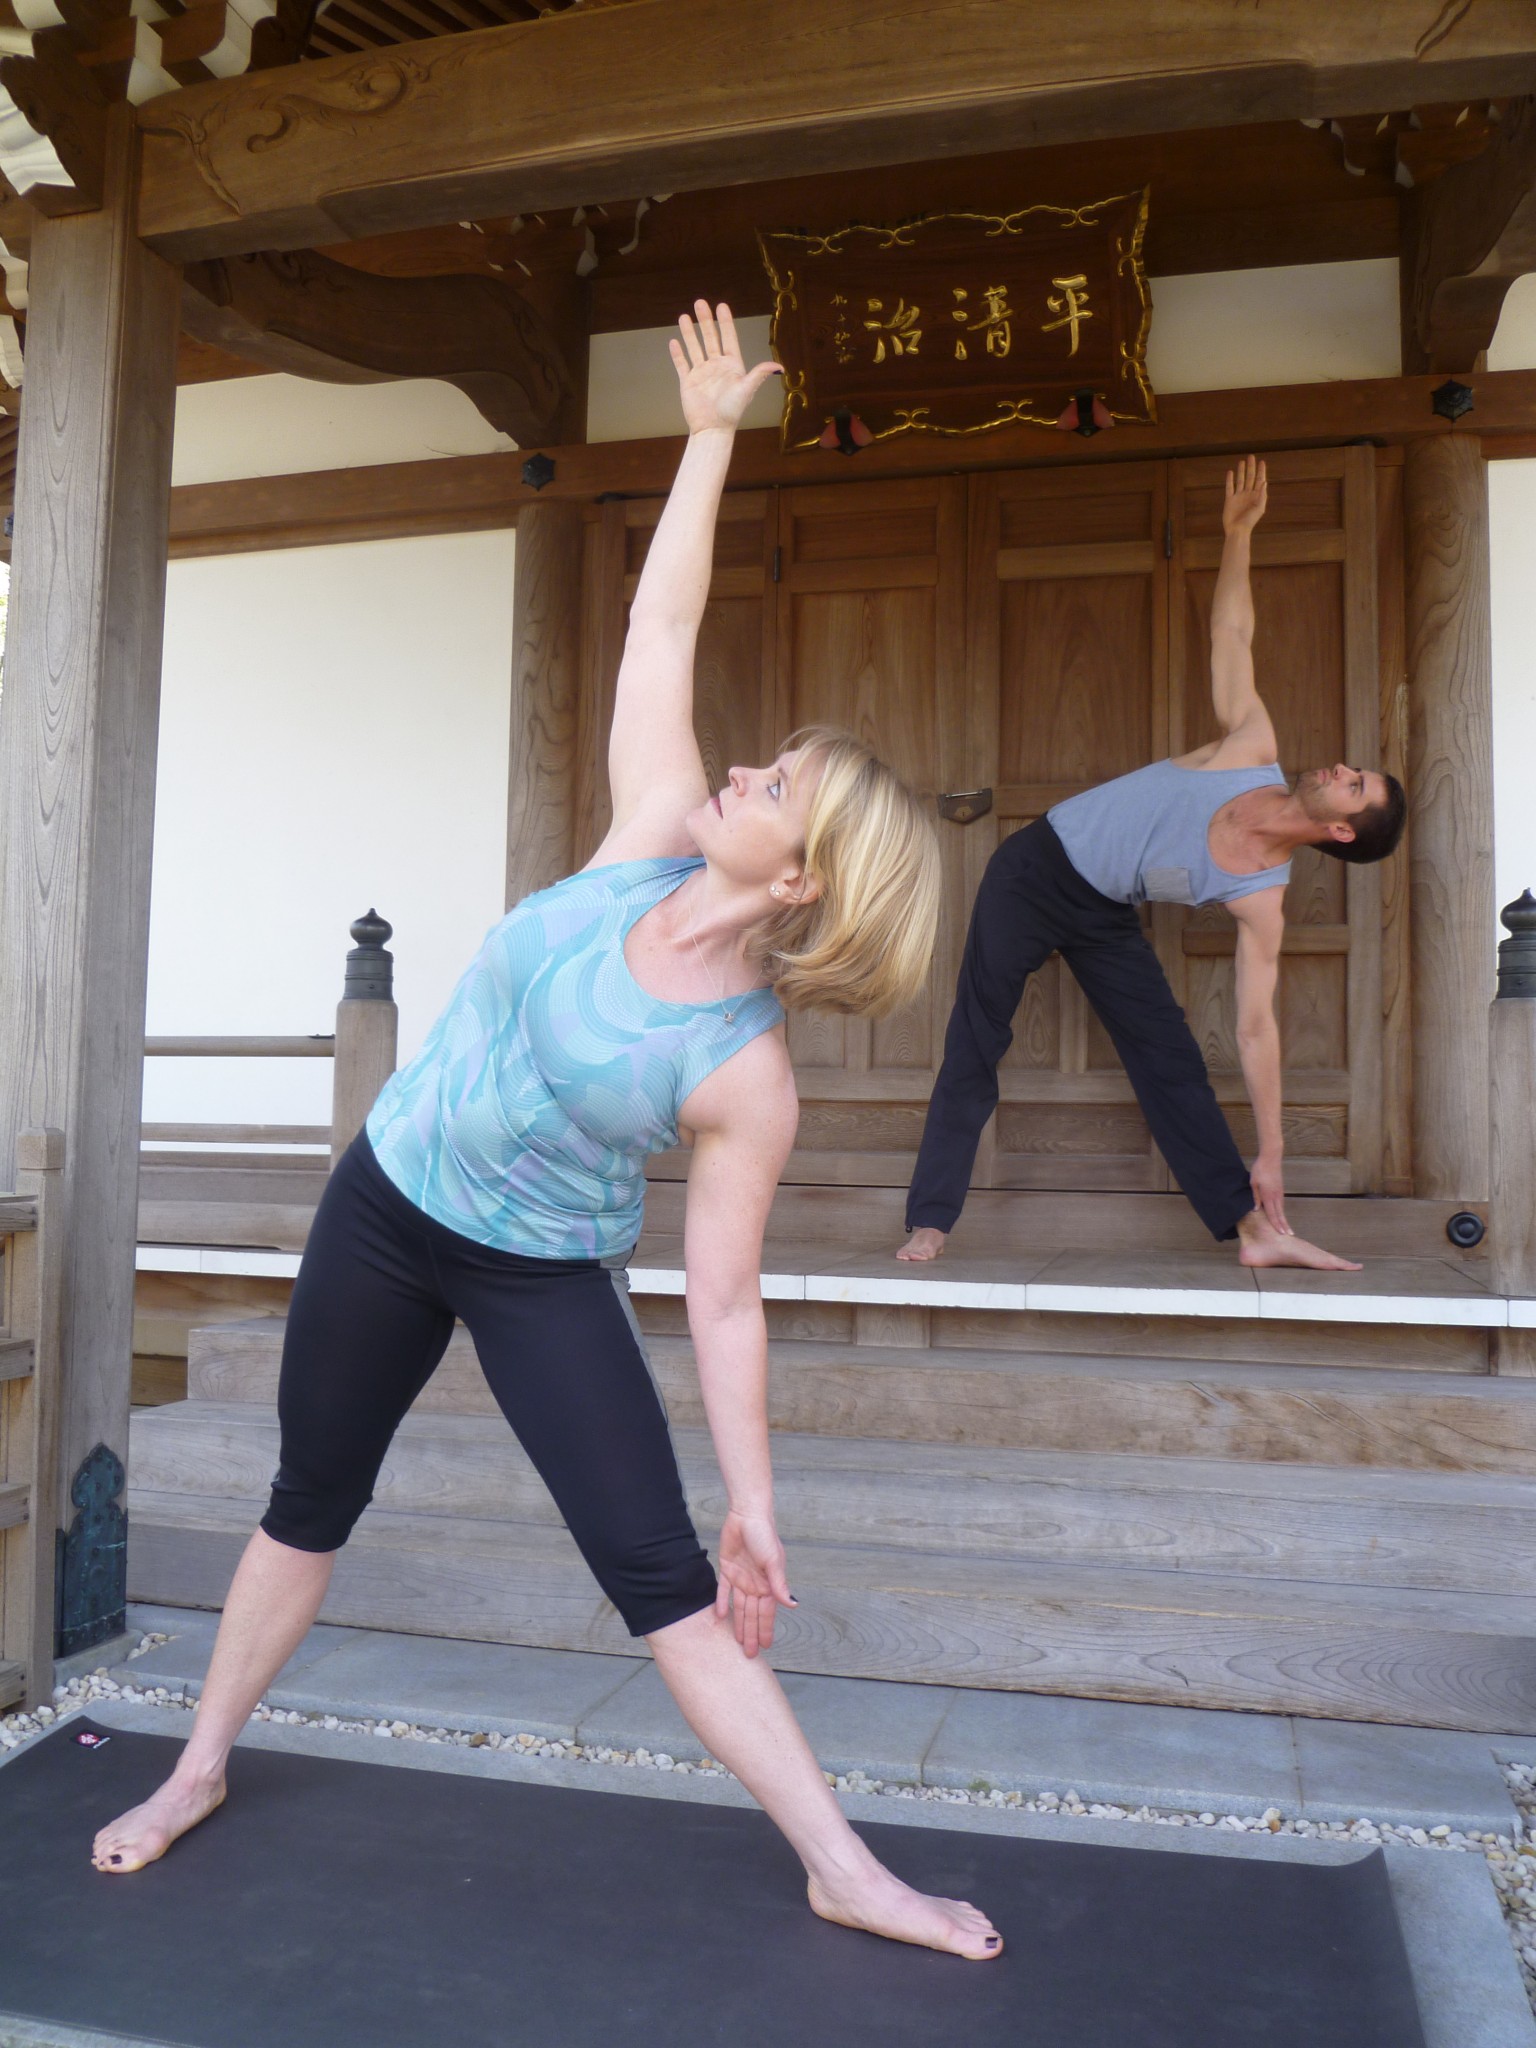
Triangle Pose: From One Arm Stretch, straighten the left leg. Inhale and reach your left arm toward the left wall. Bring your left hand down to touch your left shin. Stretch your right arm upward toward the ceiling. Draw your shoulders away from your ears to release tension from your upper back. If you were leaning against a wall, both shoulder blades would touch the wall. You are drawing a straight line from the floor to the ceiling with your arms. Diane is demonstrating Modified Triangle Pose. Austin is demonstrating Full Triangle Pose by bringing his left hand to his ankle or to the floor. Look forward or to the top hand.
Balance Postures
Balance training is extremely functional for activities of daily living. Most class participants find that their balance improves after a few short weeks.
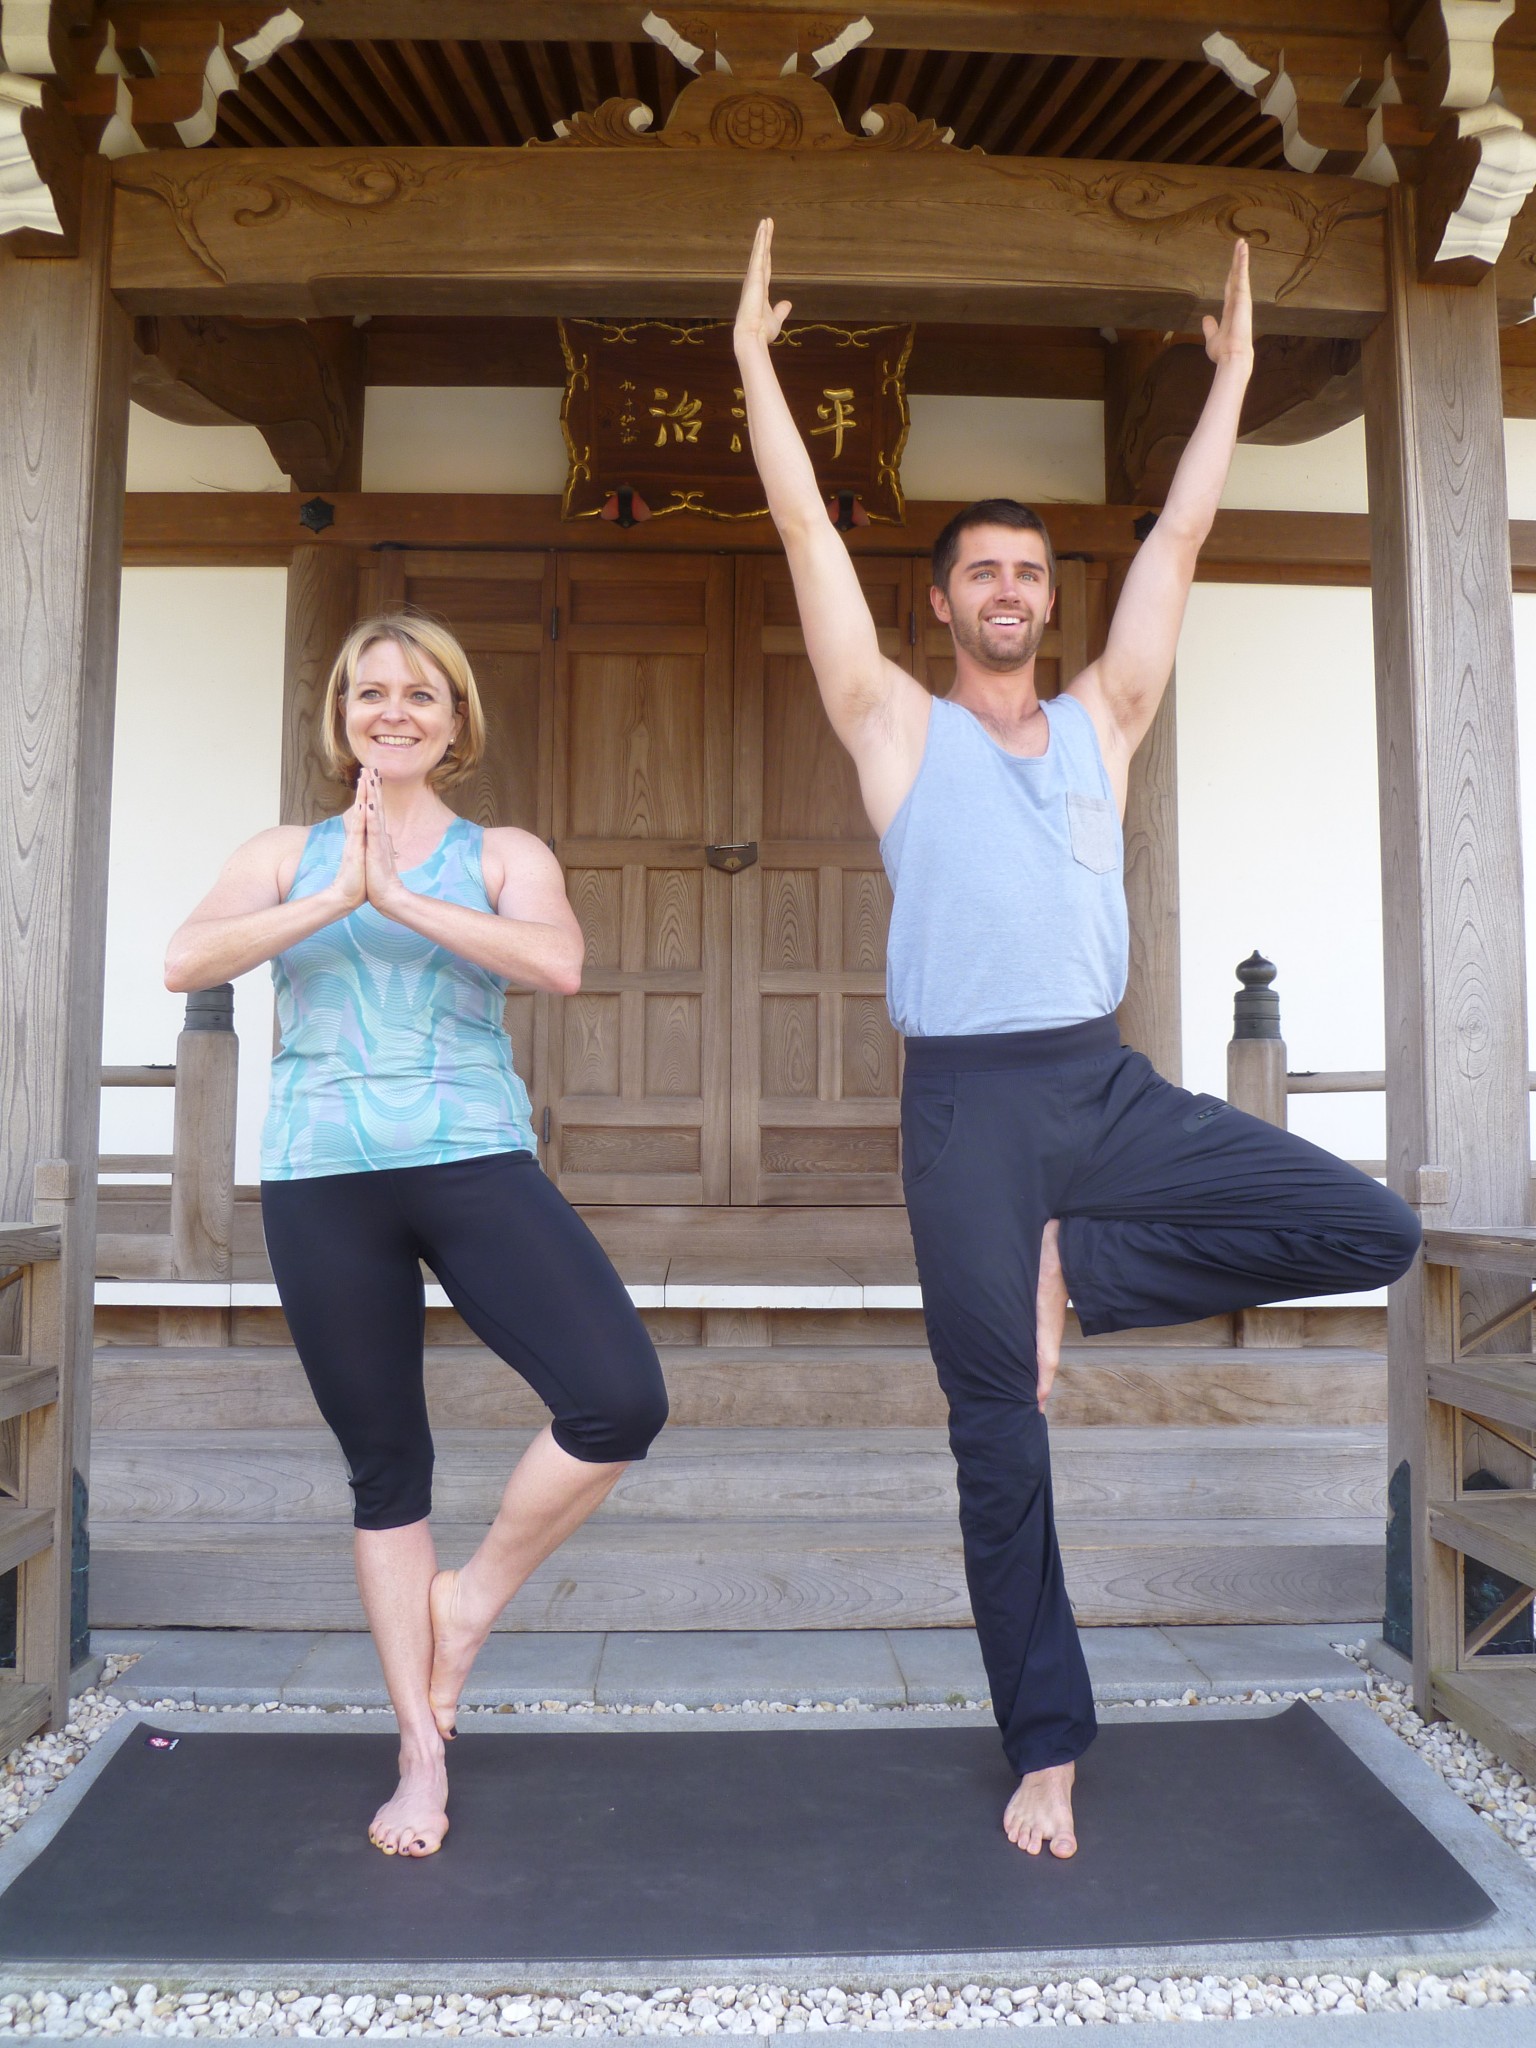
Tree Pose: Shift your body weight onto your right leg. Prop your left heel up onto your right ankle with the ball of your left foot on the floor (level 1). Diane is demonstrating a modified position with the entire left foot on the right ankle (level 2). To make the position more challenging, place the left foot on the right calf (level 3) or right thigh (level 4). Austin is demonstrating a more advanced version by stretching the arms up into the air. Imagine that you are grounding the supporting leg into the ground like a tree trunk and stretching the arms up toward the sky like tree branches that waiver slightly in the wind as you find your balance. Repeat on the other side.
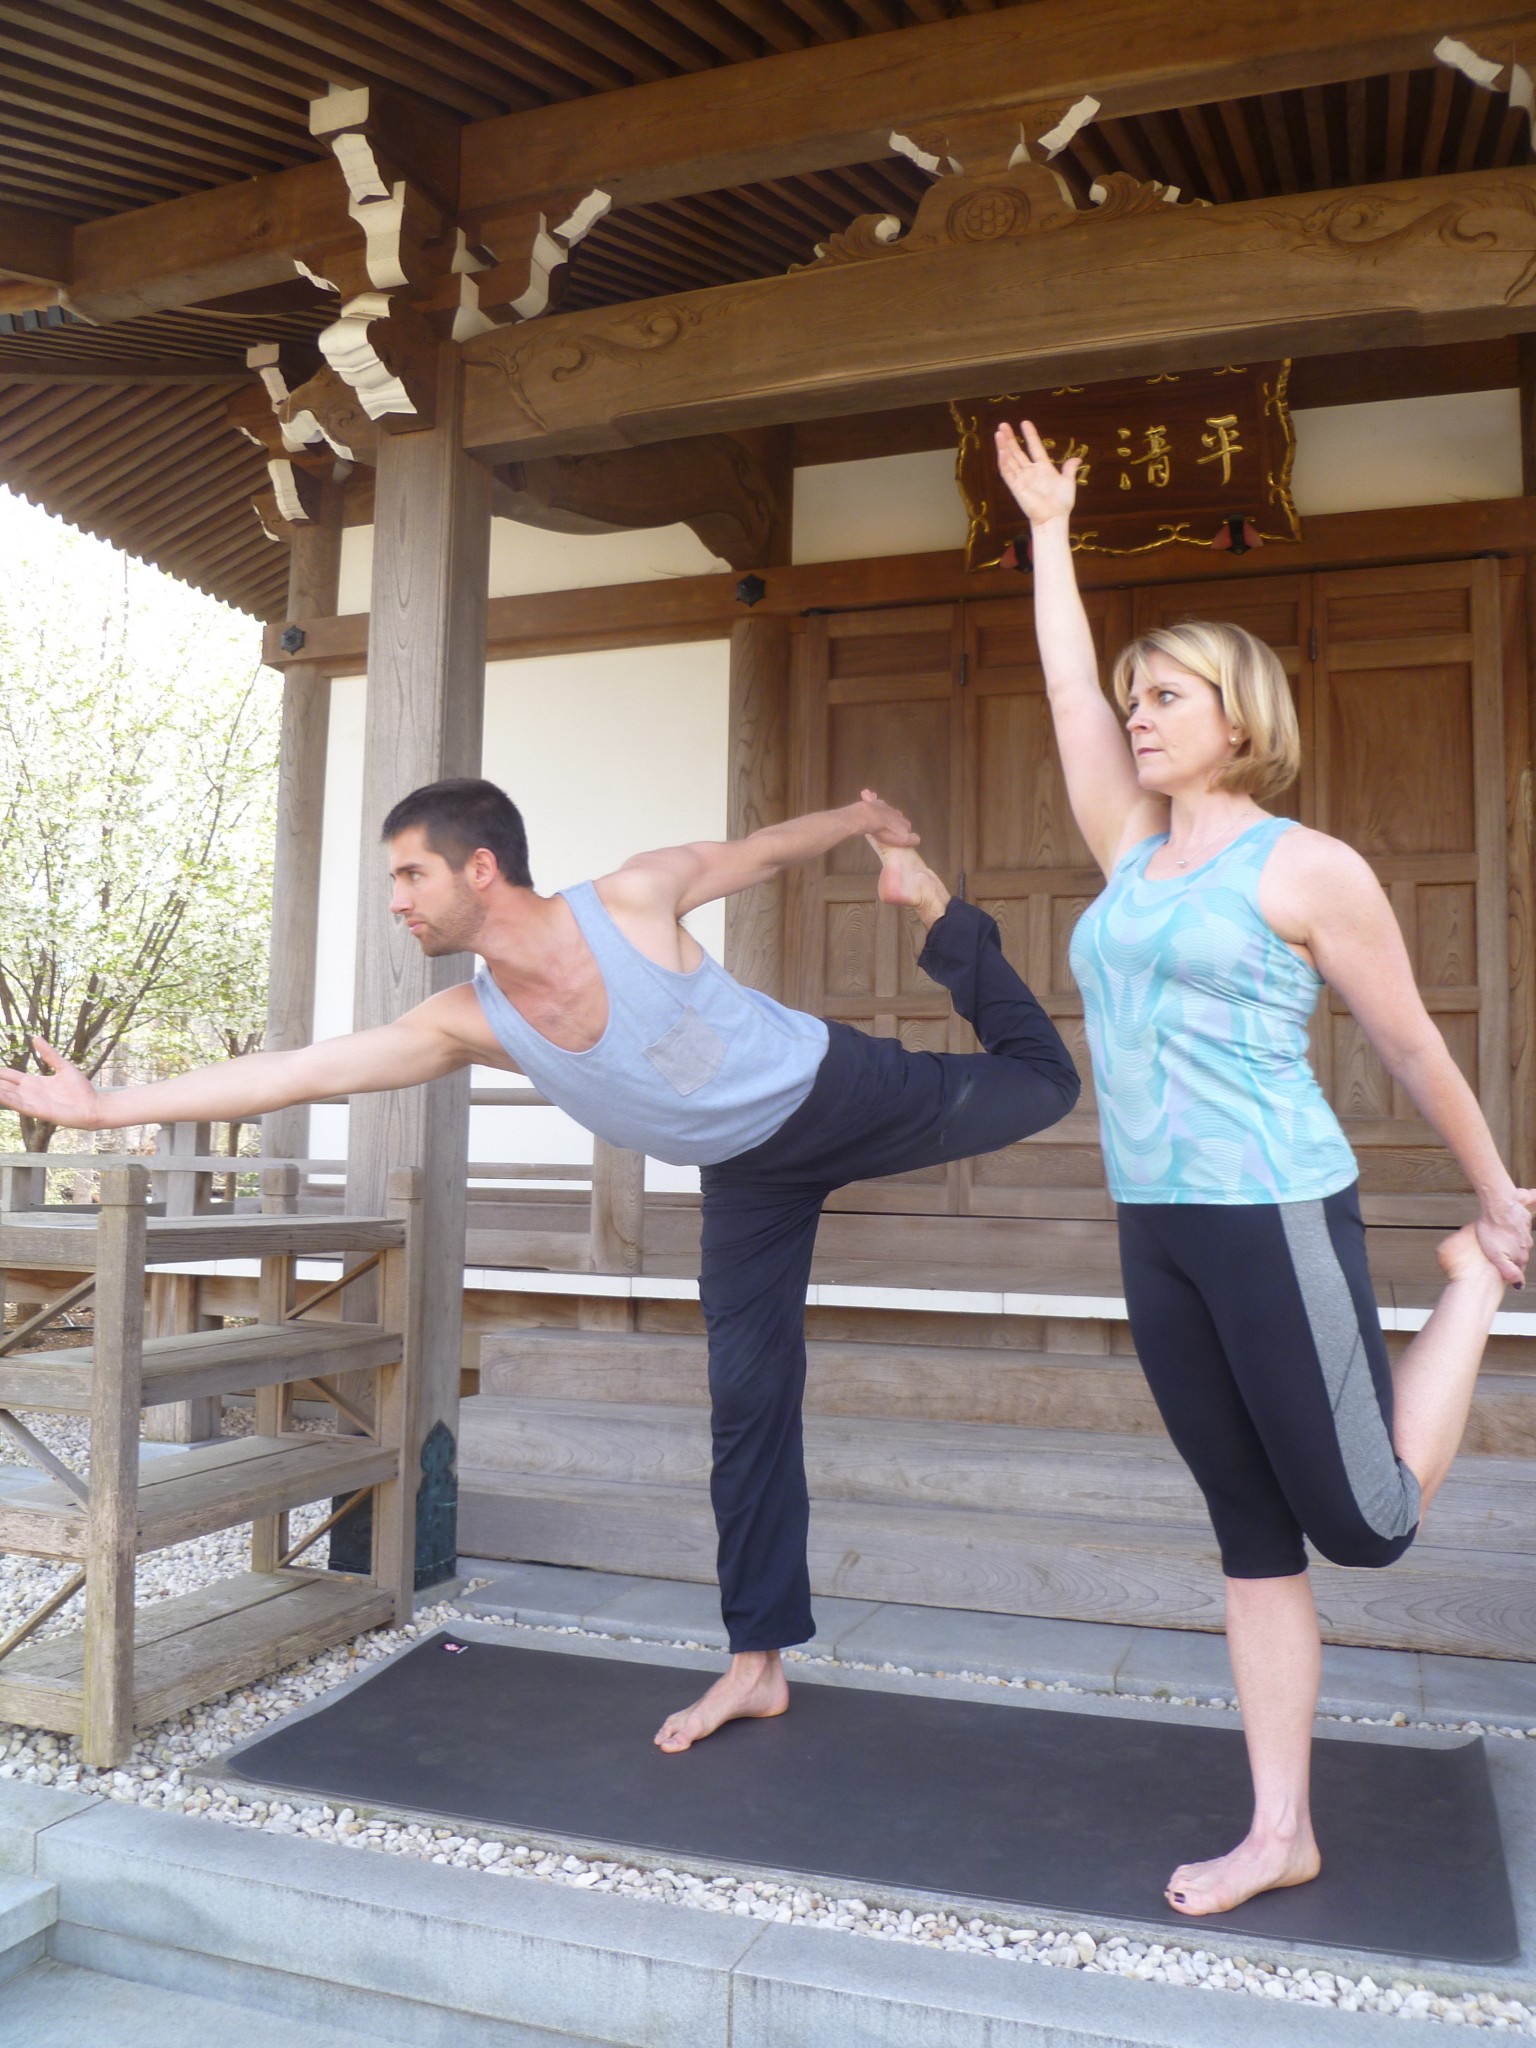
King Dancer: Hold the left foot in the left hand. Inhale and stretch the right arm up toward the sky. Diane demonstrates the modified version below. For a more advanced version tilt forward like a scale seeking balance. Notice the challenge of balancing through the posture. Austin demonstrates an advanced version below. Breathe deeply as you hold the position. Repeat on the other side.
Modified Prayer Twist: Step the right foot back into a lunge. Bring the right knee down to the ground. Press the palms together into Prayer Position and twist toward the left thigh. Place the right elbow on the left thigh or place the right elbow on the outside of the left thigh. Rotate from the hips and press off of the thigh with the elbow so you are looking to the left wall. The hands should be in the middle of the chest. Feel tension releasing from the right shoulder blade. Repeat on the other side.
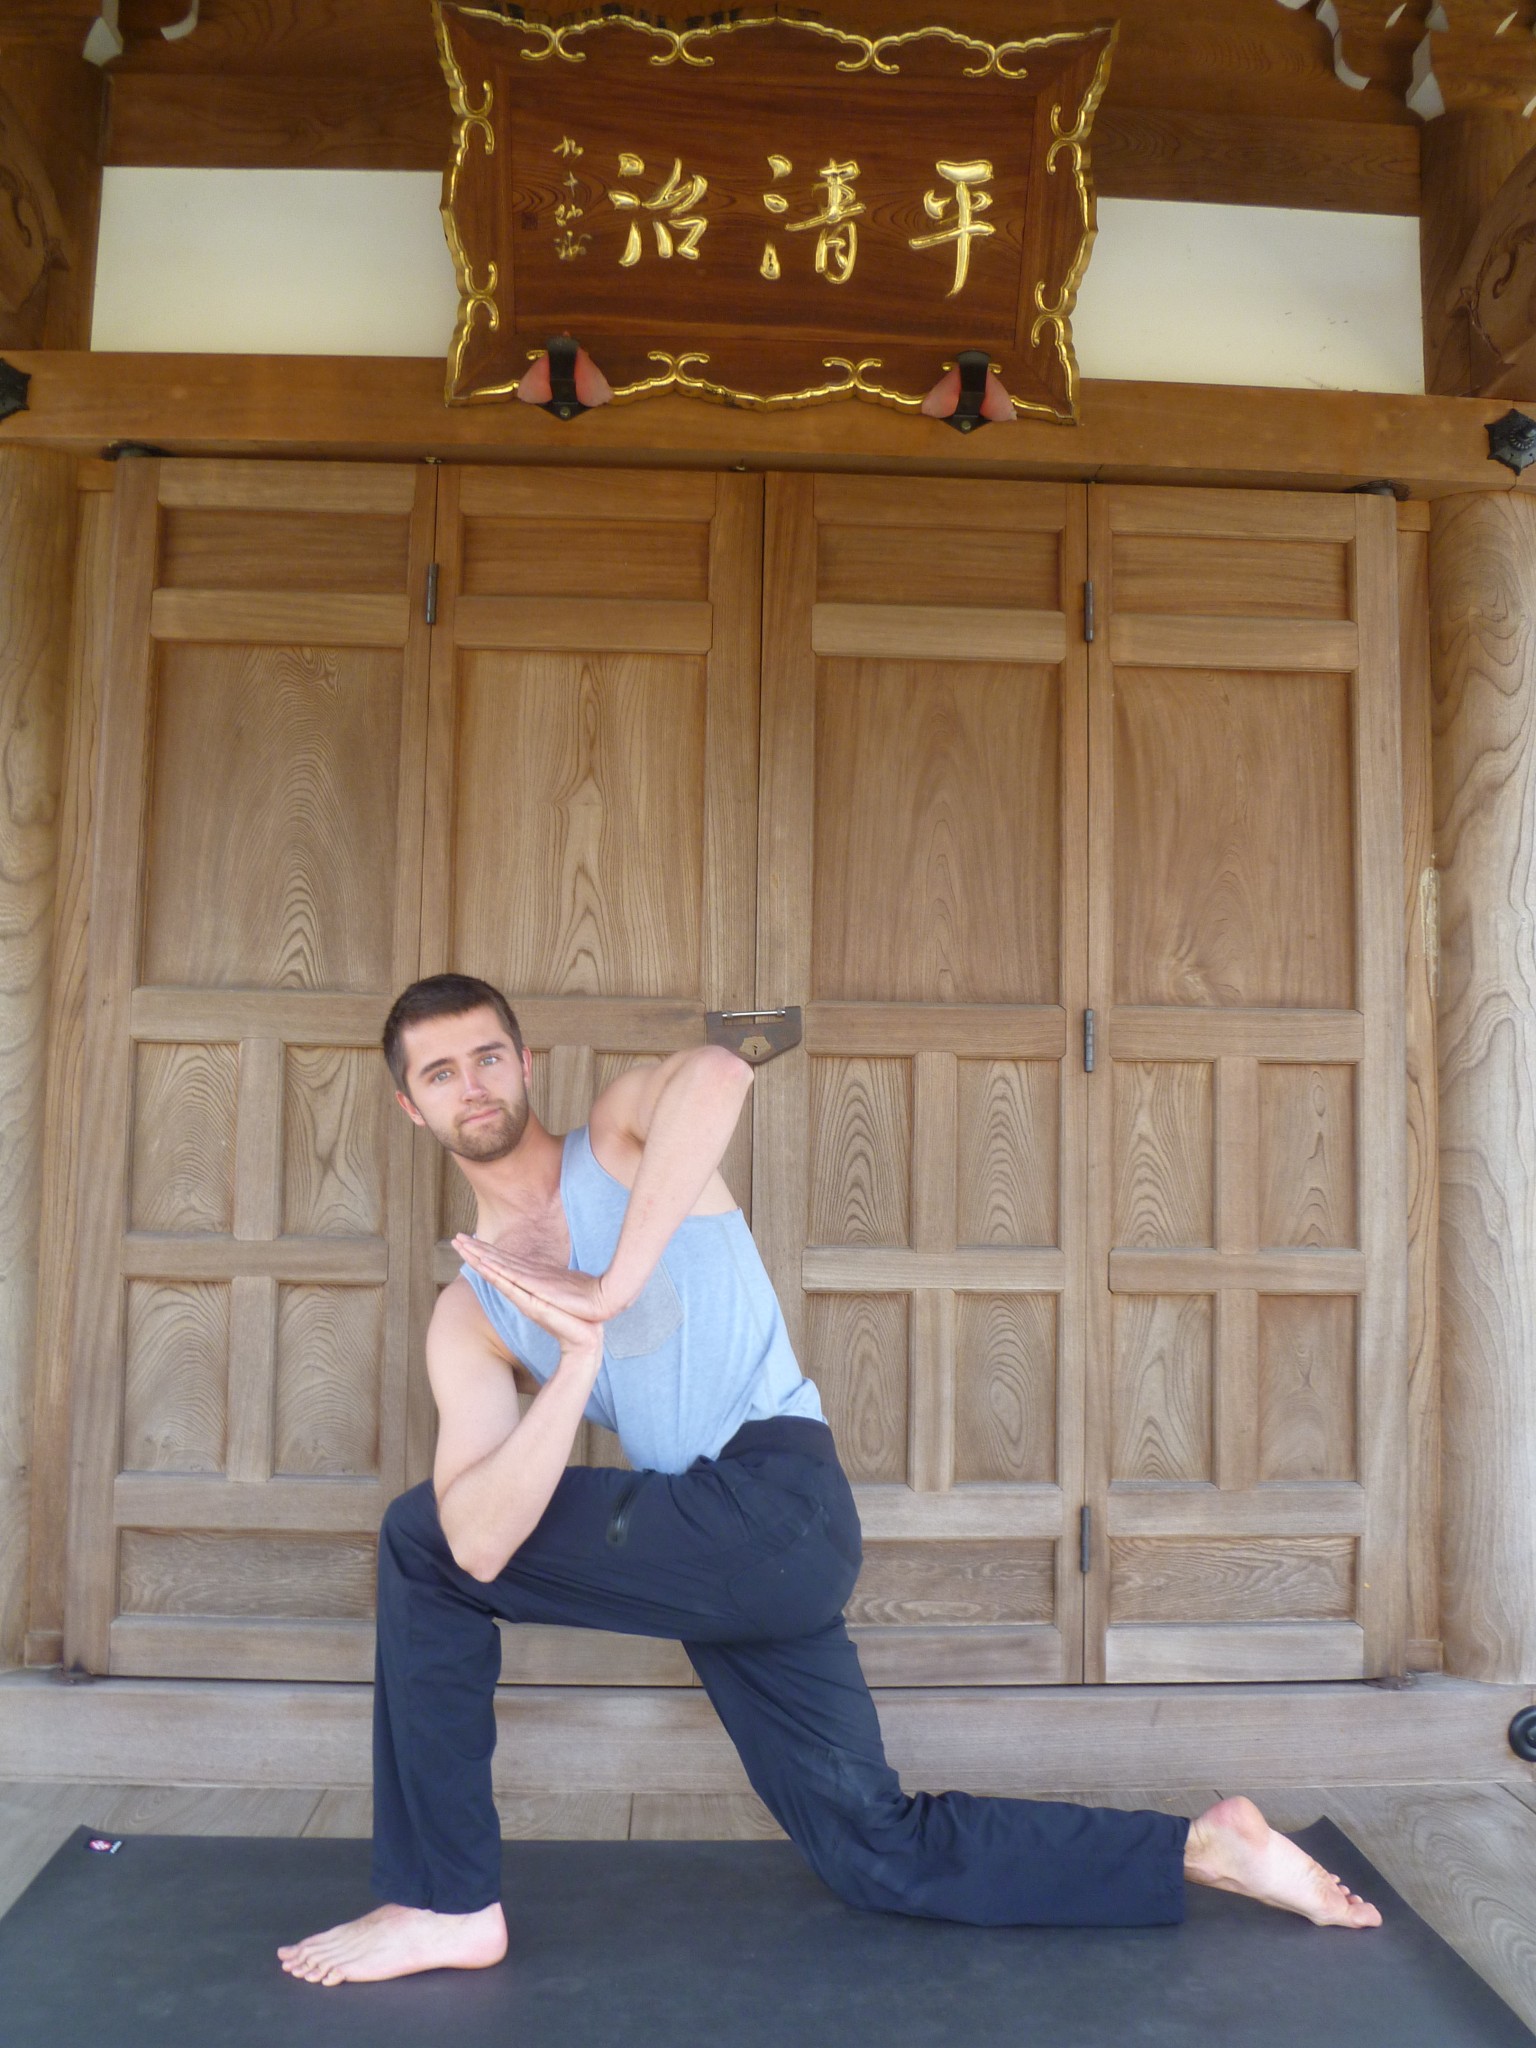
Full Prayer Twist: This advanced version incorporates more balance into the posture. Once you are in the modified version above, lift the back knee off of the floor. Look to the left wall. Repeat on the other side.
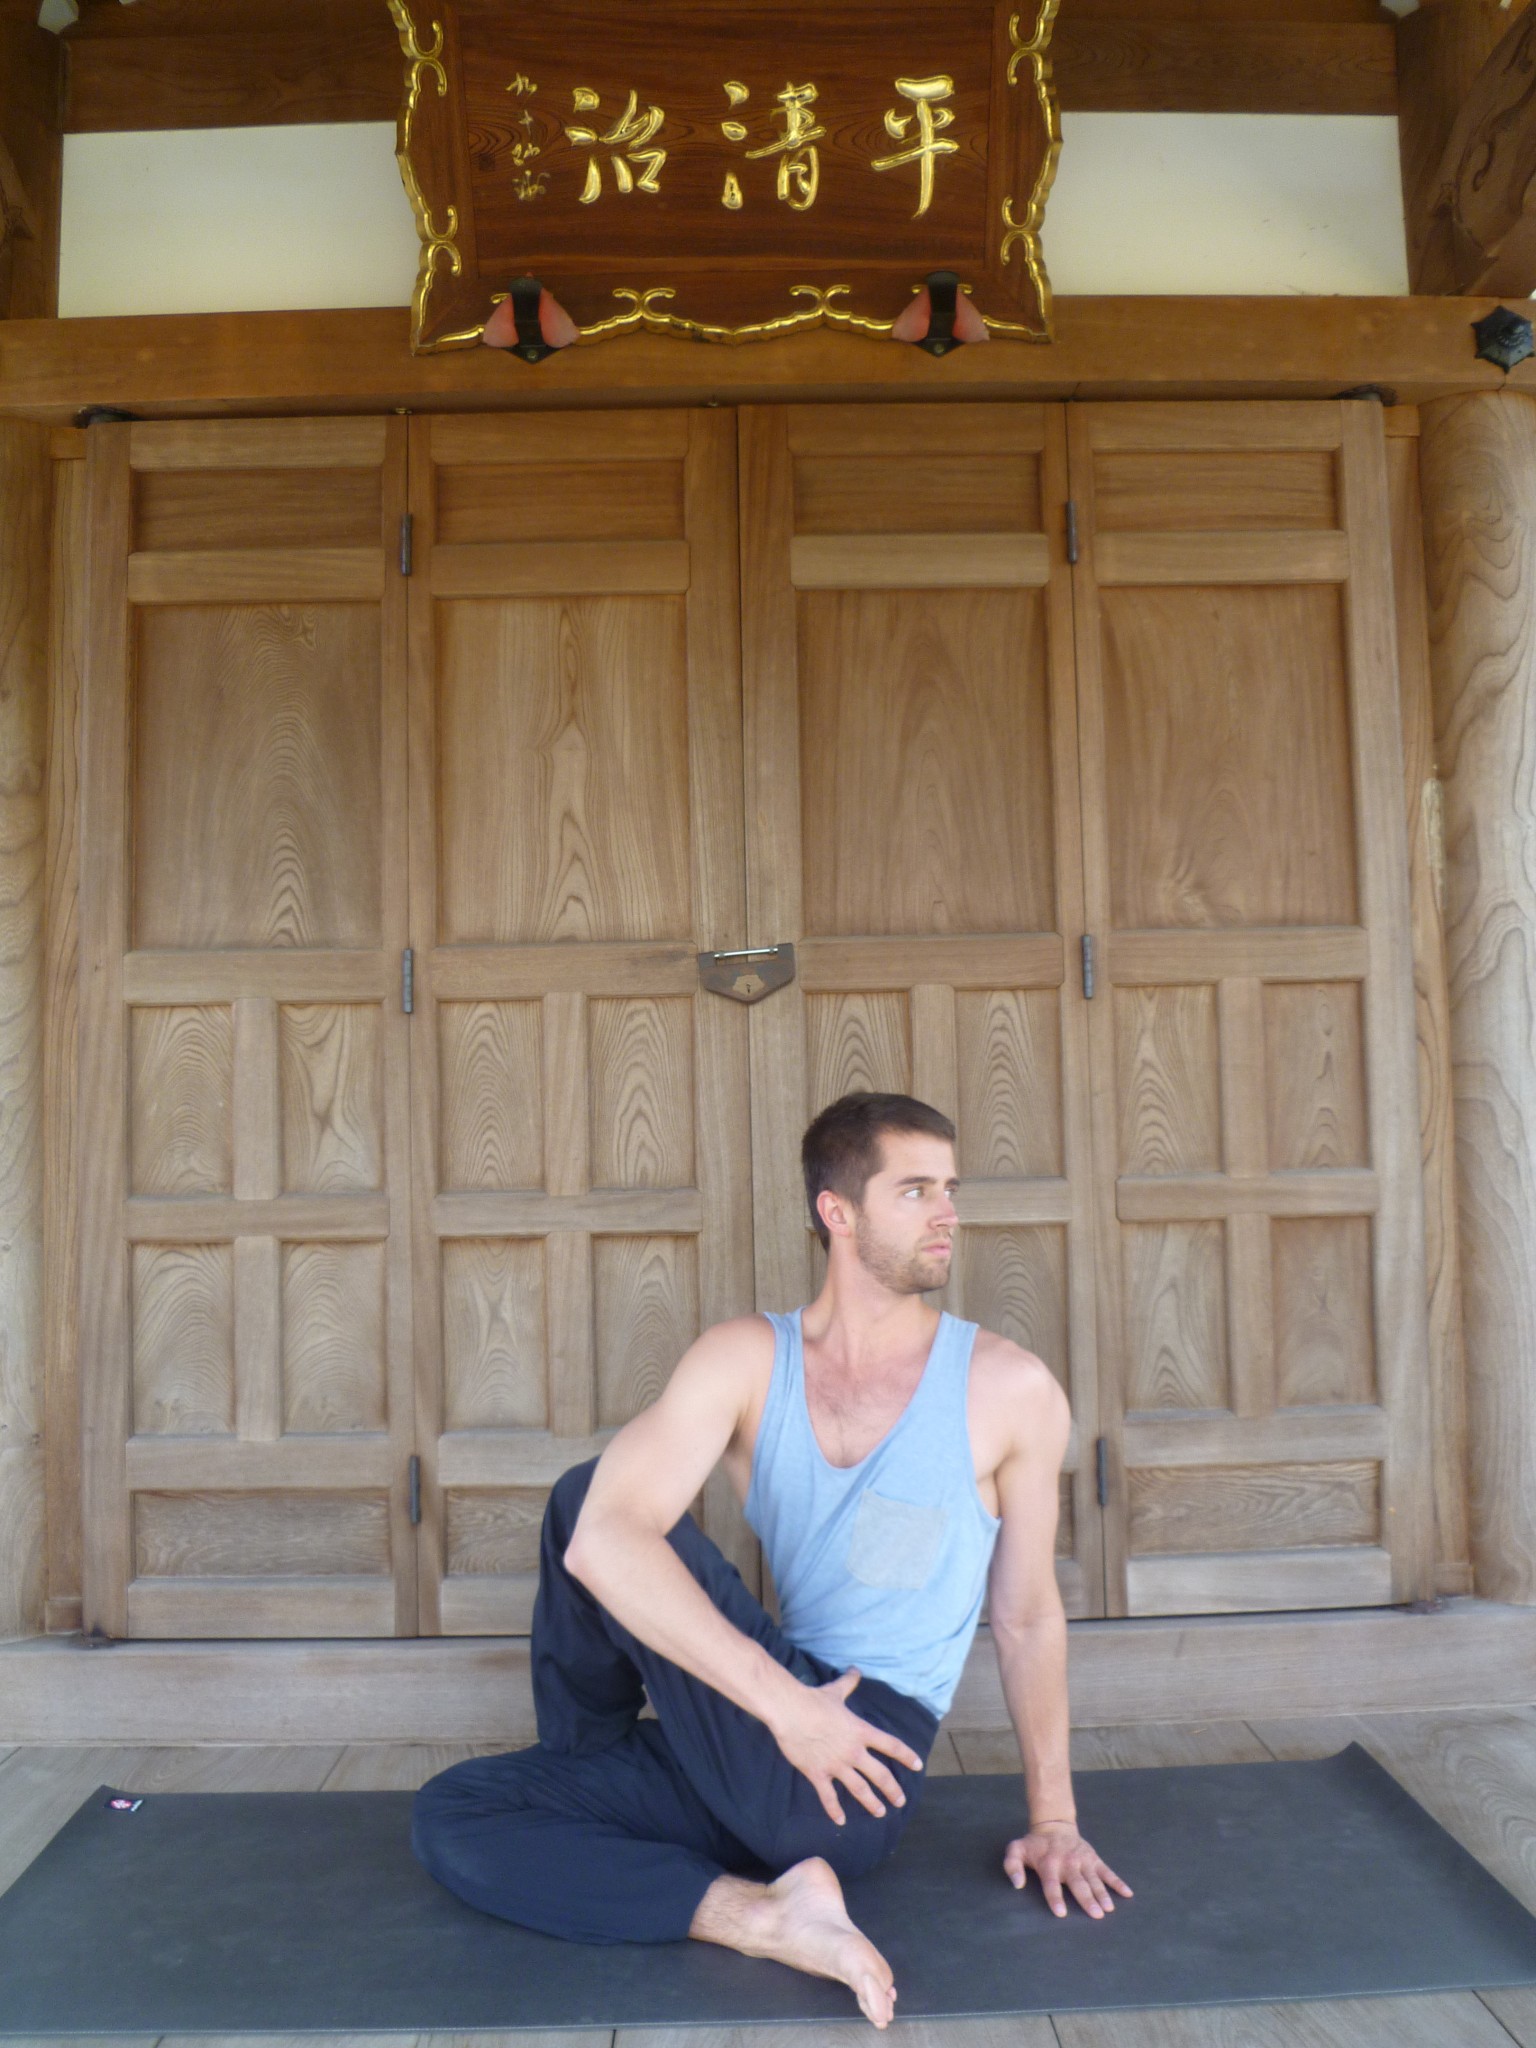
Seated Spinal Rotation: From a seated position, bring the left leg over the right as shown below. Inhale and square your shoulders to the left wall. Rotate from the torso and gently press off left leg with your right arm. Square your shoulders to the left wall. Sit up tall and rotate out. Look to the left wall or the back wall. Repeat on the other side.
Back and Neck Stretches
The most common request that I receive from yoga participants is for back and neck stretches. We tend to carry quite a bit of tension in this area throughout the day. These are a few of my favorite postures for the back and neck.
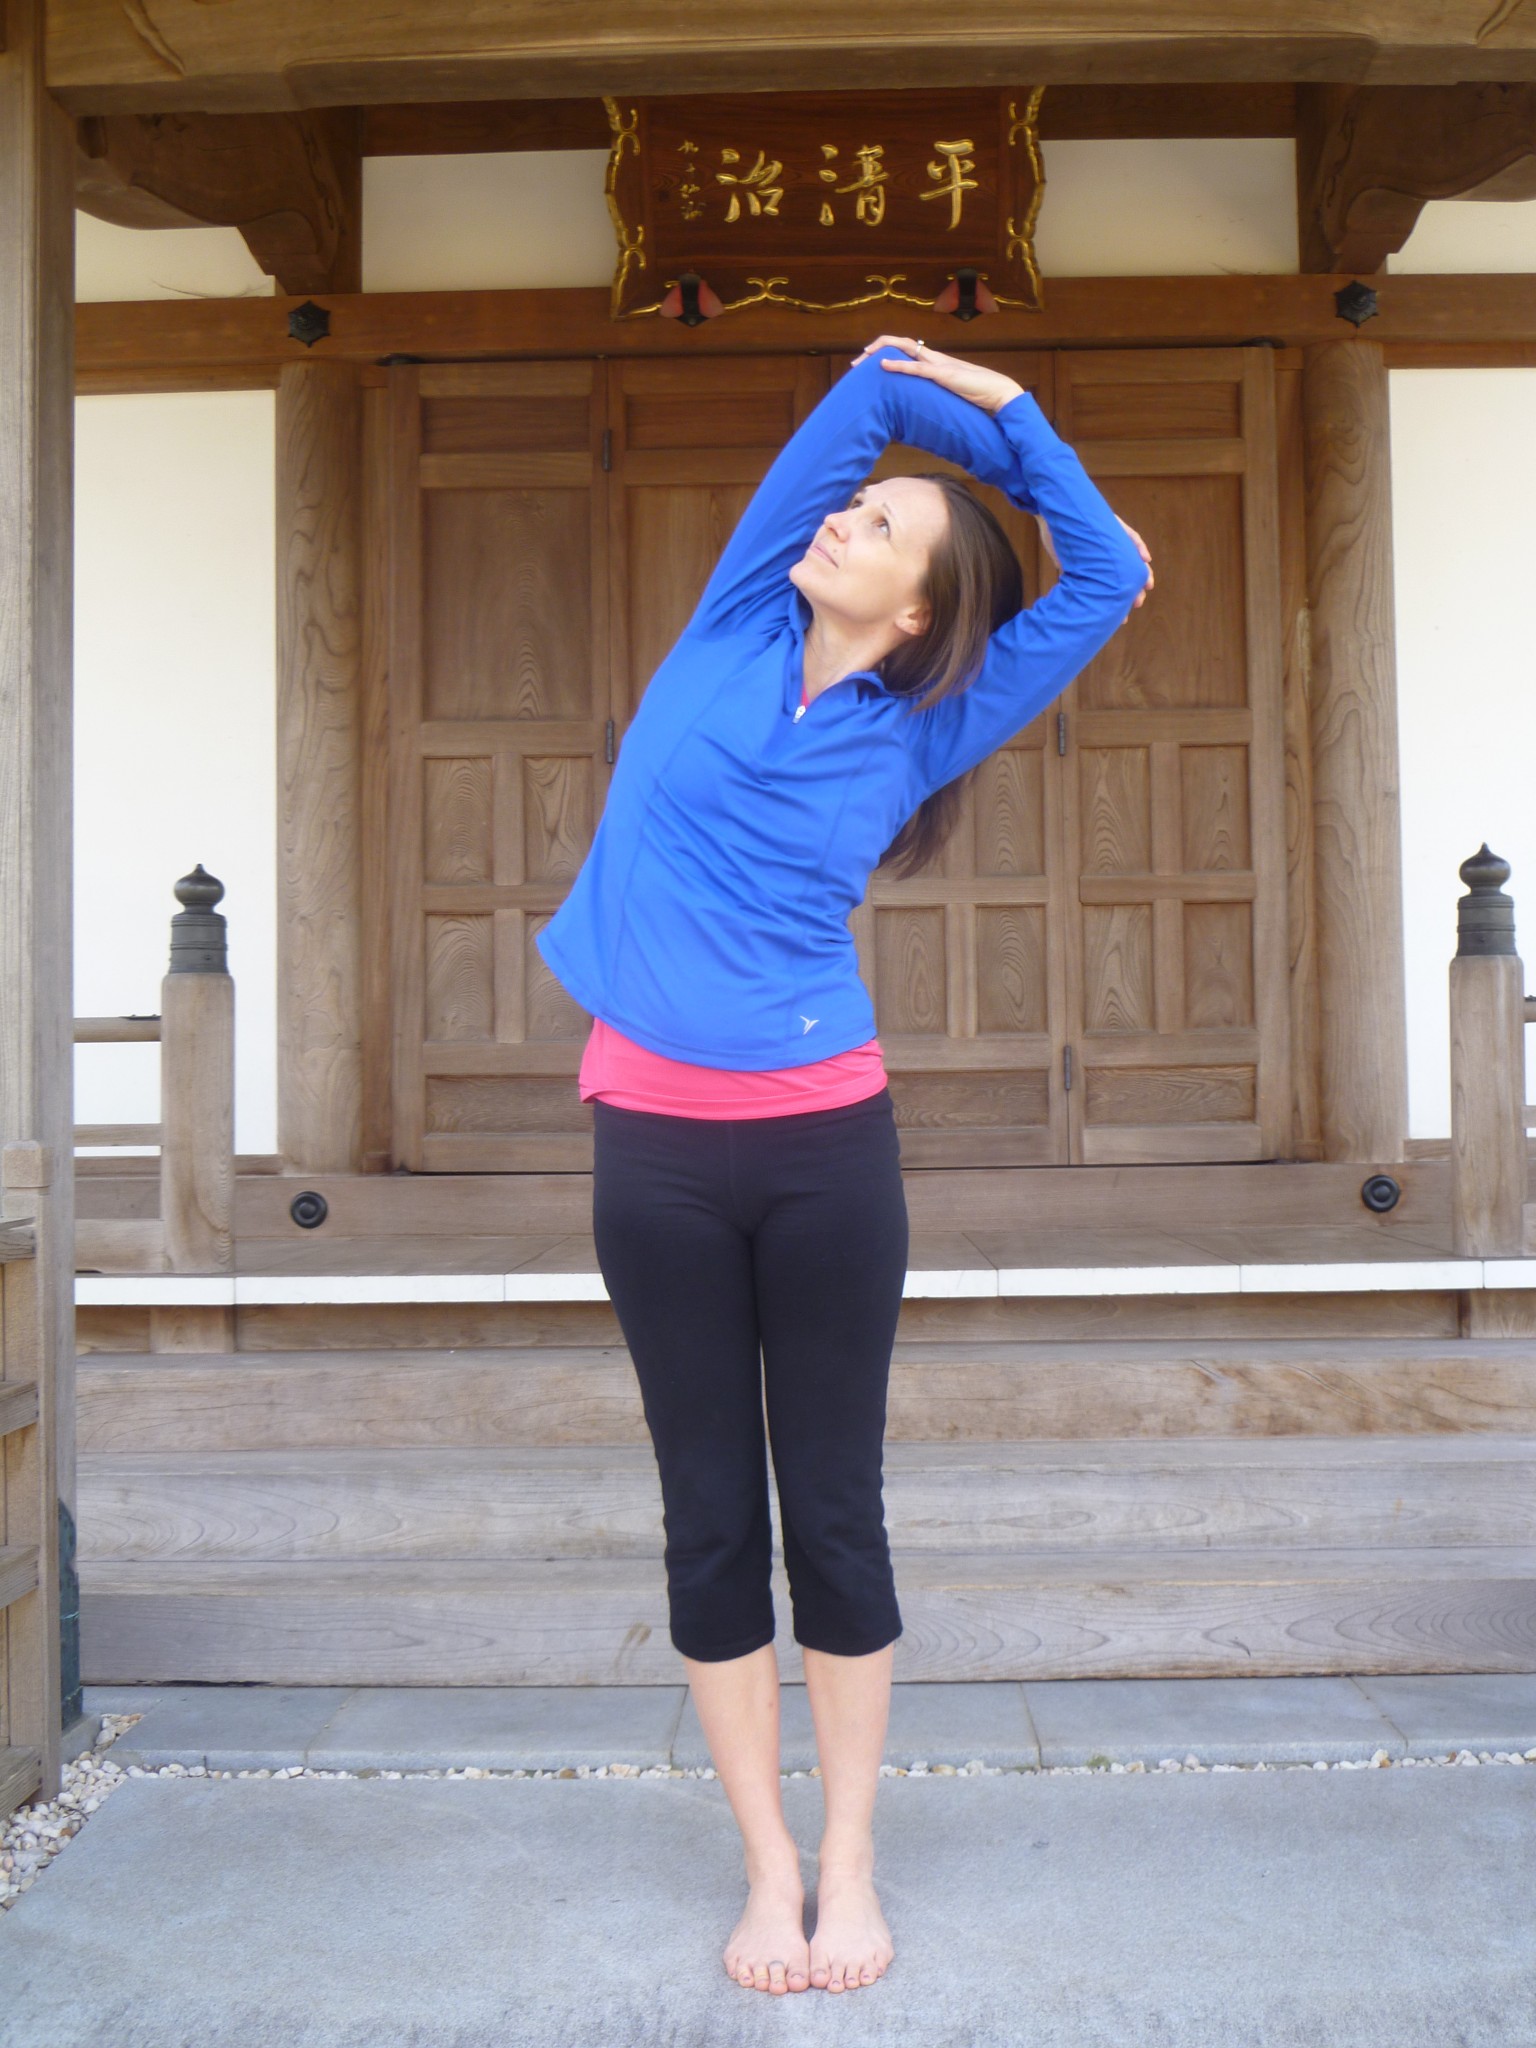
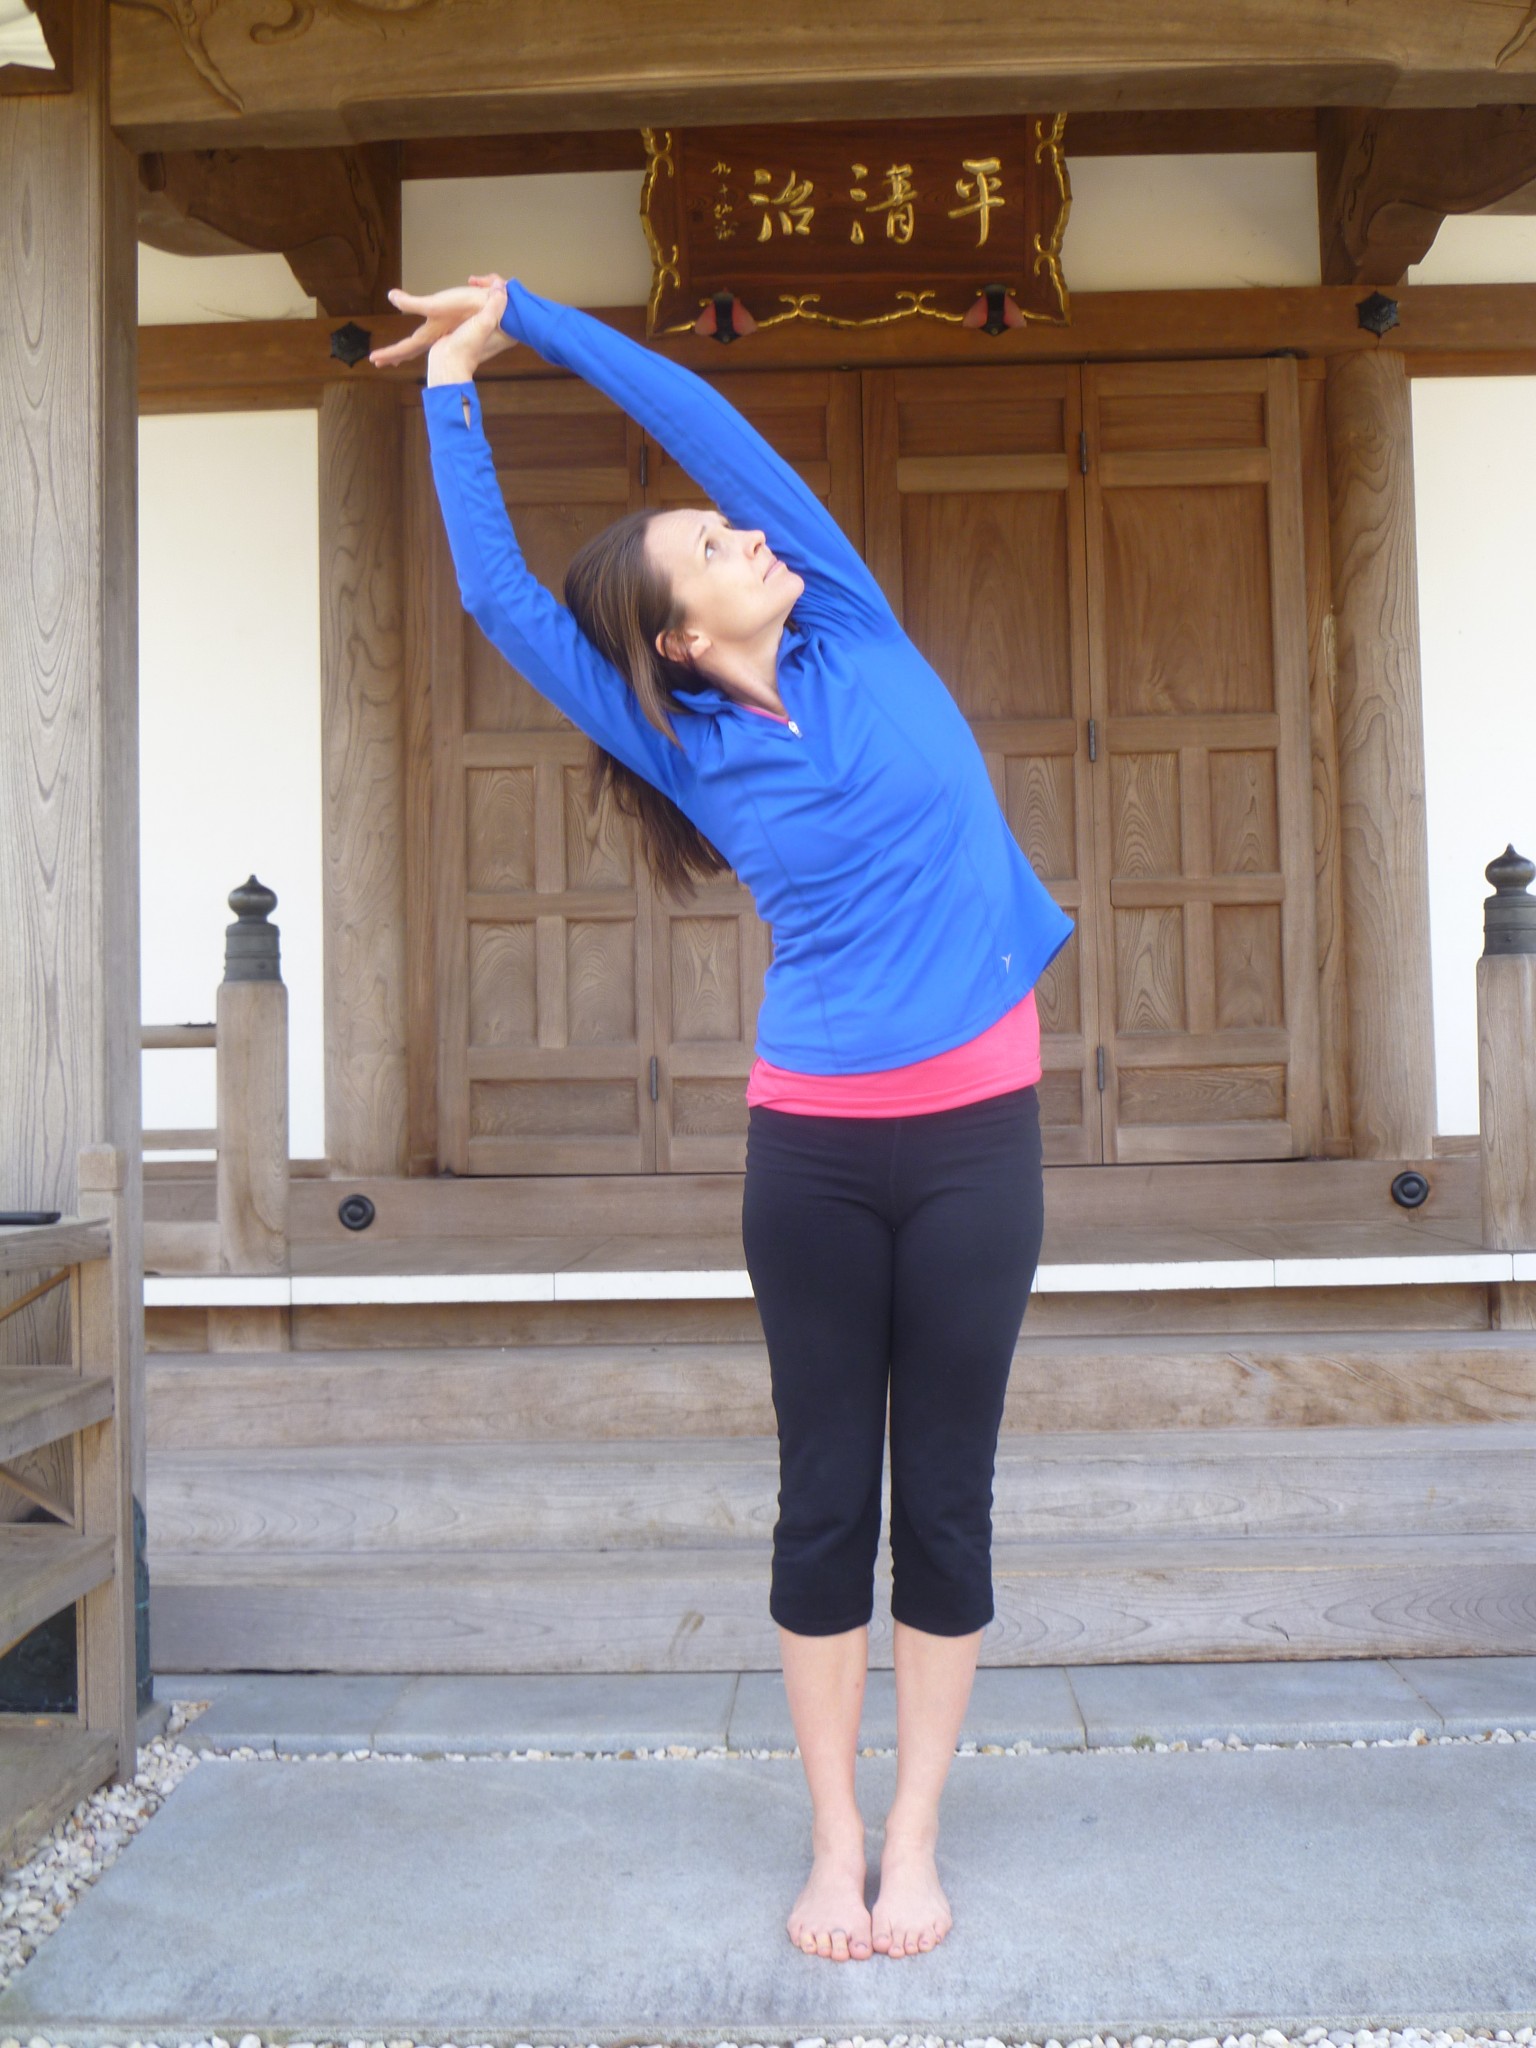
Lateral Flexion (version 1): From Mountain Pose, inhale and stretch your arms overhead. Exhale and fold your arms to hold your elbows. Inhale and lift your spine upward and then over to the left side. Arch through the torso. Try not to bring your arm toward your ear. Let the weight of your arms gently guide your top elbow toward the floor. Feel the openness through the right side of the waist and the large muscles of the back. Breathe deeply through the belly as you hold the posture. Look forward or toward the top arm. To release, inhale and lengthen your spine upward toward the ceiling. Exhale and repeat on the other side.
Lateral Flexion (version 2): From Mountain Pose, inhale and stretch your arms overhead. Interlace the fingers and arch the torso toward the right side as you exhale. Hold the left wrist with the right hand. Lift your left arm a little higher toward the diagonal. Feel the openness through the left side of the waist and the large muscles of the back. Breathe deeply through the belly as you hold the posture. Look forward or toward the top arm. To release, inhale and lengthen your spine upward toward the ceiling. Exhale and repeat on the other side.
Neck Stretch: Place your hands behind your back. Hold your left wrist with your right hand. Move it to your right hip as shown below. Keep your shoulders square to the floor without tilting. Inhale and lengthen your spine upward toward the ceiling. Exhale and tilt your head to bring your right ear closer to your right shoulder. Inhale as you stand up straight. Exhale as you press your shoulders down toward the floor. Feel tension releasing from the left side of the neck. Breathe deeply as you hold the posture. Repeat on the other side.

Upper Back Stretch: Inhale and stretch your arms overhead. Interlace your fingers as you reach toward the sky.
Exhale as your round your back and lower the arms to touch the legs. Feel the separation in between the shoulder blades. Repeat.
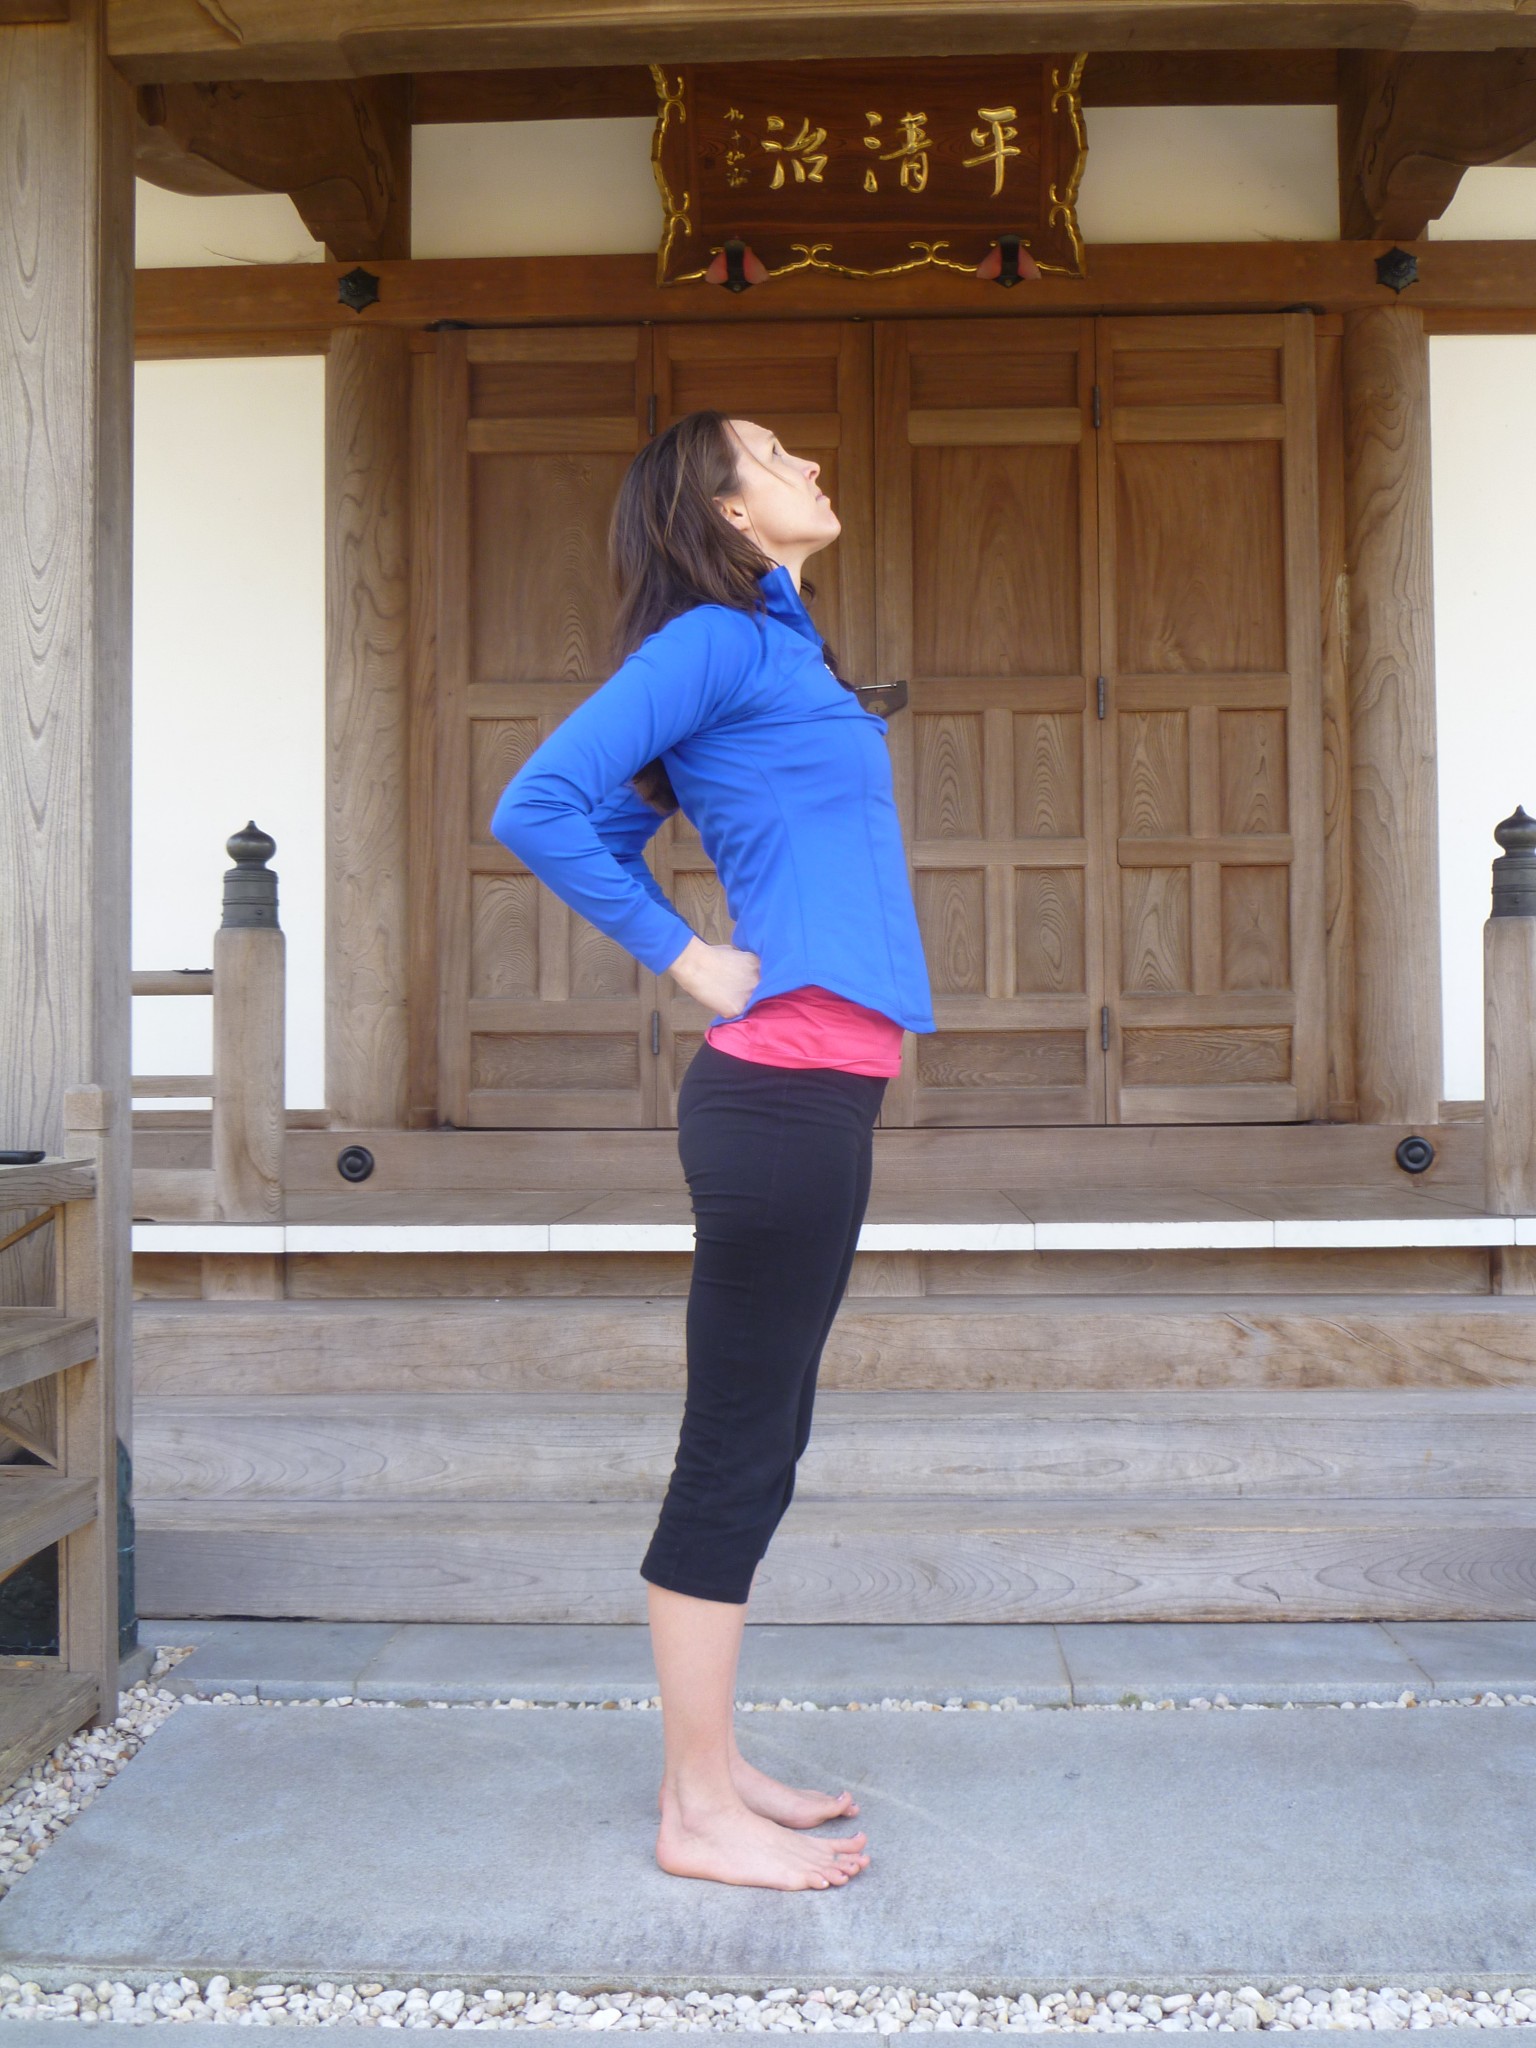
Chest Opener: Separate the feet hip distance apart. Make fists with your hands and place them on the back of your hips. Inhale as you lengthen your spine upward and bend backward slightly from the hips. Roll the shoulders down and back as you open your chest. Look gently upward toward the sky without straining your neck. Breathe deeply through the posture.
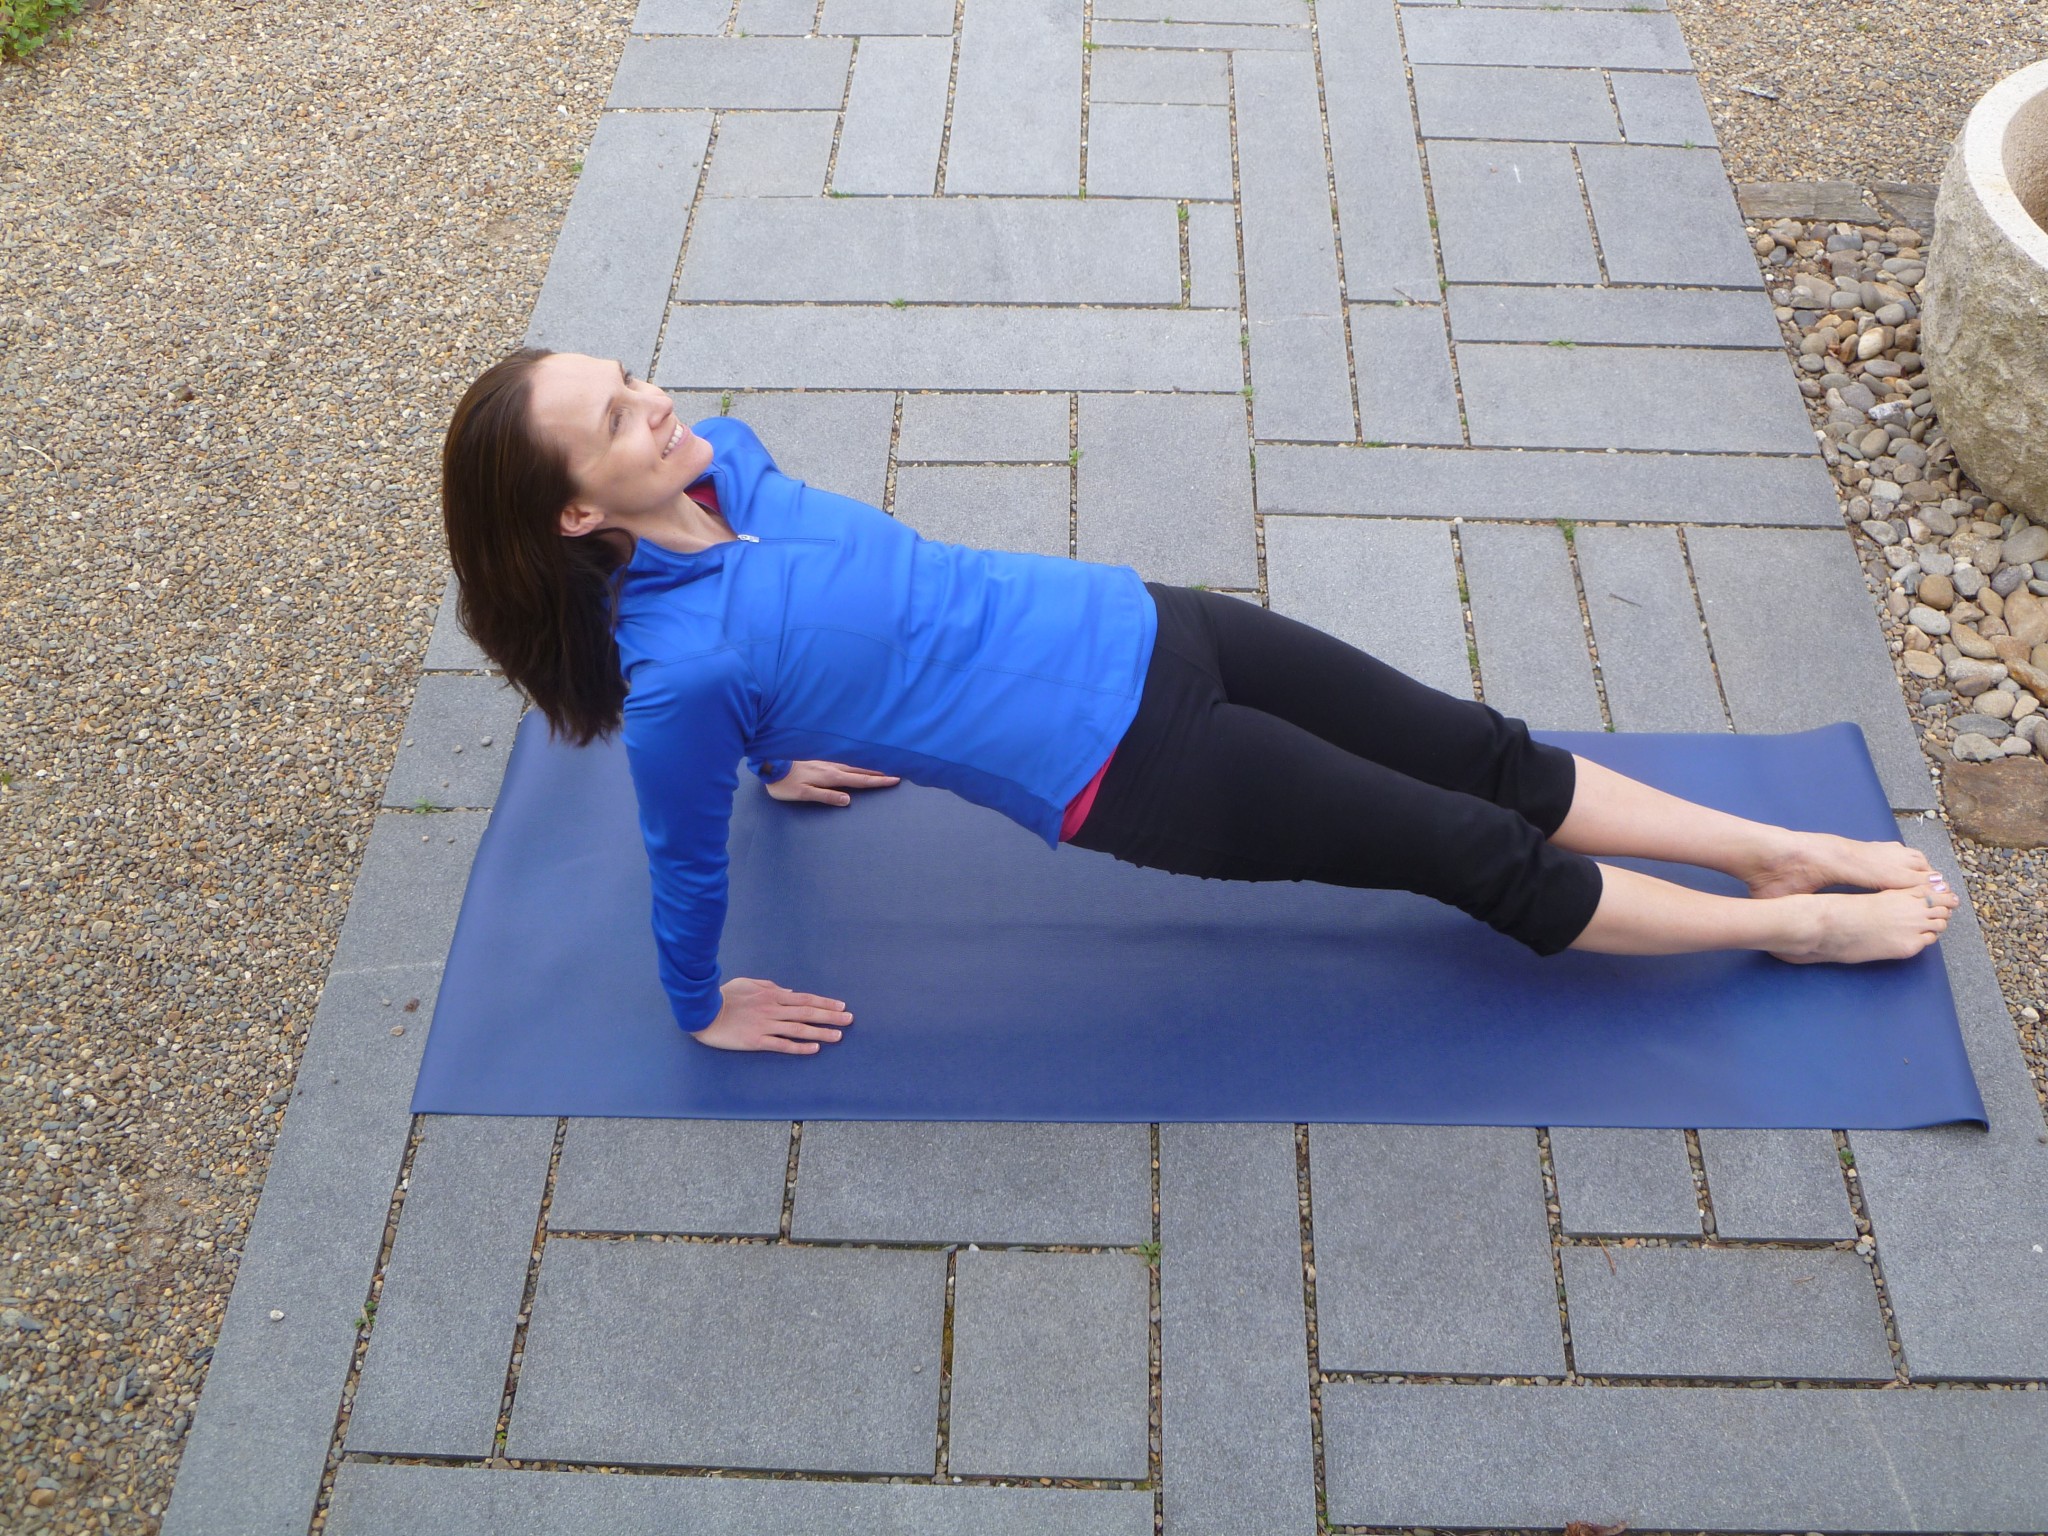
Incline Plank: From a seated position, stretch your legs out along the floor. Place your hands about 6-8 inches behind your hips with your finger tips facing forward. Lift your hips upward toward the ceiling. Keep the elbows soft (slightly bent) because they are bearing weight. Lift as far as you feel comfortable. In a full incline plank the body is straight from the feet, through the hips, to the shoulders. Keep the neck in alignment with the spine as you look upward. Feel the openness in the front of the shoulders and torso.
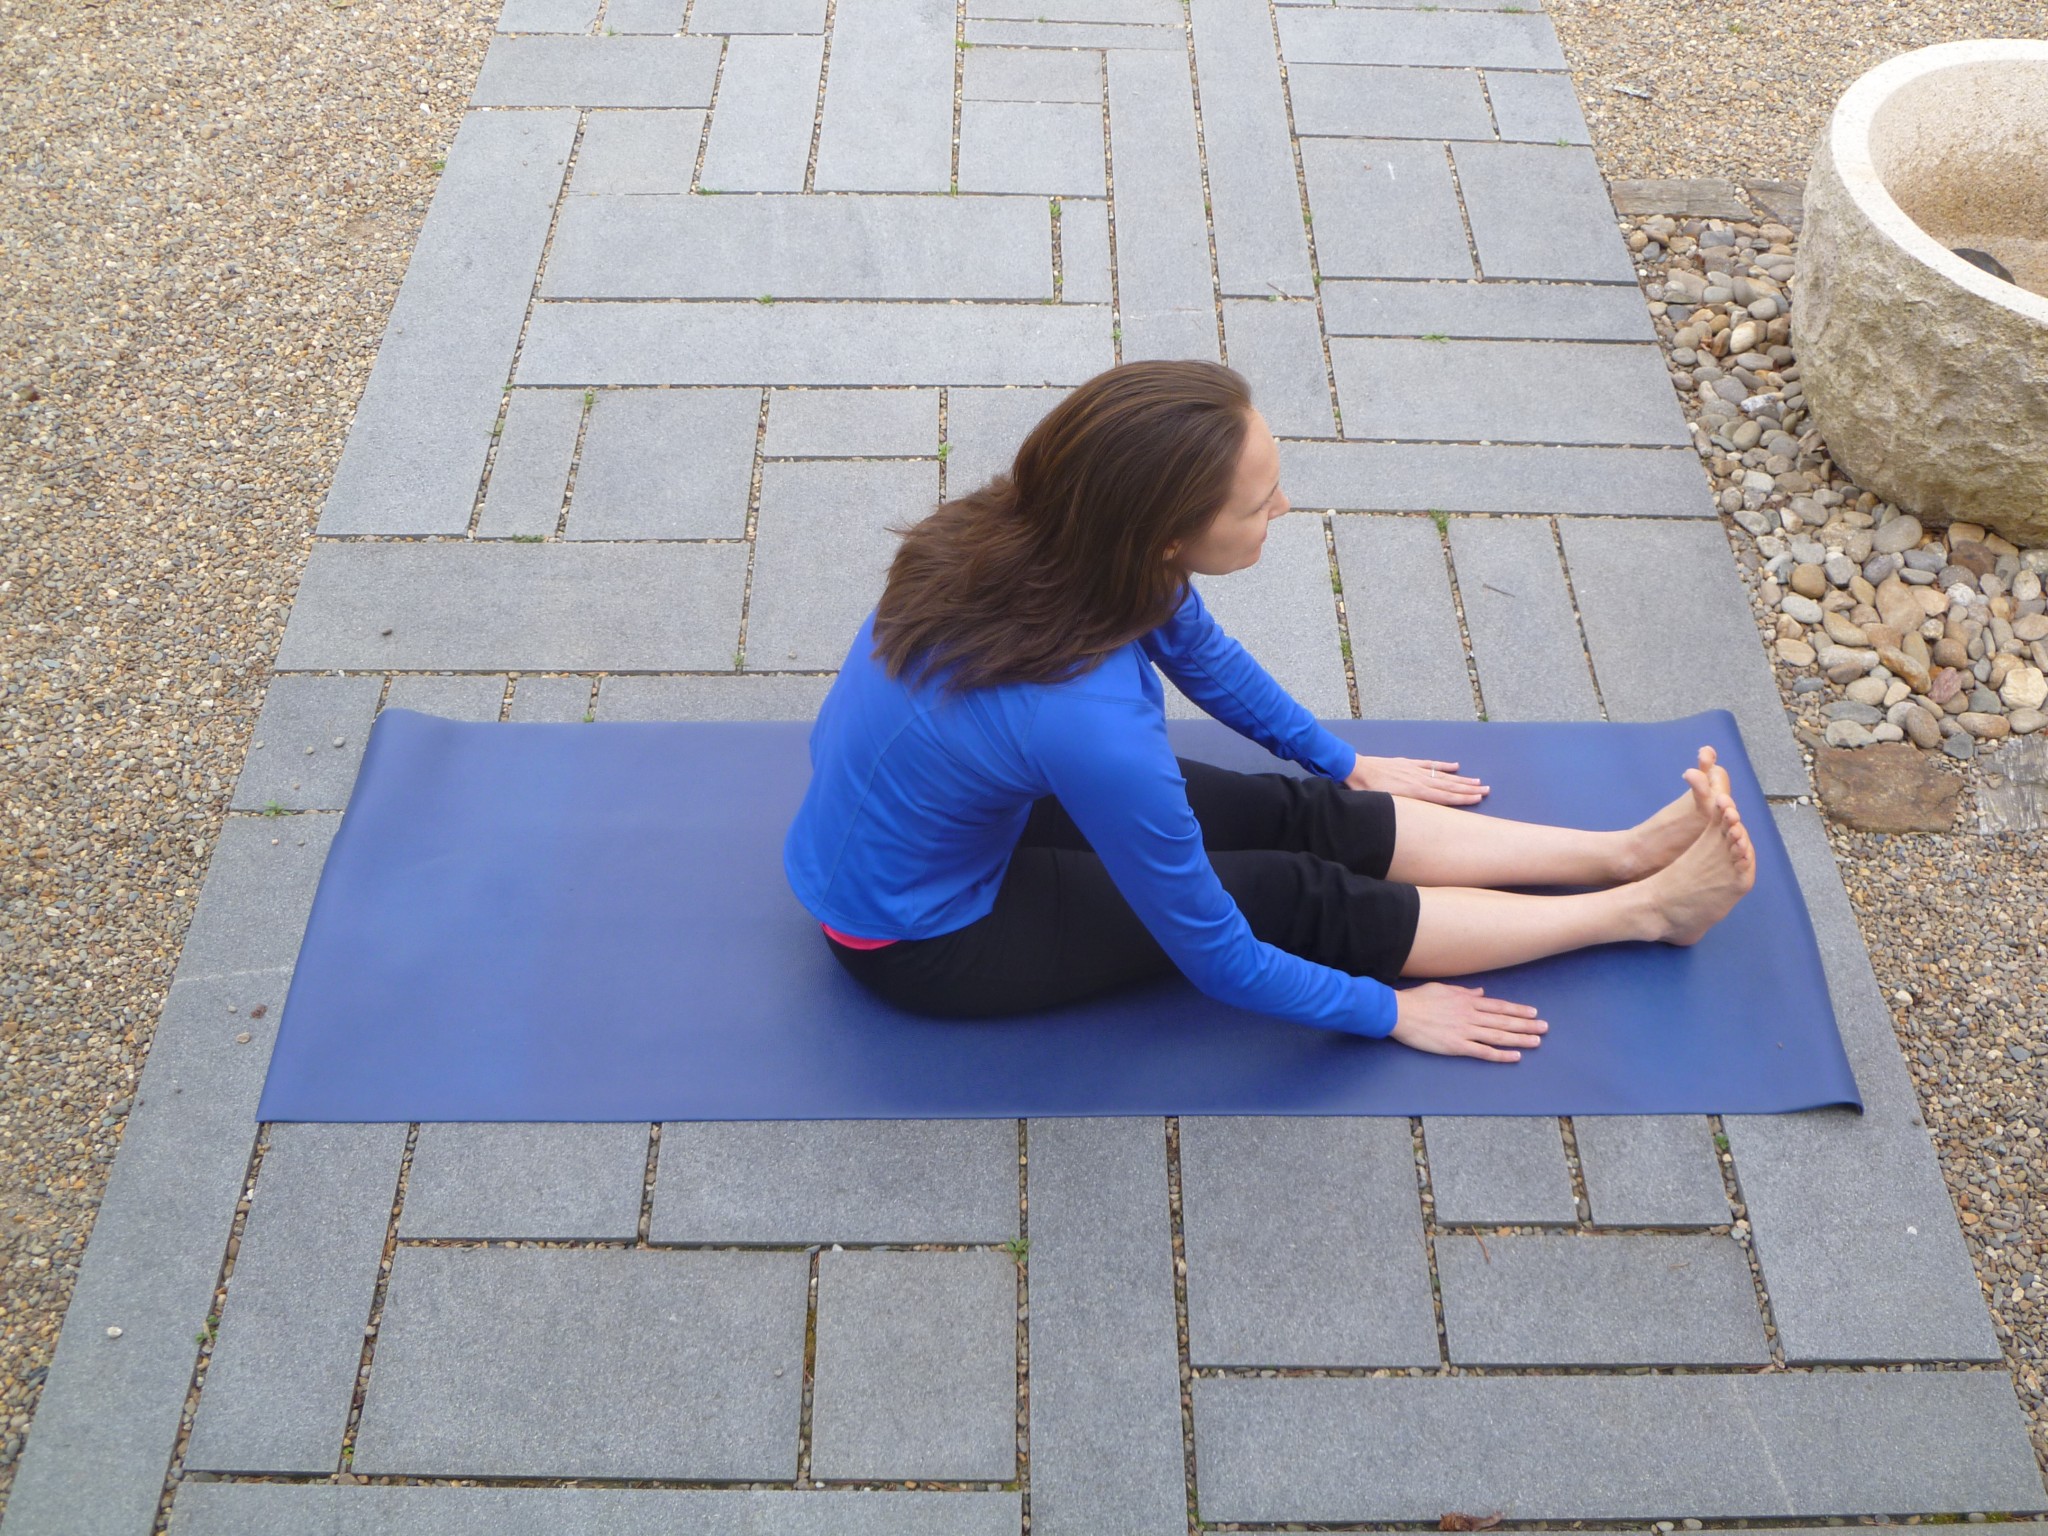
Forward Fold (modified): After Incline Plank, lower your hips back down to the ground. Inhale and sit up tall. Exhale and fold forward from the hips. Place the hands by the shins. Keep the head and chest up as you bring your stomach toward your thighs.
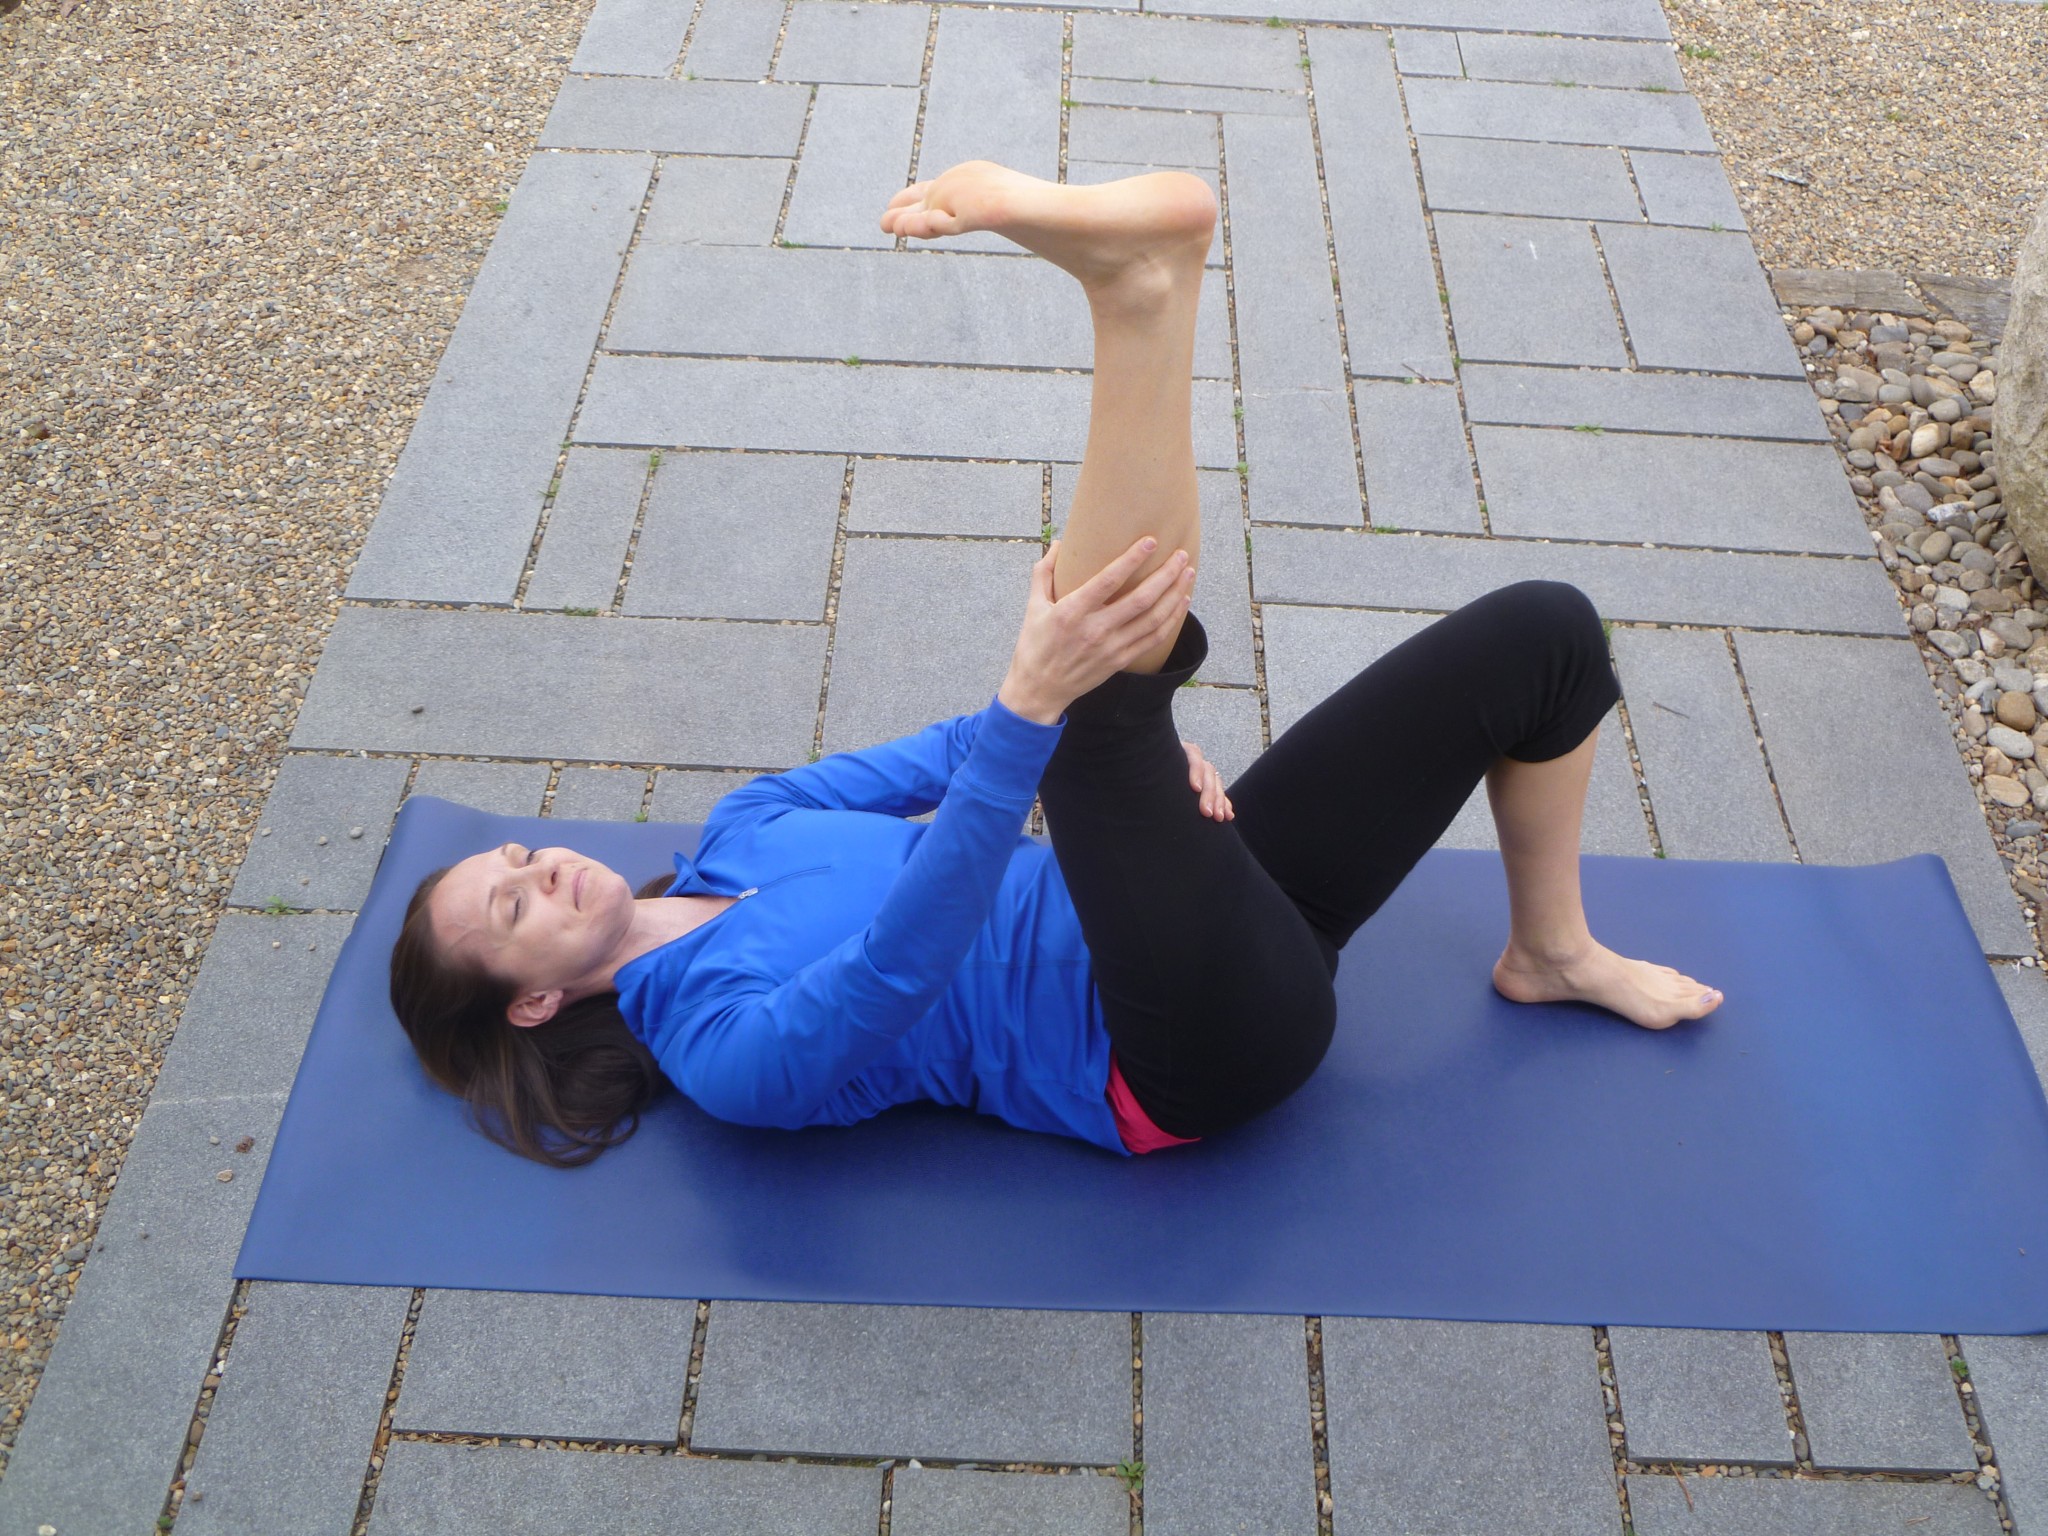
Supine Hamstring Stretch: Lie down. Bend your knees and place your feet flat on the floor. Lift your right leg into the air. Clasp both hands behind the right hamstring. If you are more flexible, place one hand behind the right calf and one hand behind the right hamstring. Inhale as you lengthen your leg upward. Exhale as you bend from the hips to bring your leg a little closer toward your head. Repeat on the other side.
Open Twist: Hands down, I think this is my favorite yoga posture. Lie down and stretch your legs down along the floor. Lift your left leg so it is pointing up to the ceiling. Bend your left knee to 90 degrees. Place your right hand on your left knee. Stretch your left arm out to the side at shoulder level with the palm facing down. Gently pull your left knee across your body. Go as far as you feel comfortable but be careful not to overstretch. Stack your hips on top of each other. At the bottom of the posture your left knee is hovering over the floor hip distance off of the floor. Turn to look over your left hand. Feel the openness in your back and left shoulder. Repeat on the other side.

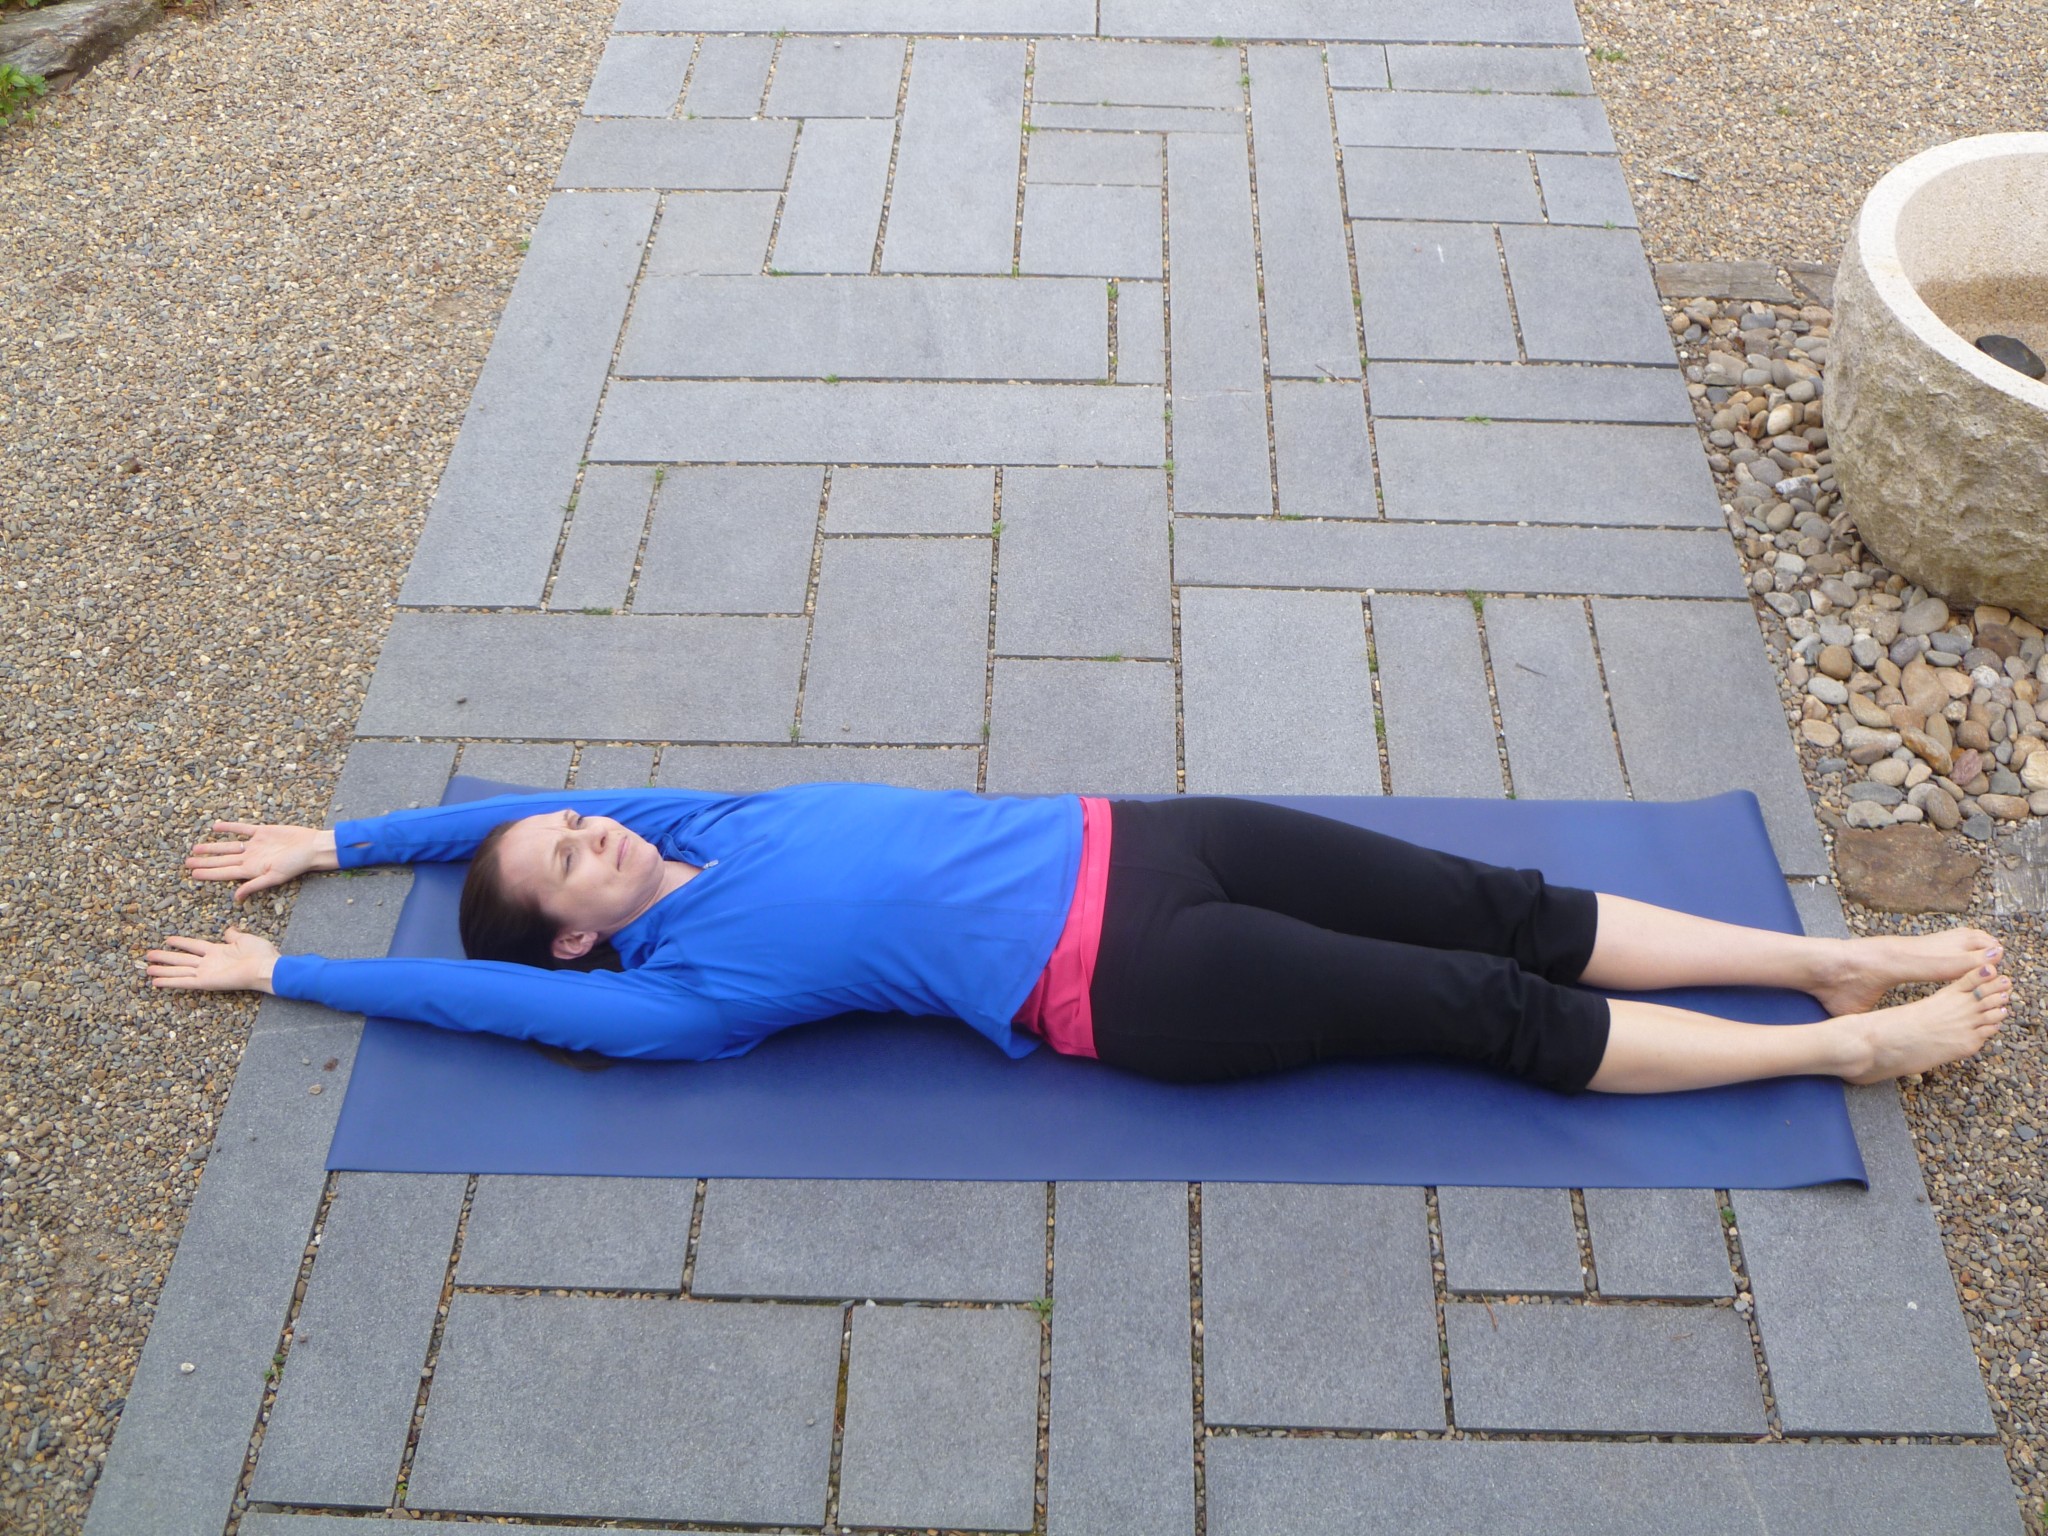
Lengthen: Lie down and stretch your arms overhead along the floor. Inhale deeply as you lengthen from your fingertips to your toes. Exhale deeply. Hold the posture as you breath deeply through the belly.
Ready to try a yoga class? Check out our group exercise schedule at www.furmanfitness.com